Overview
Some basic settings need to be aligned to best support your company's business processes. These settings are found on the Settings page under Setup.
In this article, we will describe System Setup and Events Settings.
![]() If you have already looked at the Settings Overview article, the content in this article is identical. So, you get a nice review.
If you have already looked at the Settings Overview article, the content in this article is identical. So, you get a nice review.
 In this article
Setup
The settings on this page are system settings, which means they are global.
System Setup
The description in the image below pretty much says it all. Each feature is described below the image.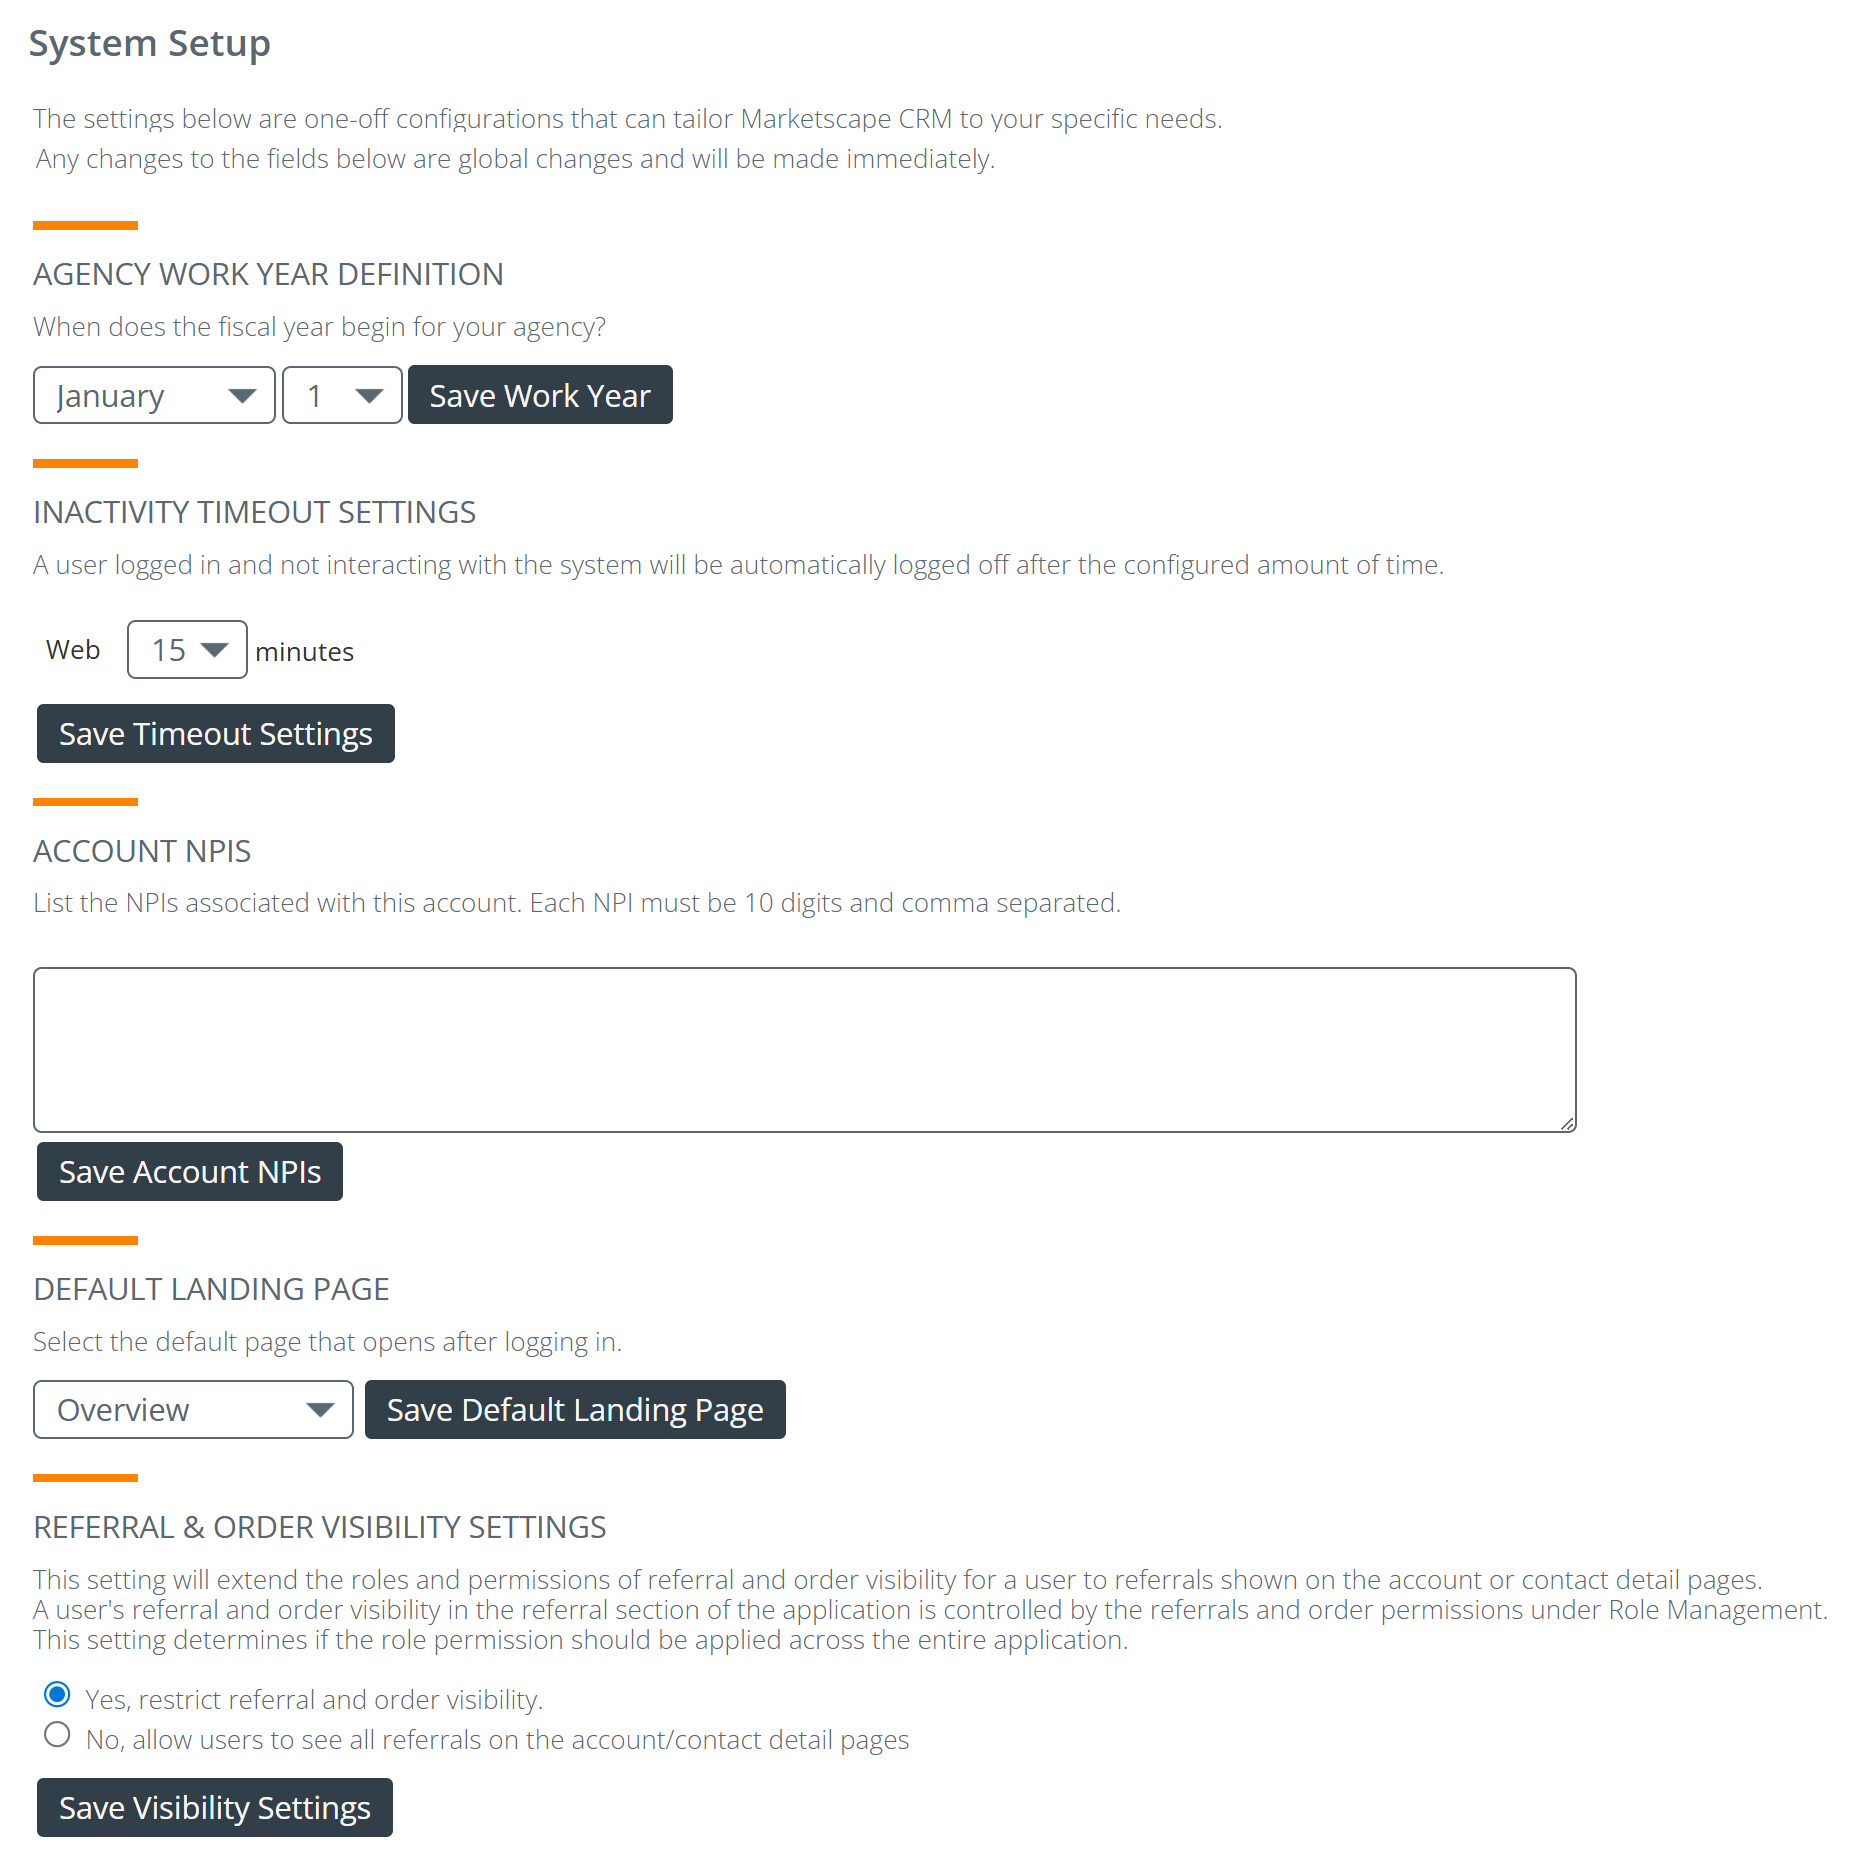
Agency Work Year Definition
If your company uses a different organization year than the calendar year, you can set the start date for your year by using the drop down lists.
![]() Make the desired change to the date and click the "Save Work Year" button.
Make the desired change to the date and click the "Save Work Year" button.
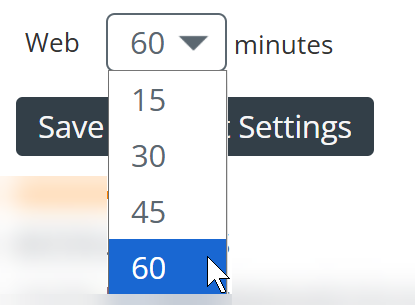
Inactivity Timeout Settings
As a security precaution, Trella CRM is designed to timeout every user's login after a set period of inactivity. You can change the length of that period.
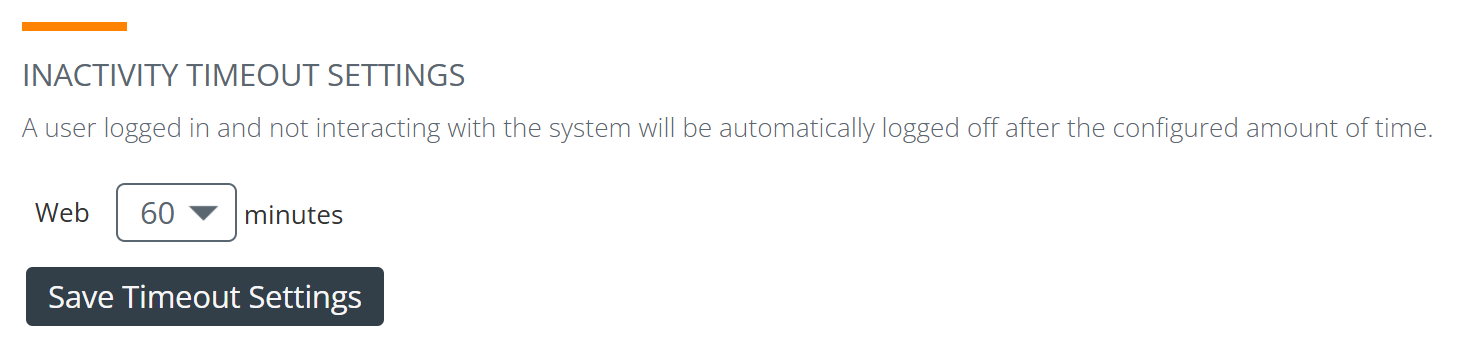
Super detailed instructions
|
 |
Account NPIs - 
This is one of the most important global settings on the page.
![]() However, the name and explanation text are vague. In Trella CRM, we consider "accounts" to be the locations where your reps will make calls. And the sentence that tells you to "list NPIs" doesn't identify what "this account" refers to. So, let's keep it simple.
However, the name and explanation text are vague. In Trella CRM, we consider "accounts" to be the locations where your reps will make calls. And the sentence that tells you to "list NPIs" doesn't identify what "this account" refers to. So, let's keep it simple.
- This setting is about your organization's NPIs - not your "account's" NPIs.
- You need to enter every NPI in your organization - separated by commas.
- These NPIs are used to make your agencies' metrics stand out, especially in Sales Spotlight.

![]() If you have a database or spreadsheet that contains all of your company NPIs, you can export the NPI list as a comma delimited file, then copy and paste all NPIs into this field.
If you have a database or spreadsheet that contains all of your company NPIs, you can export the NPI list as a comma delimited file, then copy and paste all NPIs into this field.
Default Landing page
This setting allows you to select which page of Trella CRM will open for your users when they log in. For the most part, the landing page should be the one that provides the information that is most helpful to support your company's workflows.
The image below shows you the list of pages from which you can choose.

Referral & Order Visibility Settings
The referrals available for a user to see on the Referrals page of Trella CRM are determined by the permissions set in the user's role. Setting those roles is discussed in the Role Management and Configuration article. When a user is set to "Self Only" the data available to see in Views on the Referrals page are limited to referrals assigned to the user. However, the referral information shown on an Account or Contact detail page is not restricted.
If your agency would like to ensure that a marketer is restricted to only view the referrals and patient information for those referrals they own across all Accounts and Contacts, you can enable Strict Referral Visibility. Strict Referral Visibility is an additional layer of security that limits the information shown on the Contact and Account detail pages.

Event Settings
See the details for each feature below the image.

Default Event Type
|
This setting defines which type of event will appear by default when a user first creates an event. The image to the right shows the options.
|
![]() We recommend that you use "Face-to-Face" as your default Event Type.
We recommend that you use "Face-to-Face" as your default Event Type.
![]() You can add more event types to the list - make contact with your CSM or Support@TrellaHealth.com.
You can add more event types to the list - make contact with your CSM or Support@TrellaHealth.com.
Required Event Objects

|
This feature allows you to choose whether a contact or an account is the required object when a user completes an event.
|
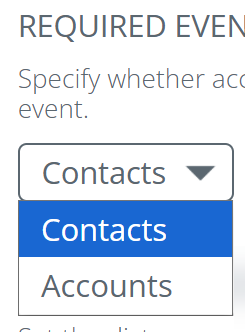 |
![]() This allows you to reinforce how you want your reporting structured. If your company is heavily focused on physicians and contact engagement, you may choose to enforce contacts so that no event can be completed without one. Conversely, if your focus is more account-driven, you may want to report on events at the account level and enforce accounts instead. This ensures reporting stays aligned with your primary business focus.
This allows you to reinforce how you want your reporting structured. If your company is heavily focused on physicians and contact engagement, you may choose to enforce contacts so that no event can be completed without one. Conversely, if your focus is more account-driven, you may want to report on events at the account level and enforce accounts instead. This ensures reporting stays aligned with your primary business focus.
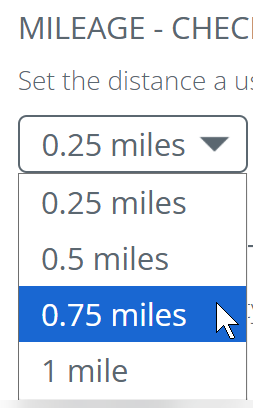
Mileage - Check-in Radius

|
This dropdown allows you to set a radius that restricts successful mileage check-in by your users.
|
 |
Mileage - Event types
This feature allows you to set which event types will work for mileage tracking.
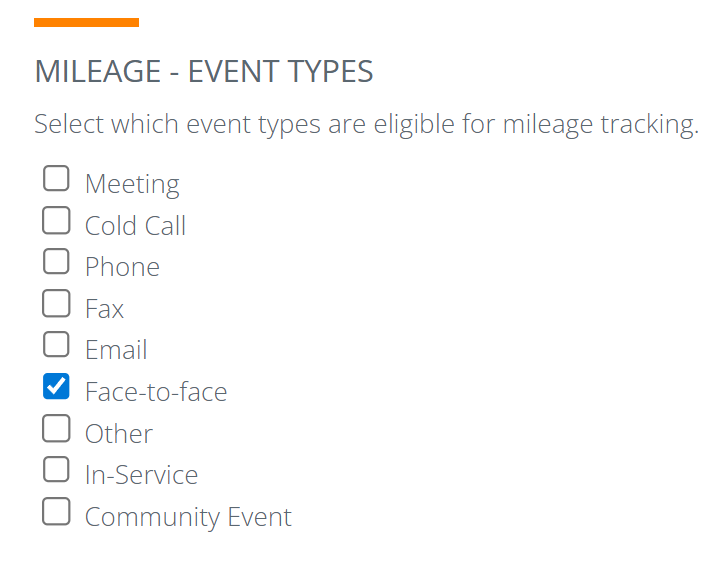
![]() You may select as many event types as you want.
You may select as many event types as you want.
Next Step
![]() Success! - If you have reached this point, you are ready to move on to Step 5 - Customizations.
Success! - If you have reached this point, you are ready to move on to Step 5 - Customizations.