
Overview
Any of the reports on the Reporting page of Trella CRM can be customized by using filtering options at the top of the report. Once the report filters are set to deliver the desired results, the report can be saved to view on-screen later, or it can be scheduled to be sent to email on a recurring basis. This article describes how to configure and save a report, as well as how to set up a scheduled report.
 In this article
Report Basics
To configure and/or schedule a report, click on Reporting in the left navigation. Once the Reporting page has loaded, click on a report name to customize and save for later viewing or scheduling.

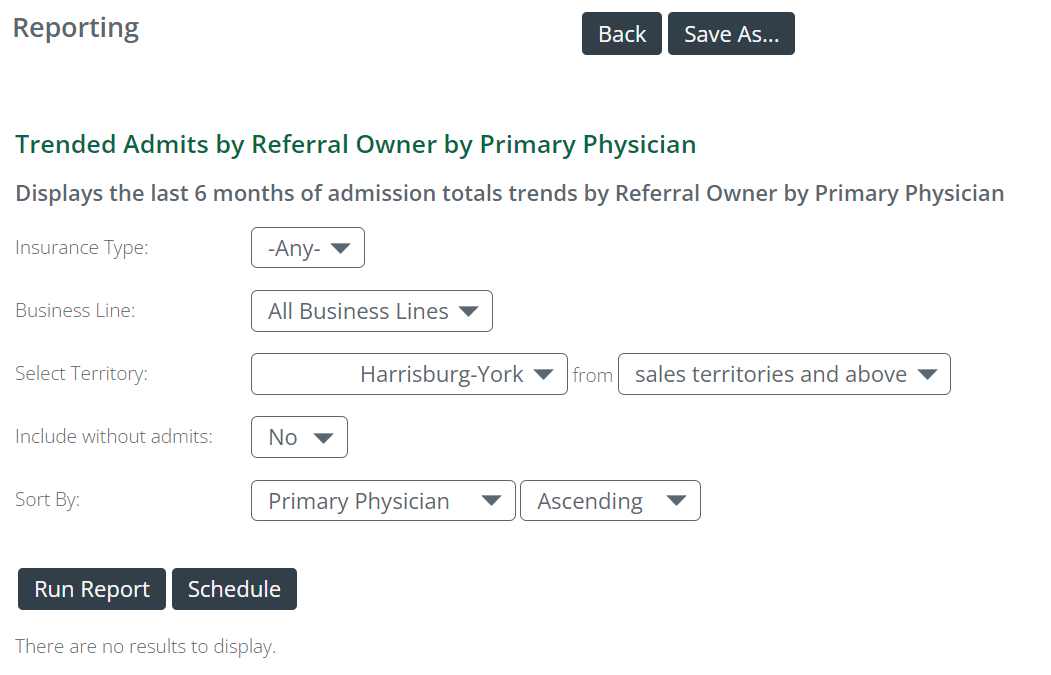
The picture below shows the filters available on most reports. These filters allow a user to tailor reports based on their individual needs. As a reminder, the options that will be available in each filter are based on the user's permissions. Once customized, the new version of the report is only saved to that user's account and not able to be viewed by other users.
![]() It is suggested that you save reports before scheduling them. This allows users to go back and review filters set in the report. If a report is not saved before scheduling, only the schedule can be edited or removed. Filters for that scheduled report cannot be viewed.
It is suggested that you save reports before scheduling them. This allows users to go back and review filters set in the report. If a report is not saved before scheduling, only the schedule can be edited or removed. Filters for that scheduled report cannot be viewed.
Saving a Report
To save a report to be viewed on-screen:
- Set filtering options as desired.
- Click Run Report to ensure desired results are met.
- Click Save as…
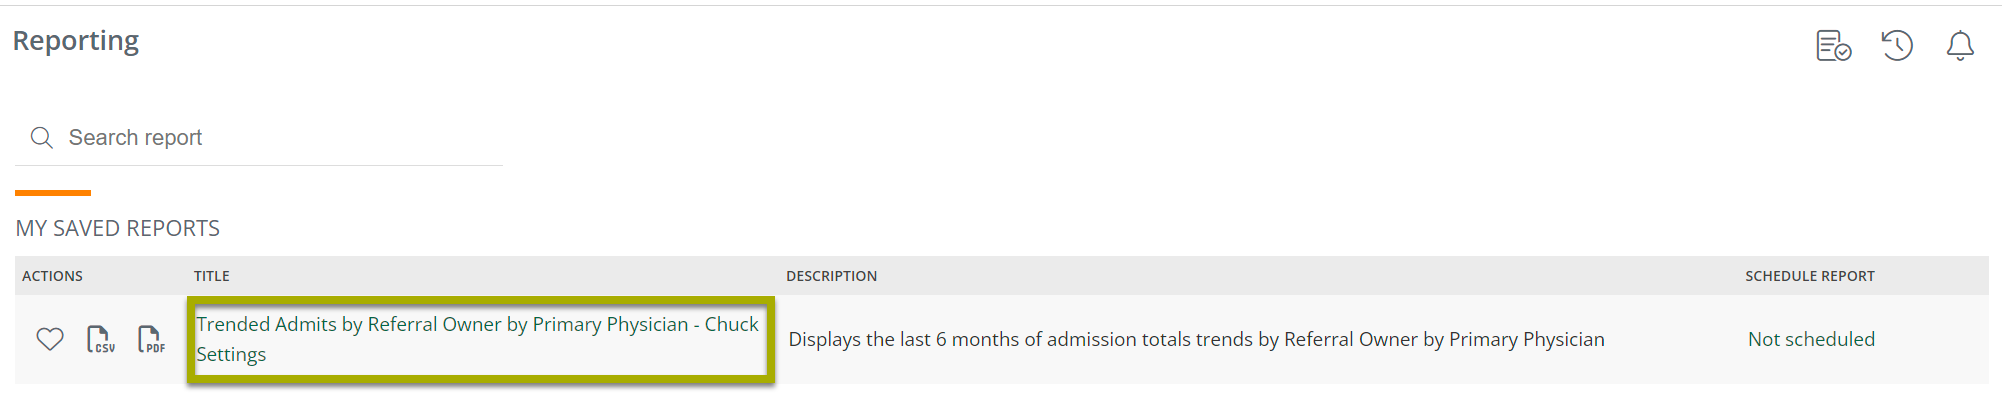
- Enter a detailed name (the example below shows the report type, area, and sorting priority) into the pop-up dialog box.

- Click Save.
- The report is saved and shows up at the top of the Reporting page, in the new My Saved Reports section.
Favorite Reports
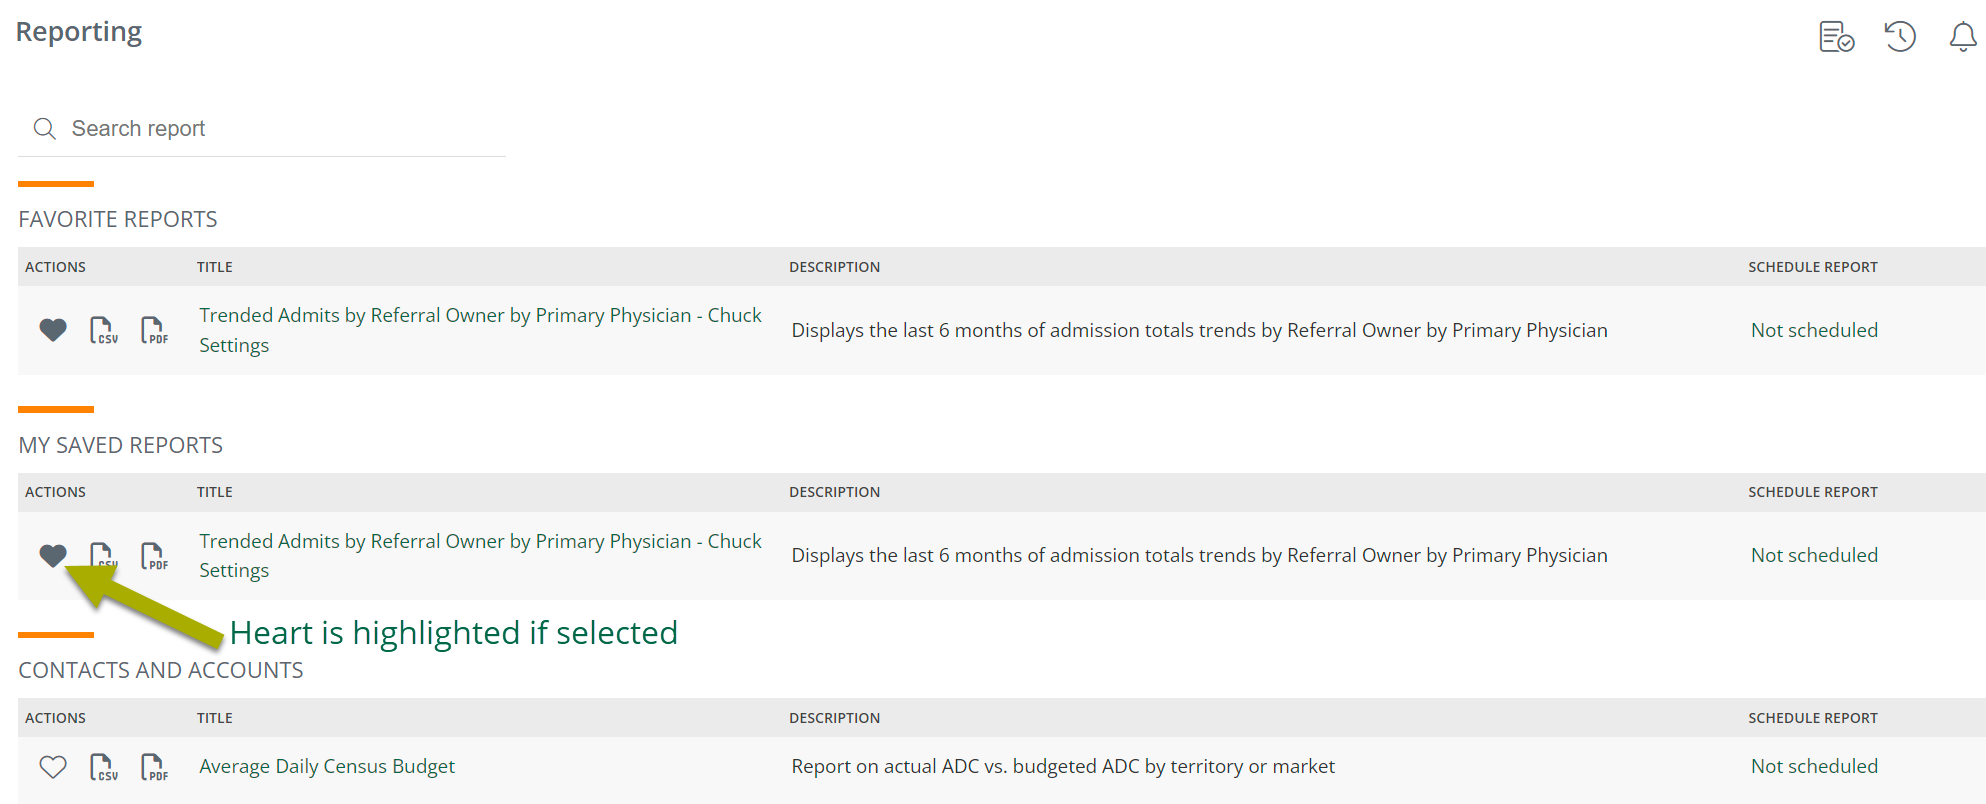
If the default filtering options deliver the desired results, a report can be marked as a "Favorite." This is done by clicking on the heart icon to the left of any report listed on the Reporting page. Once selected, the heart icon will fill in, to give a visual queue that it has been selected.
Additionally, any reports marked as a "Favorite" will show up in the Favorite Reports section, up at the top of the Reporting page.
Exporting a Report to .CSV & .PDF
The two right icons in the "Actions" column allow users to export that report to a .csv file (for Excel) or a .PDF file.

Scheduling a Report
To schedule a report to be emailed:
- View the saved report that needs to be scheduled by clicking on the name, then set filtering options as desired.
- Click Run Report to ensure desired results are met.
- Click Schedule.
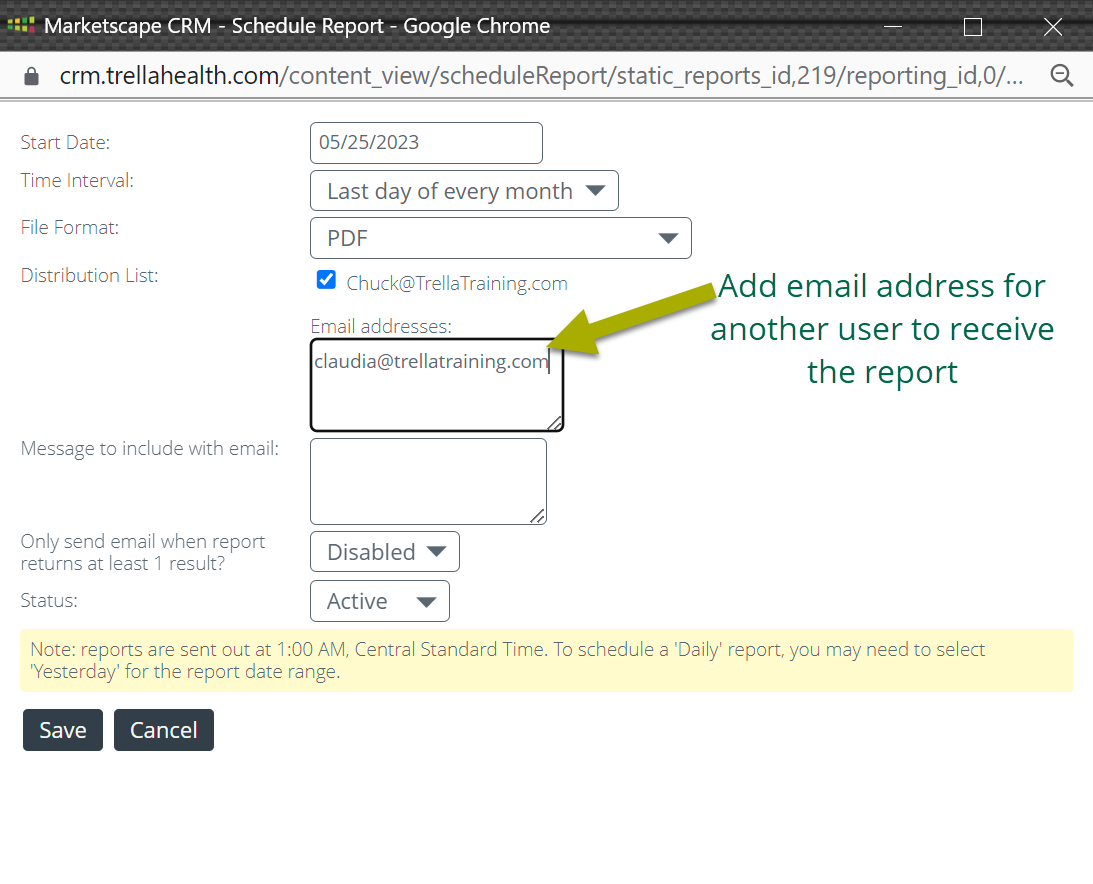
- In the pop-up window, select the Start Date for the report.
- Set the Time Interval (or frequency) of the report. Recurring weekly, bi-weekly, or monthly reports will use the Start Date to determine which days the report will be generated.
- Select File Format for the report to be delivered in (PDF or .csv file, which can be opened by Excel).
- Set the Distribution List. By default, the user creating the report will be included in the distribution (but can be removed by deselecting the checkbox next to the user's email address). Additional users can be added by entering email addresses, each separated by a comma.
- If a message should accompany the email, enter it in the next box.
- We suggest that you Enable the feature of only generating a report when there is at least 1 result to display. This will cut back on inbox clutter by only delivering reports when data is available.
- Ensure Active is selected in the Status drop-down. Inactive will remove the scheduled report.
- Click Save.
The report is now scheduled. To confirm this, click on the Reporting link at the top of the page to return to the list of reports. In the Schedule Report column, the report that is scheduled will now display the frequency of the schedule, rather than reading Not Scheduled. Clicking on this link will provide the option to change the schedule or distribution list. To change the report itself, deactivate the current scheduled report (by turning the Status to Inactive), then create a new report with the desired filters and set a new schedule.
Final Details
- Export Size limit: All exports and scheduled reports will be limited to ten thousand entries.
![]() This limitation does not apply to views! If you need to see more than ten thousand entries, you can still see them within Trella CRM for Web.
This limitation does not apply to views! If you need to see more than ten thousand entries, you can still see them within Trella CRM for Web.
- PDF Size Limit: any export or scheduled report requested as a .PDF file that exceeds one thousand rows will be automatically converted to a .CSV file. That .CSV file is limited to the ten thousand entries restriction mentioned above. If a report you are viewing exceeds one thousand entries, the .PDF export icon will be grayed out.
- Email File Size Limit: Any attachment emailed from Trella CRM that exceeds 20 megabytes will be automatically converted to a ZIP file.