Overview
On the Accounts page in Trella CRM you can create and manage your accounts — the facilities and organizations that anchor your referral relationships. If you have been using Trella CRM for a while, your existing accounts are already there. The features described below help you find the right account quickly, work multiple accounts at once, and create new accounts as your territory grows.
 Location
| Click on the Accounts button in the left navigation to open the Accounts page. |  |
 Let's get Oriented
The Accounts page is dense — for a larger company, the volume can feel daunting. The features and tools on the page help you find the accounts you need, work them efficiently, and add new ones as your territory grows. One thing worth orienting on up front: there are three ways to interact with an account record — creating a new one, editing an existing one, and viewing an existing one. Each mode looks a little different, and this article walks through what changes between them.
 In this Article
- Common Features
- Create/Edit/View an Account -
- Views - How to create, edit, or delete a view
- Filters
- Bulk Actions
- Account Tools
- Account Reports
- Accounts in Trella CRM Mobile - Coming Soon!
Common Features
When you click on the "Accounts" button in the left navigation, the page shown in the image below opens.
The Accounts page is shown in the image above. Use the image as a reference for the features described below.
![]() Click on any image to enlarge it.
Click on any image to enlarge it.
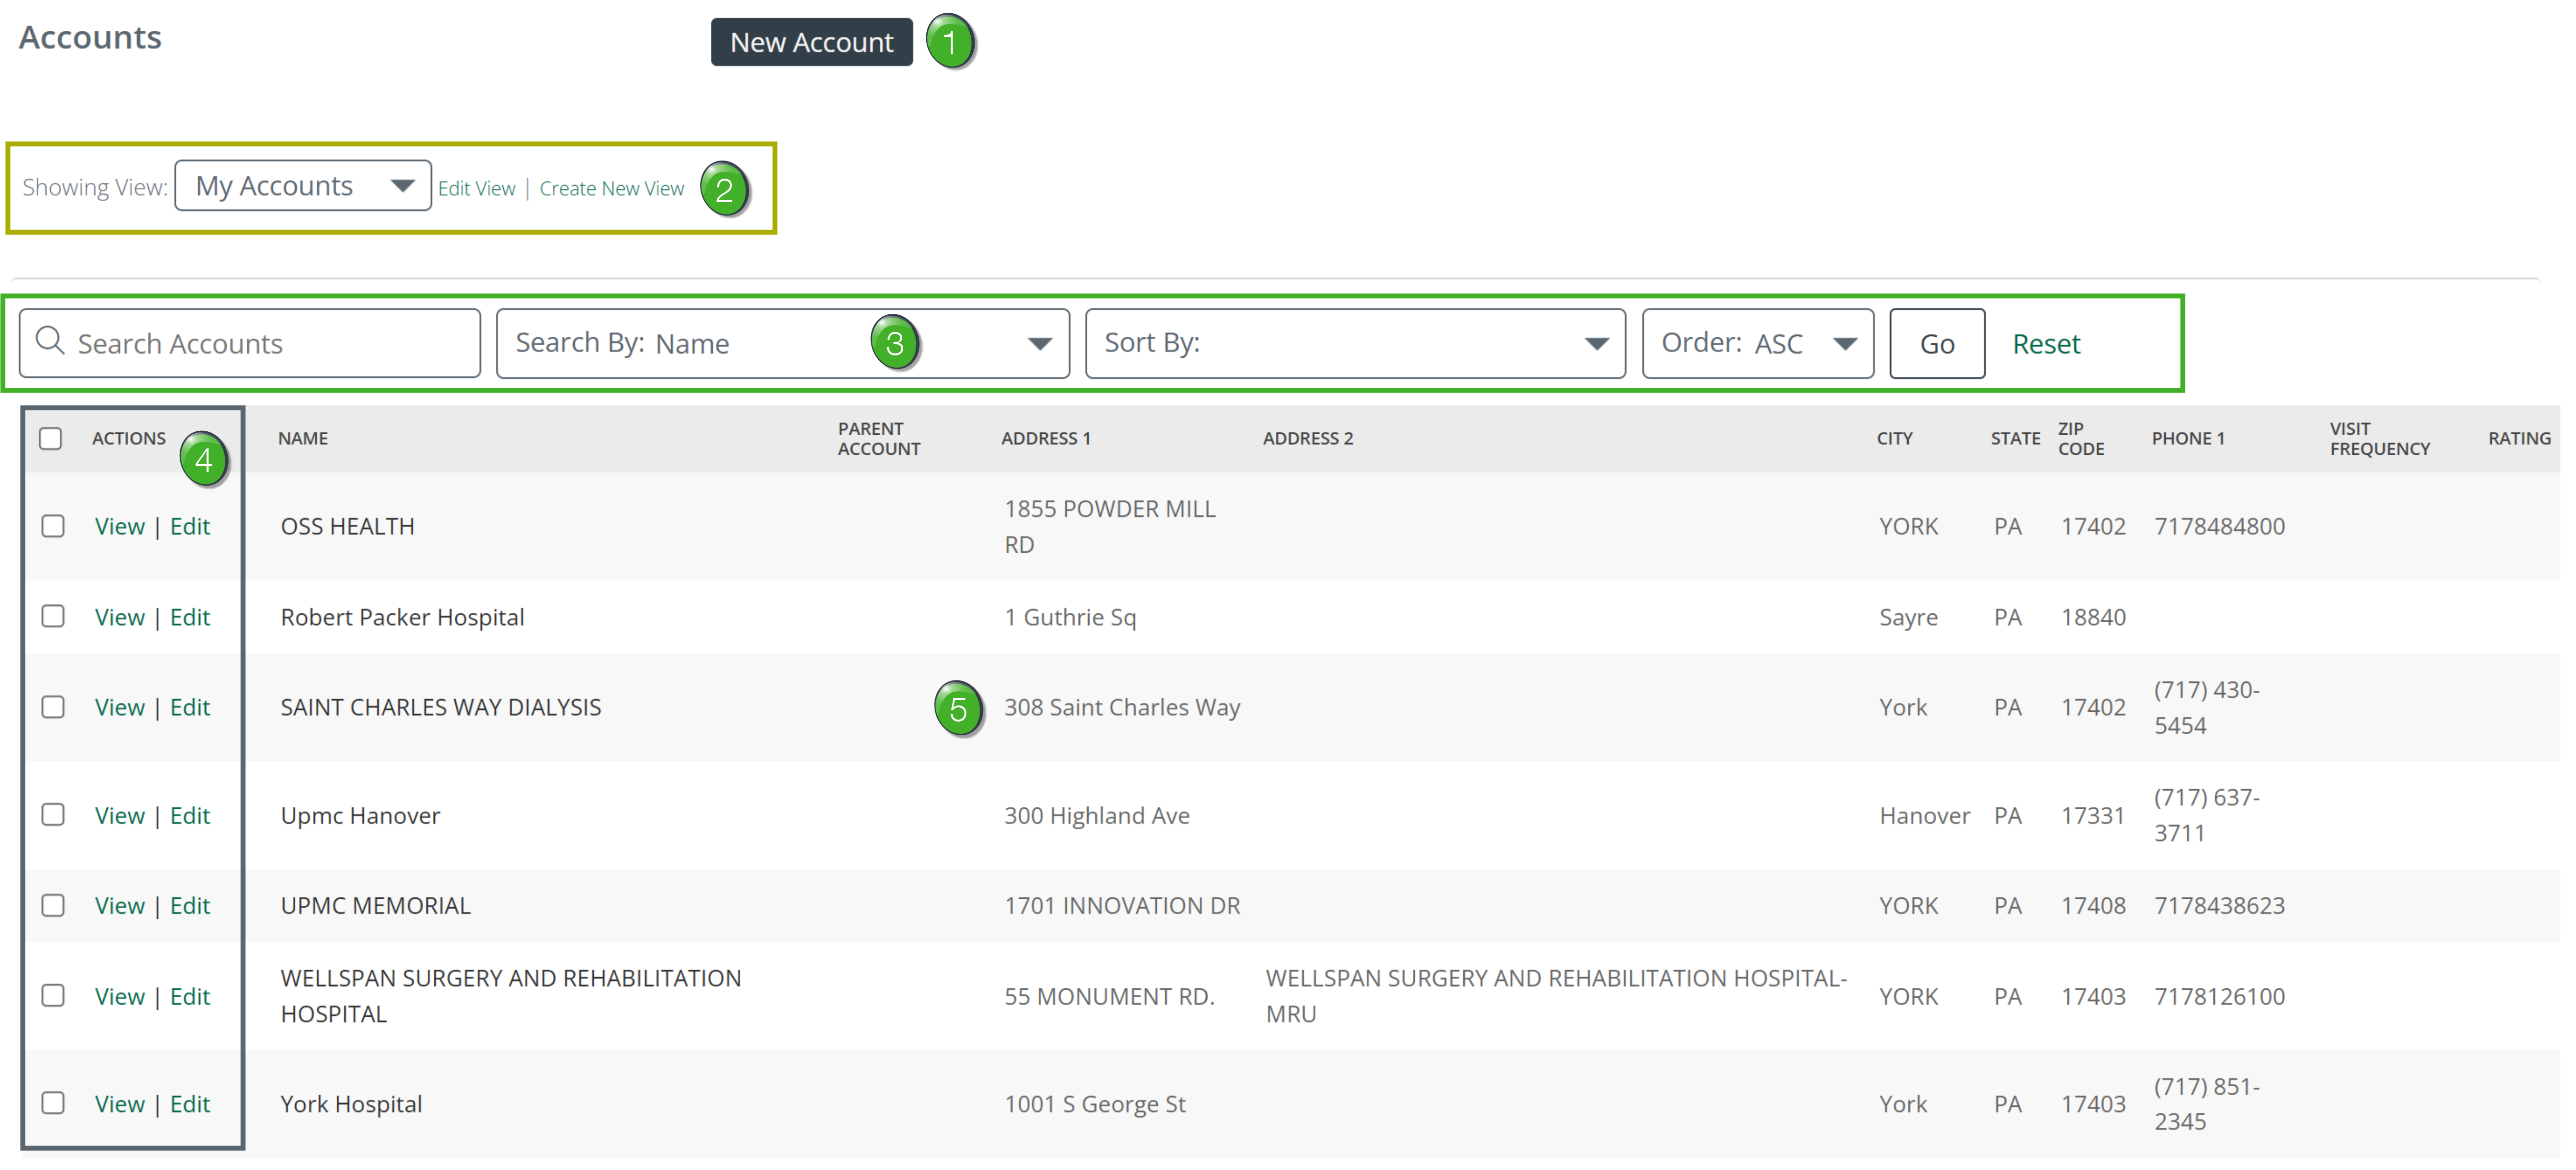
![]() New Account - clicking the New Account button will open the interface to create a new account.
New Account - clicking the New Account button will open the interface to create a new account.
![]() For complete details, see Create/Edit/View an Account. (below)
For complete details, see Create/Edit/View an Account. (below)
![]() Views - a "View" is a set of parameters you can set to customize what is shown on the Accounts page. The default view is "My Accounts," which shows the accounts assigned to you. You can create custom views, edit existing views, or delete a saved view.
Views - a "View" is a set of parameters you can set to customize what is shown on the Accounts page. The default view is "My Accounts," which shows the accounts assigned to you. You can create custom views, edit existing views, or delete a saved view.
![]() For more information, see Views. (Below)
For more information, see Views. (Below)
![]() Filters - If your list of accounts is so large that you can't scroll through the table to find the account you want, use the search filters at the top of the page.
Filters - If your list of accounts is so large that you can't scroll through the table to find the account you want, use the search filters at the top of the page.
- Set the "Search by" dropdown to "Name" and type a name in the "Search" field. Click the "Go" button
- To find accounts associated with a specific parent organization, set the "Search by" dropdown to "Parent Account" and type the parent name. Click the "Go" button
- Use the "Sort by" dropdown to choose a column to use for sorting the table
![]() For details on how to use the filters, see Filters. (below)
For details on how to use the filters, see Filters. (below)
|
|
 |
![]() The Account Details page displays the same content for an account whether opened in "View" mode, "Edit" mode, or when creating a new account. The fields are described in Create/Edit/View an Account.
The Account Details page displays the same content for an account whether opened in "View" mode, "Edit" mode, or when creating a new account. The fields are described in Create/Edit/View an Account.
![]() The Accounts table - the Accounts table shows your current accounts. The default columns include Name, Parent Account, Address, City, State, ZIP Code, Phone, Visit Frequency, and Rating.
The Accounts table - the Accounts table shows your current accounts. The default columns include Name, Parent Account, Address, City, State, ZIP Code, Phone, Visit Frequency, and Rating.
Create/Edit/View an Account
In short, when you create a new account, edit an existing account, or view an existing account you will see many similar sections of fields from the account record in the database. There are also differences. A new account will have blank fields. Those same fields may contain information when you edit an existing account. When you view an account, there are numerous extra sections.
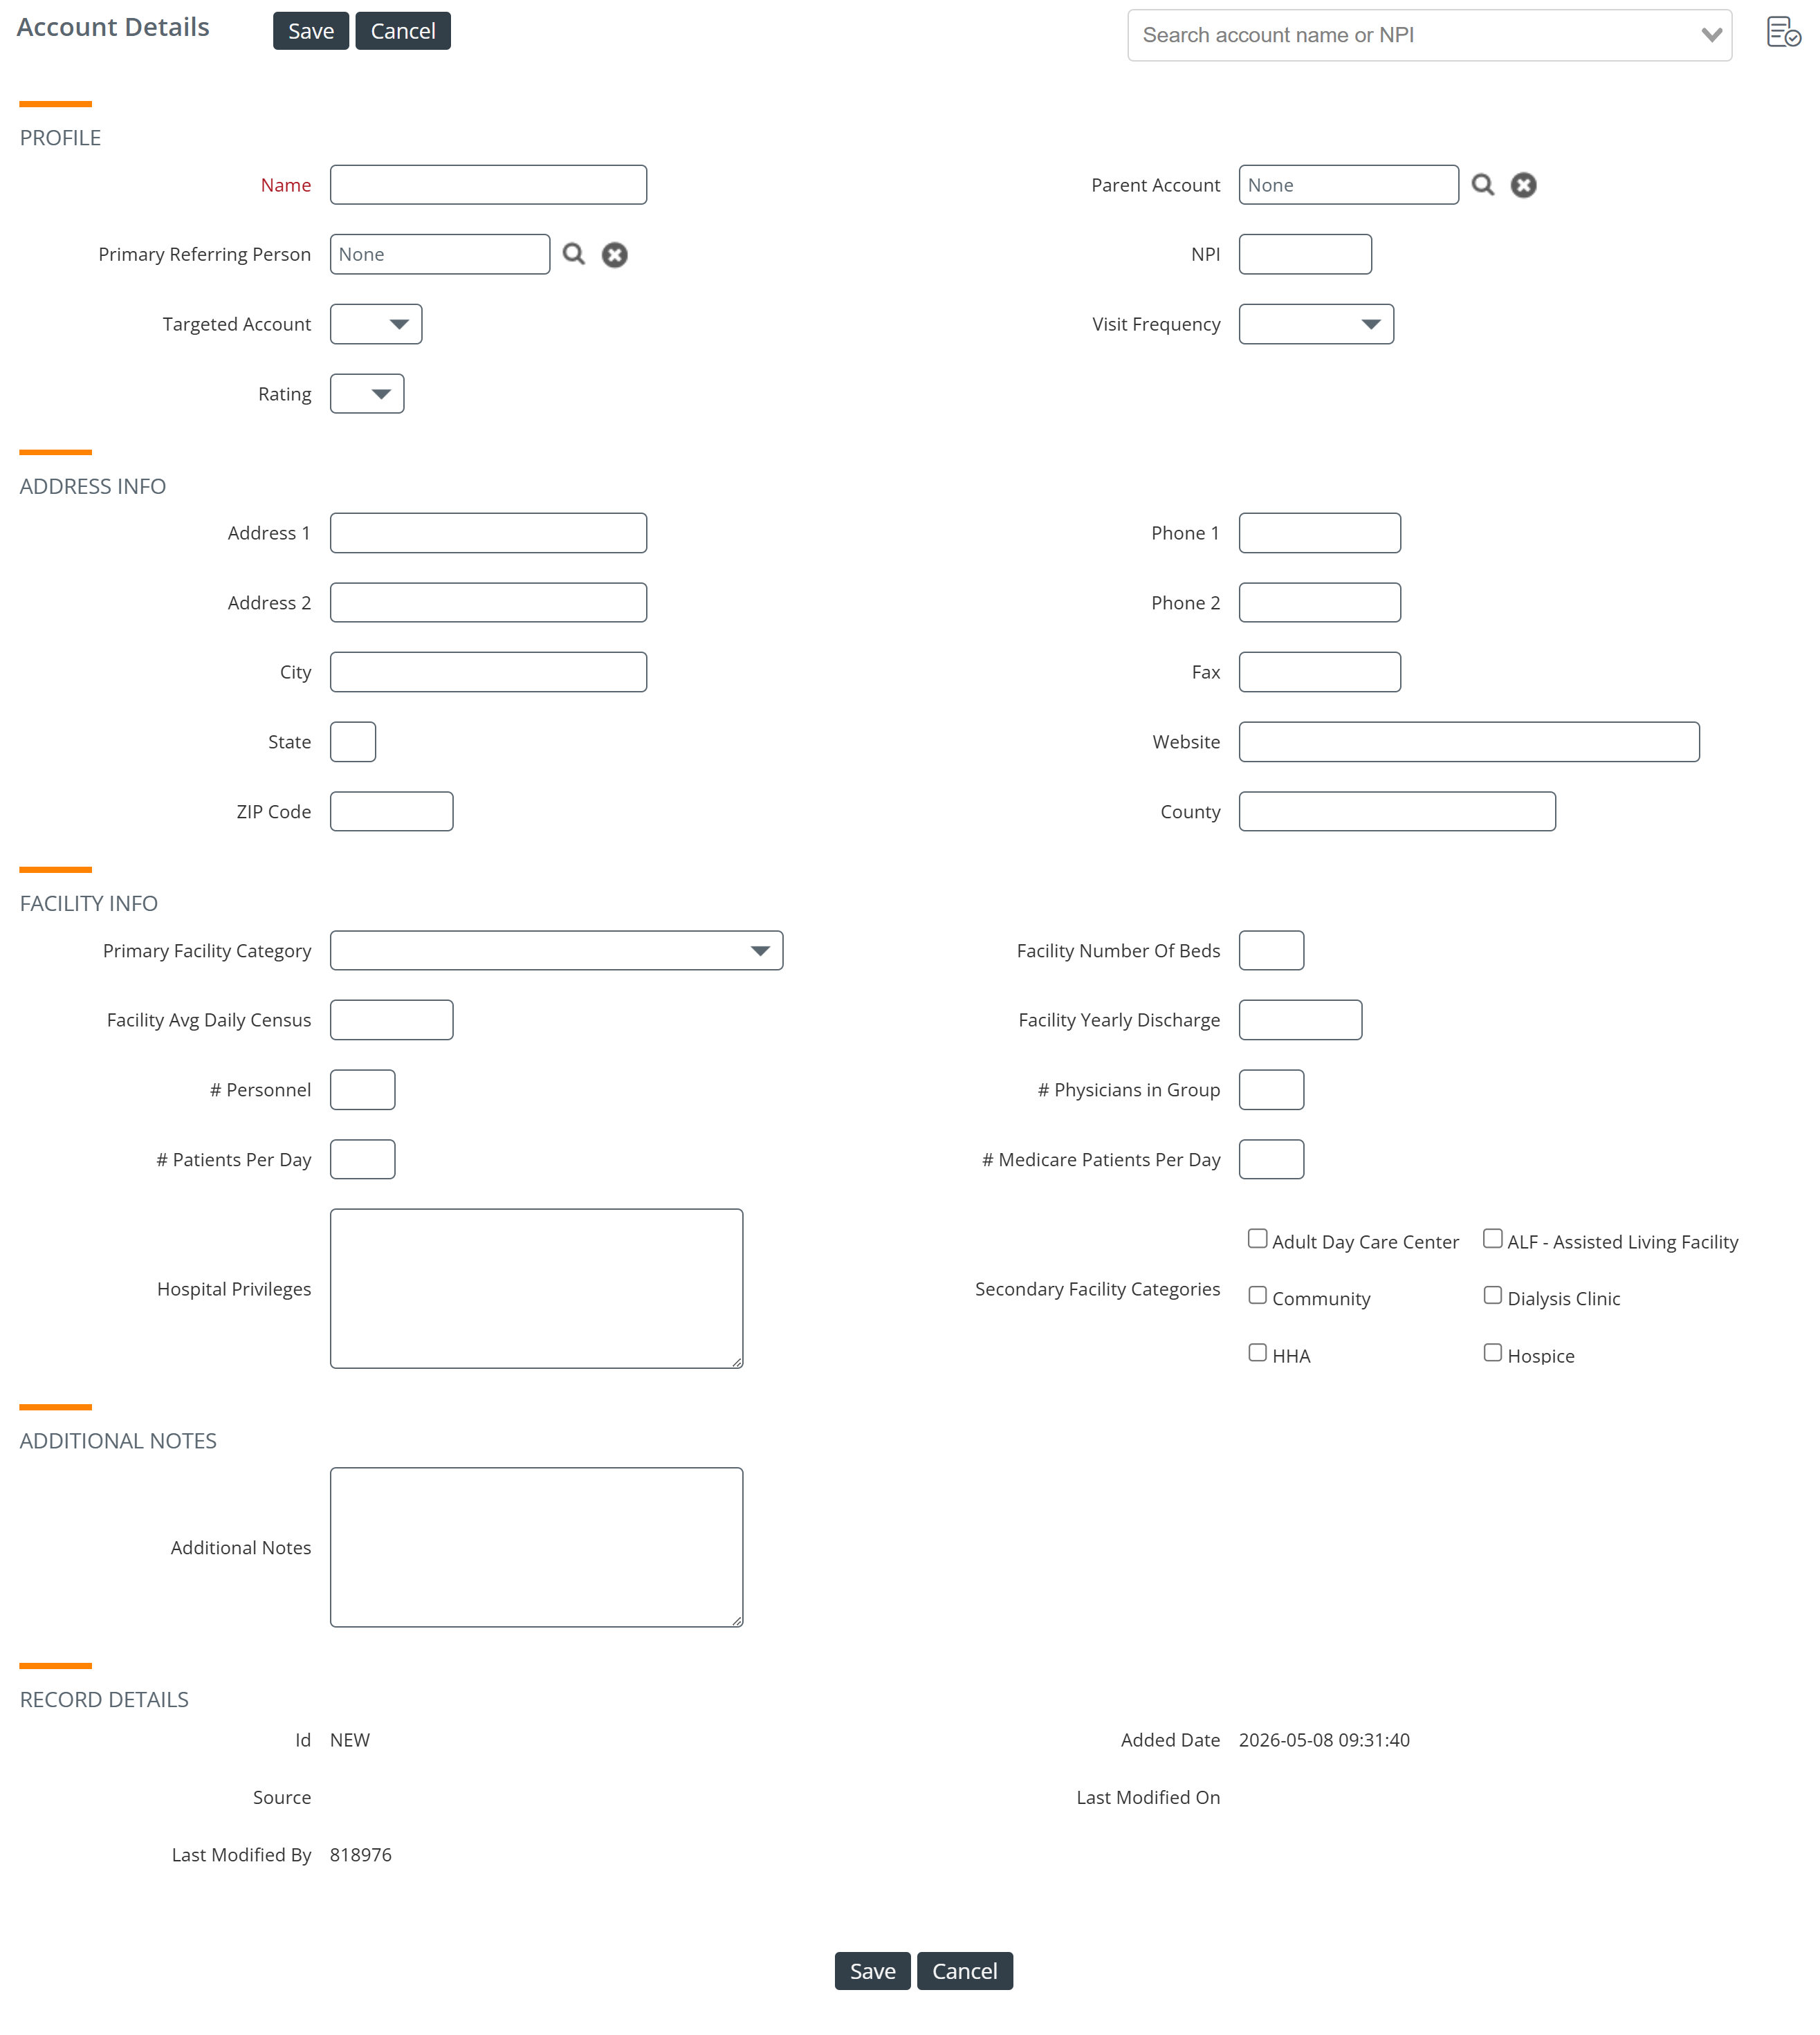
- Creating a new account - This will create a blank account record that you will need to fill in so that it can be associated with events and contacts. When you create and save a new account, it will then show up in your Accounts page.
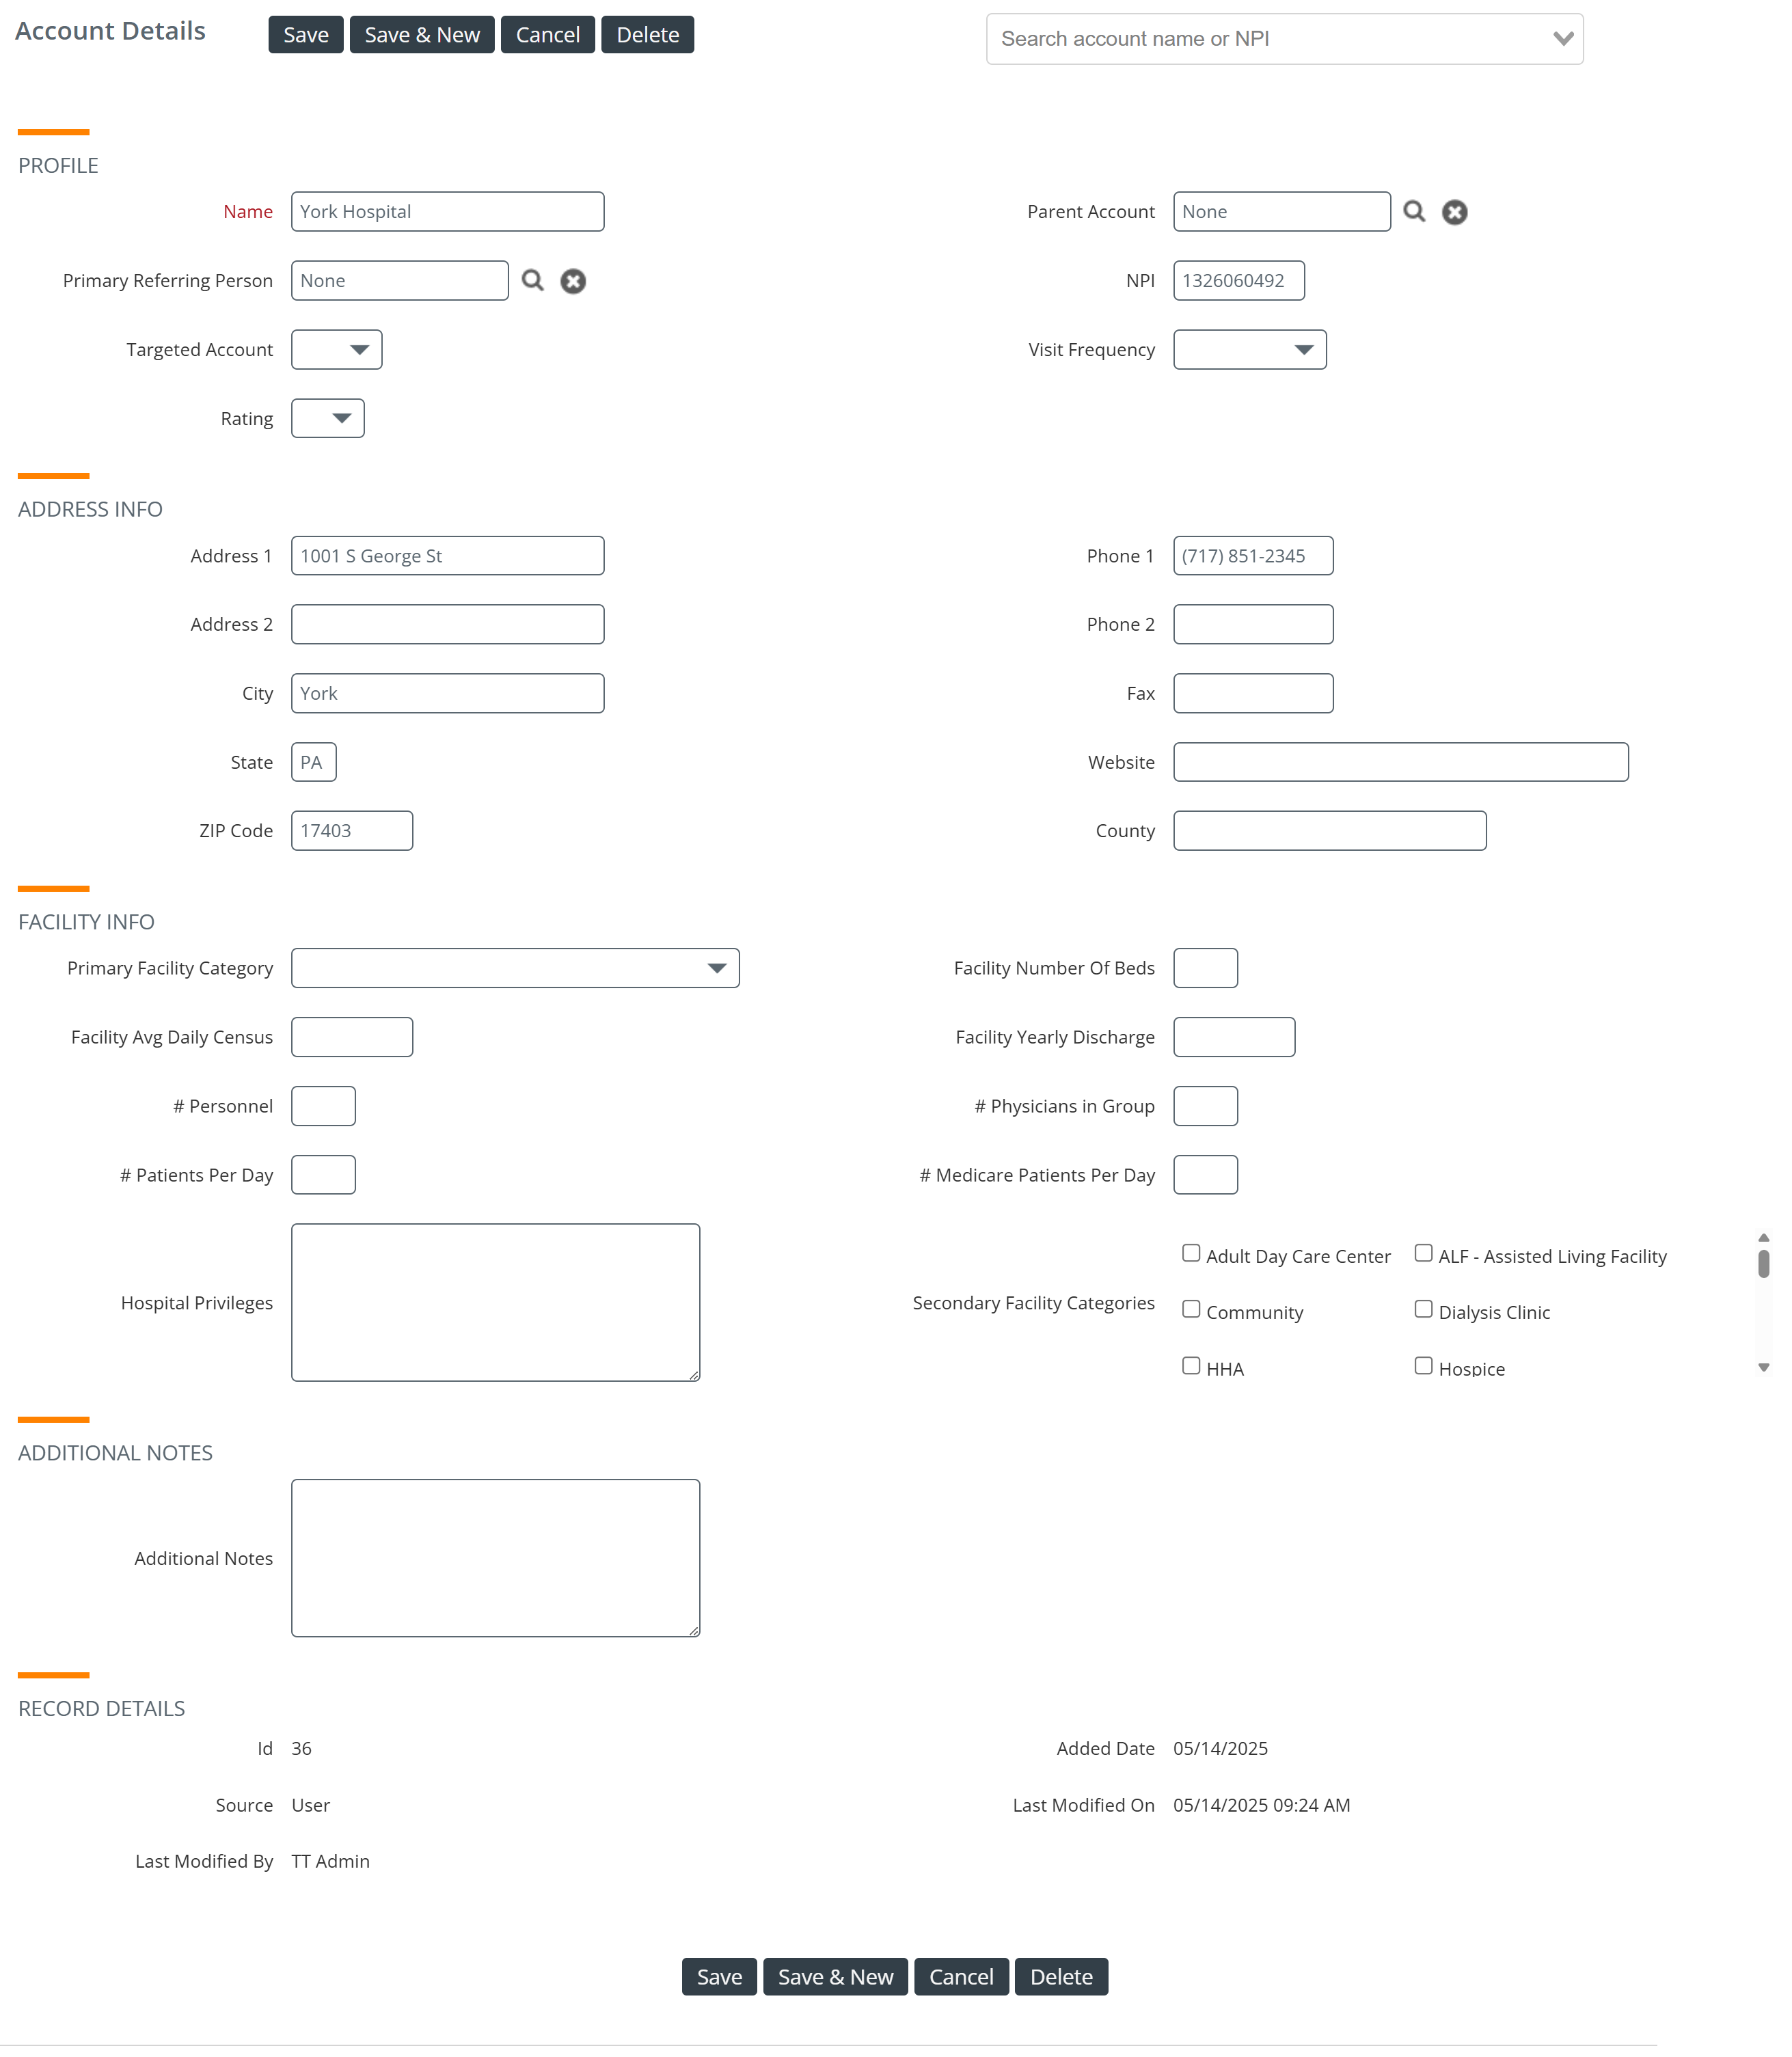
- Editing an existing account - If details for an account need to be changed, you can add, change, or delete individual fields to update the account record. You can save your changes to the existing record.
- Viewing an existing account - As implied, this option allows you to look at the records for a selected account. The view mode shows far more information about the account, including assigned users, event records, Sales Spotlight data, and more.
![]() Not every user can create and/or edit accounts. This depends on the role you have been assigned. If you feel you should be able to create or edit accounts, speak with your manager or account administrator.
Not every user can create and/or edit accounts. This depends on the role you have been assigned. If you feel you should be able to create or edit accounts, speak with your manager or account administrator.
Opening the Pages
The following table shows the step required to create, edit, and view an account.
![]() Click on an image of a detail page to enlarge it.
Click on an image of a detail page to enlarge it.
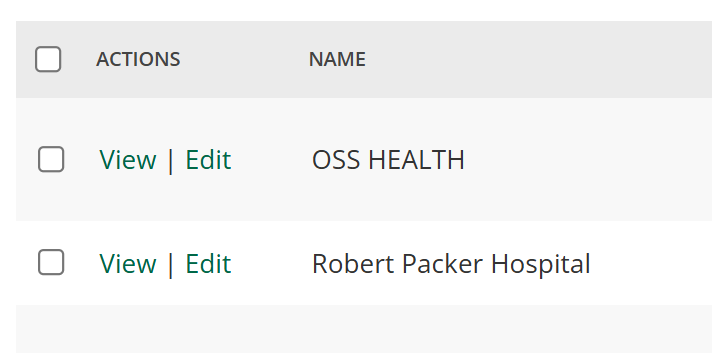
| To Create an account, Click on the New Account button at the top of the page. | To View an account, click on the View link to the left of an account. | To Edit an account, click on the Edit link to the left of an account. |
 |
 |
 |
| The blank Account Details page will open. | The Account Details page for the selected account will open. | The Edit Account Details page for the selected account will open. |
 |
 |
 |
|
 |
List of Sections and Fields
![]() The following tables includes all possible sections that could show up on
an
Account Detail page. Which sections are visible changes a bit between
a new account view you are creating, an existing account view that
you
are viewing, and an existing account view that you are
editing. In the table, we will indicate which section shows up in
which
version of the account view with the identifiers:
NEW
EDIT
VIEW
The following tables includes all possible sections that could show up on
an
Account Detail page. Which sections are visible changes a bit between
a new account view you are creating, an existing account view that
you
are viewing, and an existing account view that you are
editing. In the table, we will indicate which section shows up in
which
version of the account view with the identifiers:
NEW
EDIT
VIEW
Profile SectionNEW EDIT VIEW |
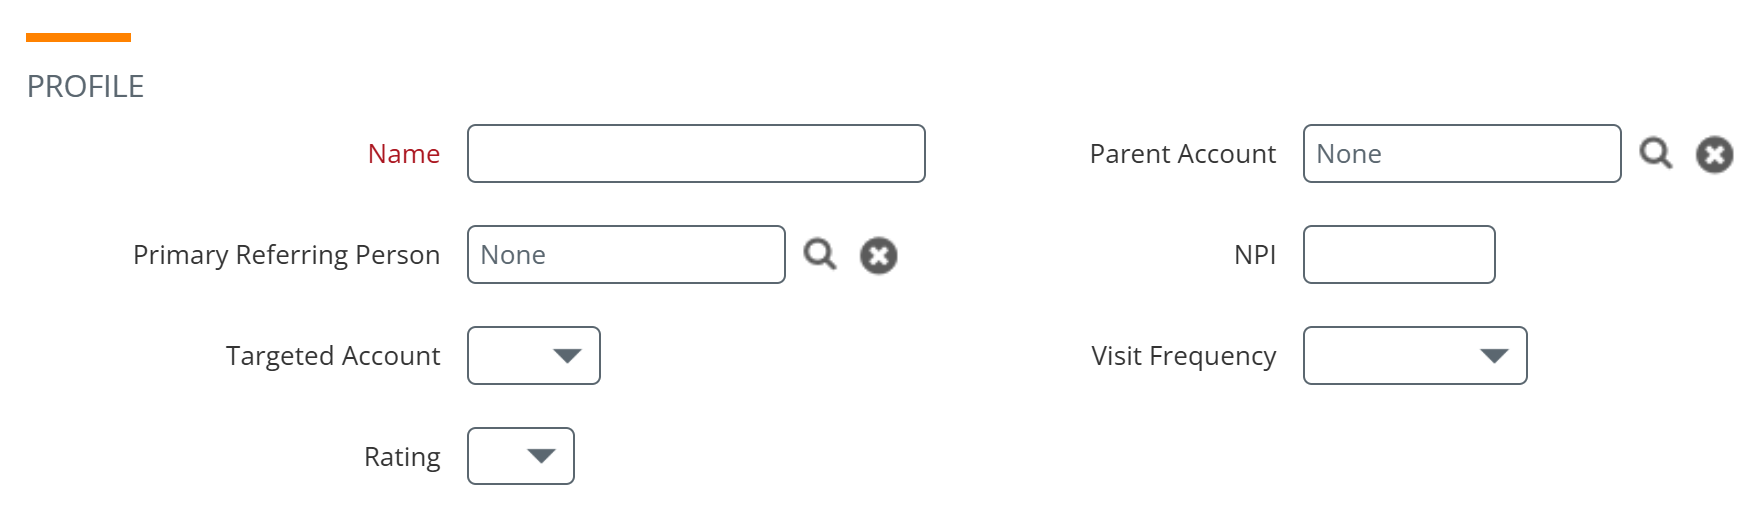
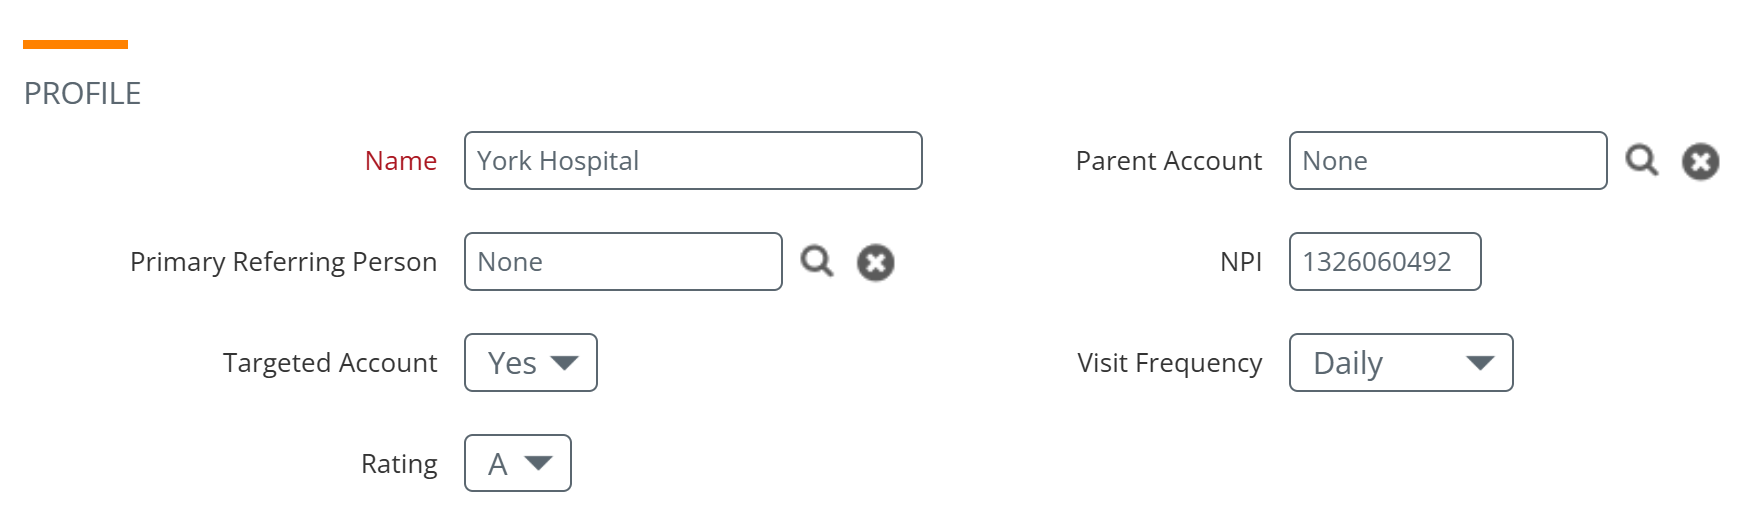
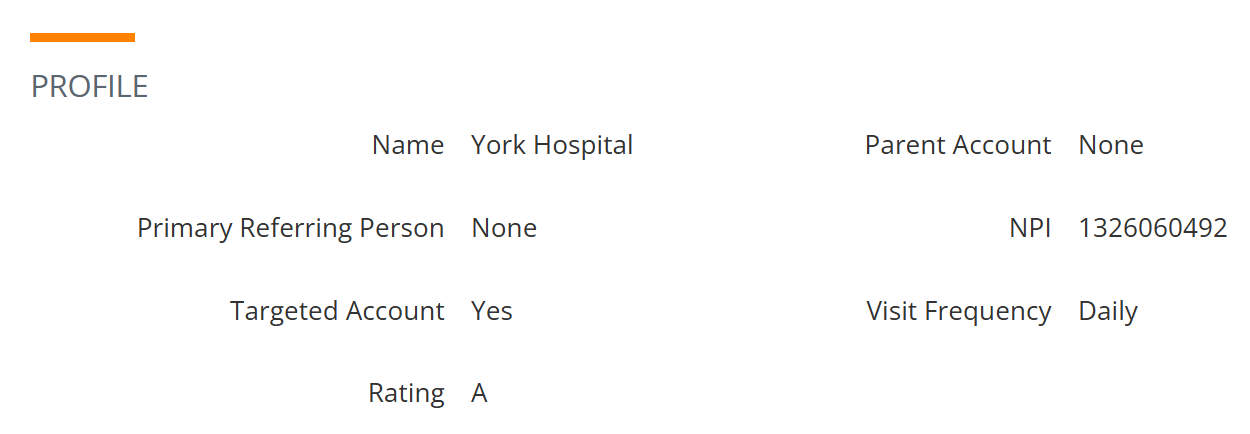
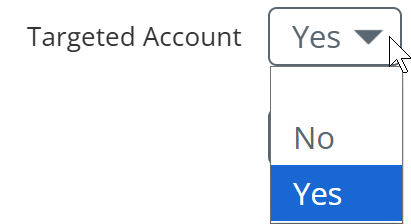
The core identity of the account: Name, Parent Account, Primary Referring Person, NPI, Targeted Account flag, Visit Frequency, and Rating. Name is required. Parent Account associates this account with a larger organization — use Parent Account for branches, locations within a system, or facilities under a parent group. The Targeted Account flag designates the account as a priority for tracking and reporting. |
Action |
What you will see |
|
Creating a New account All fields are empty.
|
 |
|
Editing an Existing account All fields show boxes indicating that they can be edited.
|
 |
|
Viewing an existing account The information is shown, but it can't be edited. |
 |
Details for the Profile section | |
|
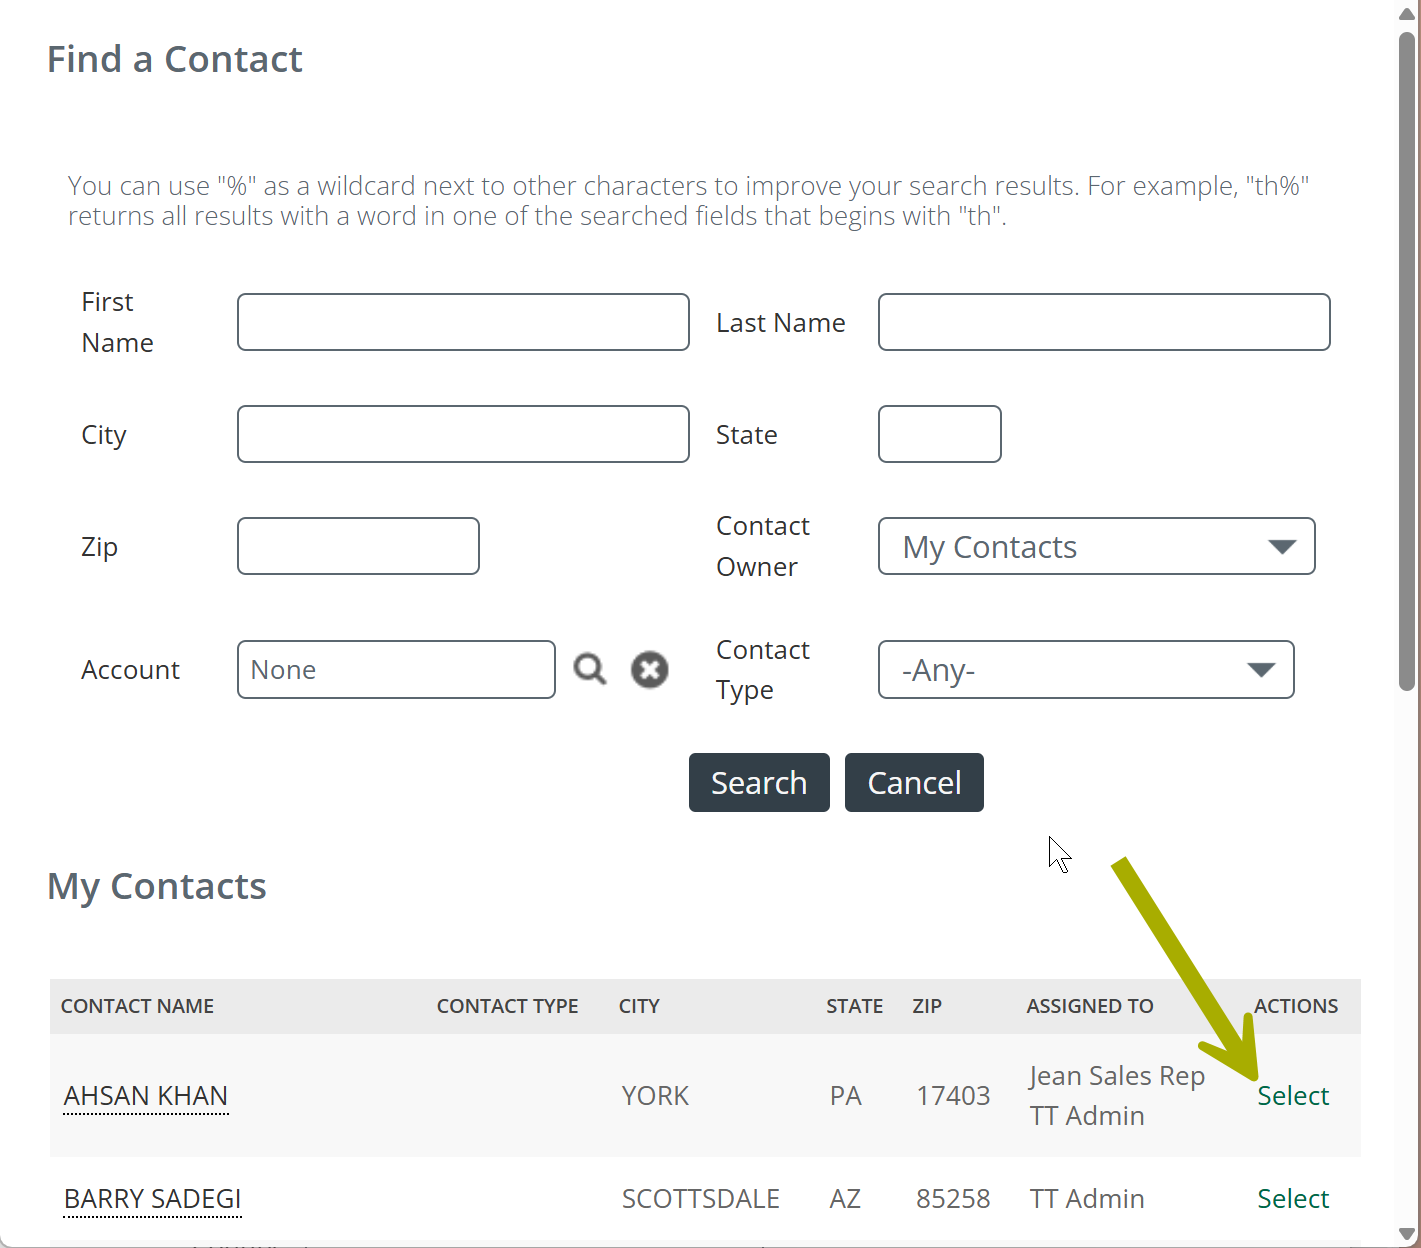
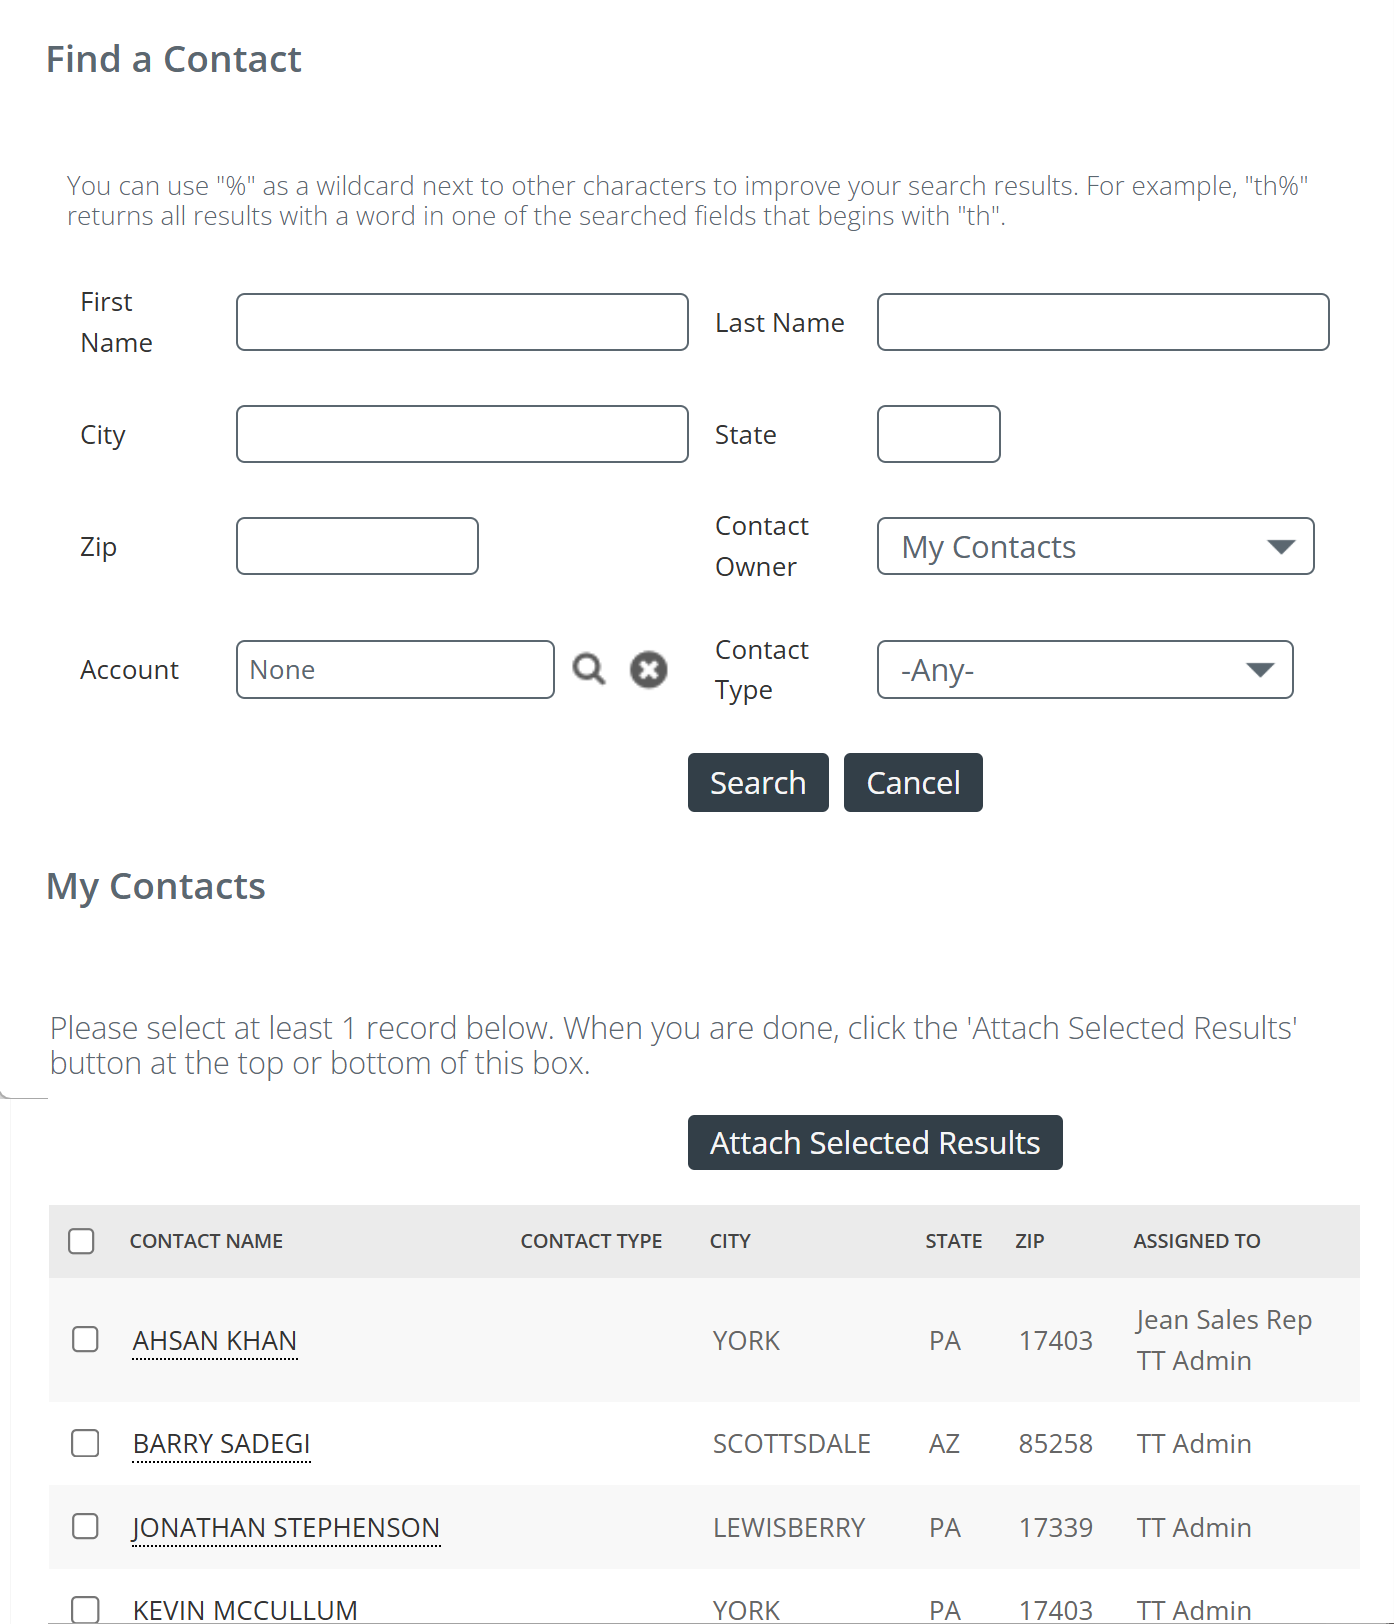
Primary Referring Person - If there is a provider who is the outstanding referral partner at the selected account, you can identify that provider in this field.
The interface shown to the right will open. The top section allows you to search for a known contact who you want to select as the top referrer. The bottom section allows you to browse all contacts.
|
 |
|
Targeted Account - Identify whether the selected account is being targeted for attention.
|
 |
|
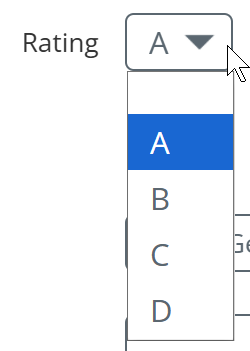
Rating - use this dropdown to identify the priority rank of the selected account
|
 |
|
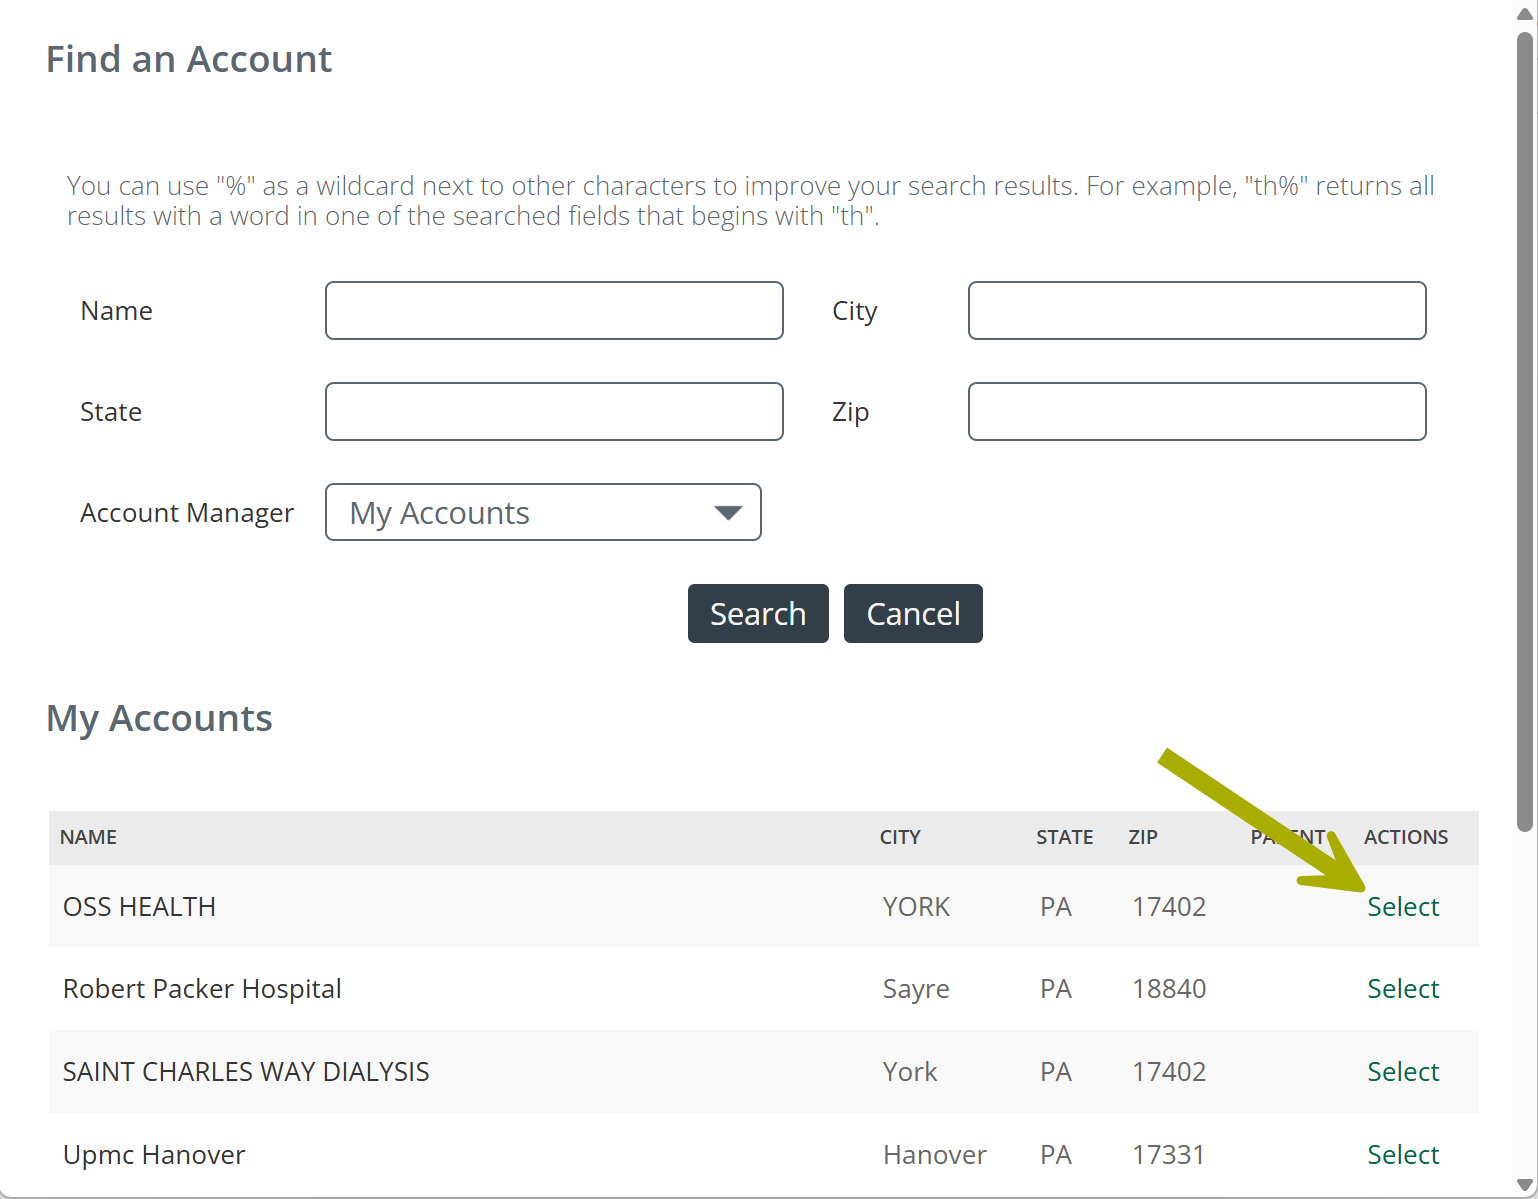
Parent Account - If there is an account that is a parent to the selected account, you can identify that account in this field.
The interface shown to the right will open. The top section allows you to search for a known account that you want to select as the parent account. The bottom section allows you to browse all accounts.
|
 |
|
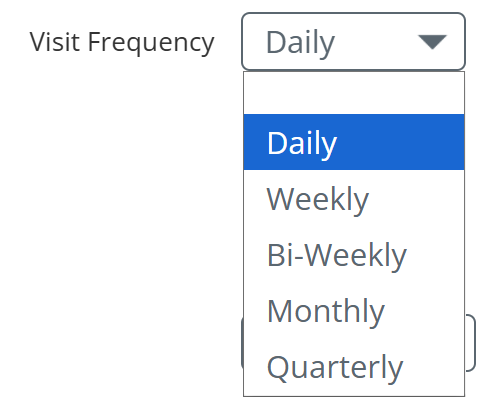
Visit Frequency - This dropdown identifies the desired frequency for visits to the selected account.
|
 |


Shared Owners SectionVIEW |
Assign one or more users as owners of the account. Click the "Add Shared Owner" link to open the Find a User dialog. Click the "Add Myself" link to add your own user record as an owner. Click the "X" next to a user to remove their ownership.
Account ownership controls who sees the account in their "My Accounts" view and which users receive credit for activity logged against the account. |
|
Viewing an existing account In Trella CRM we use the term "ownership" to indicate assignment of accounts, contacts, or referrals to a person in your agency. The Shared Owners section displays all users to whom the selected account has been assigned.
|
 |
Details for the Shared Owner section | |
|
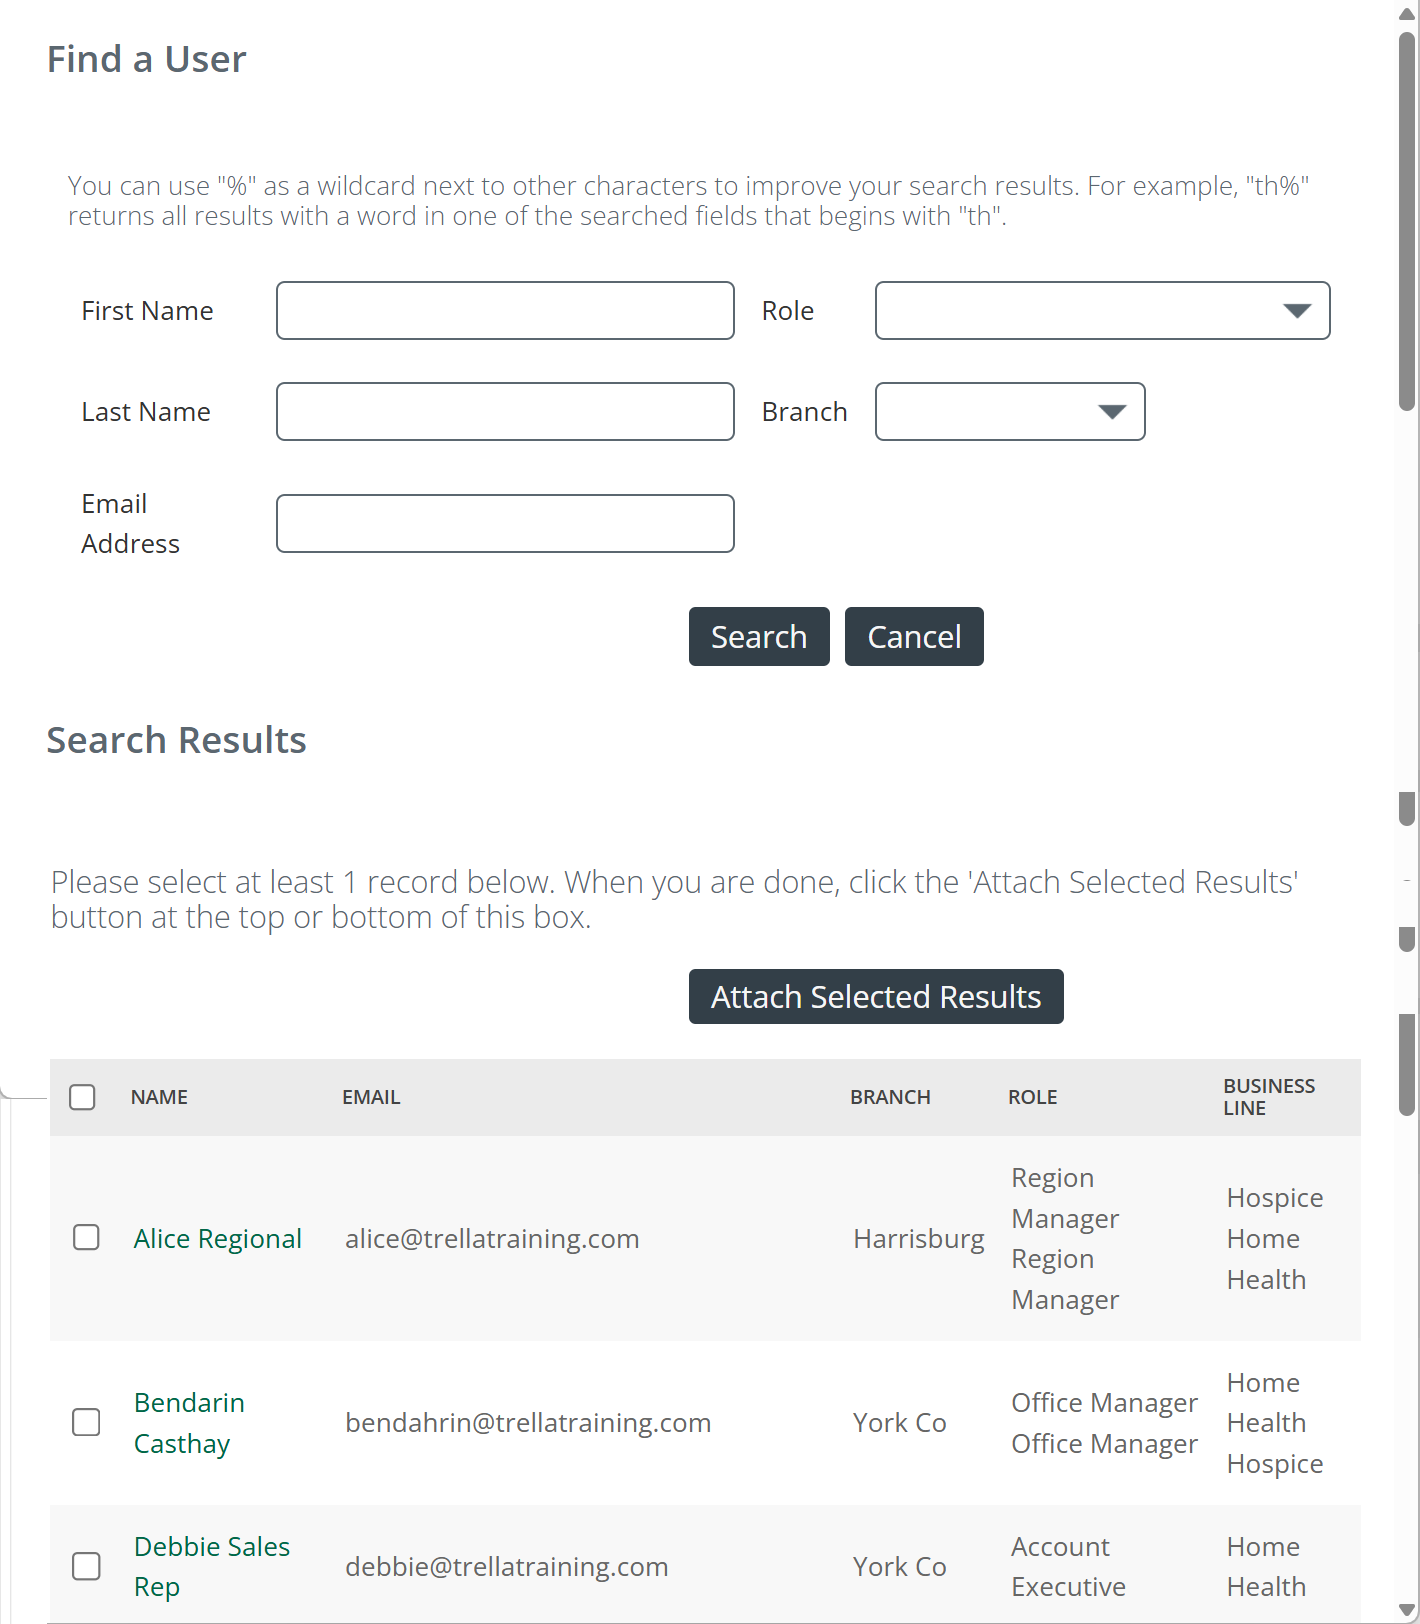
Add Shared Owner - If you click on the Add Shared Owner link, the interface shown at the right will open. This tool allows you to add other users as owners of the selected account. Use the top section to search for a specific user or multiple users. The bottom section is a table that you can browse to find specific users.
The user or users you select will be added as shared users of the selected account. |
 |
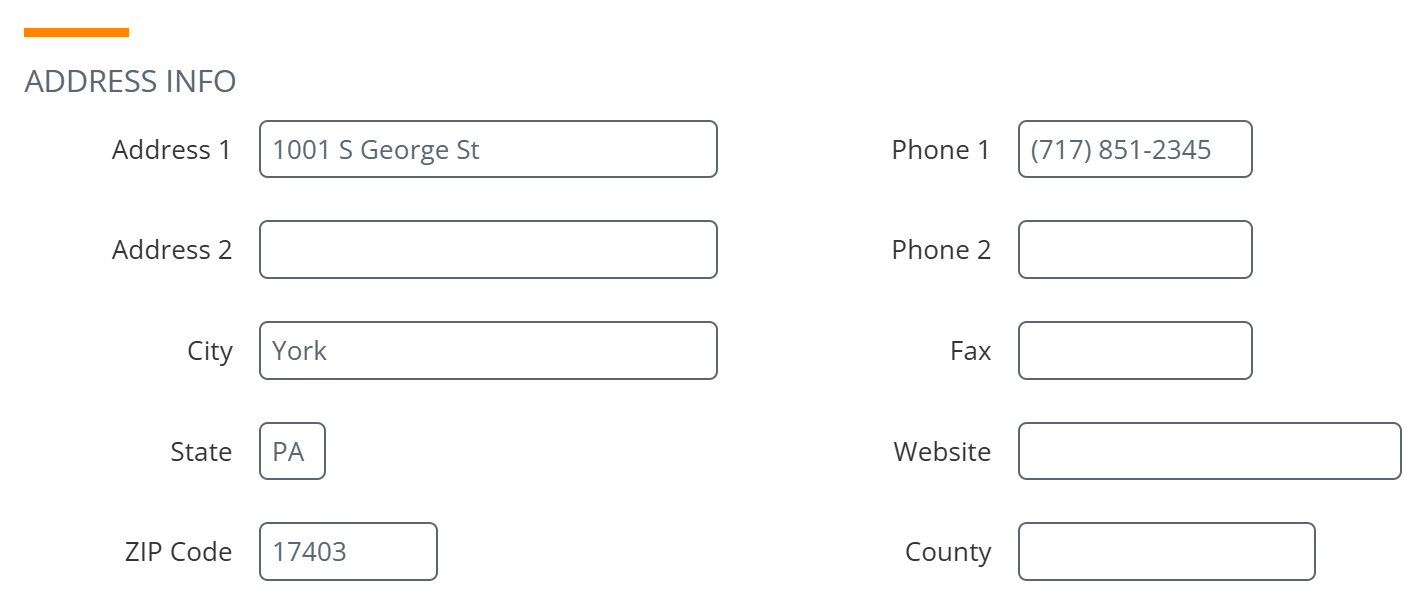
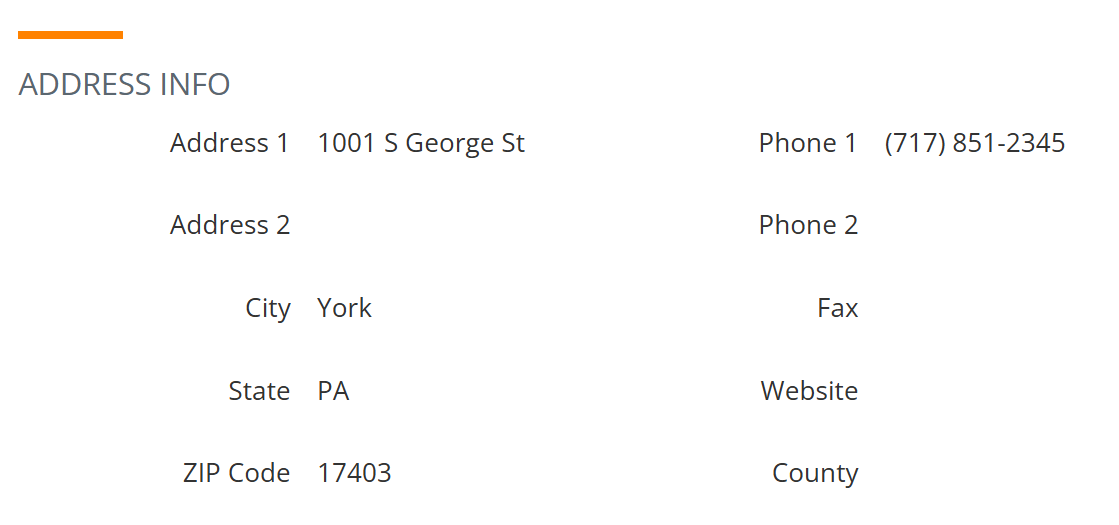
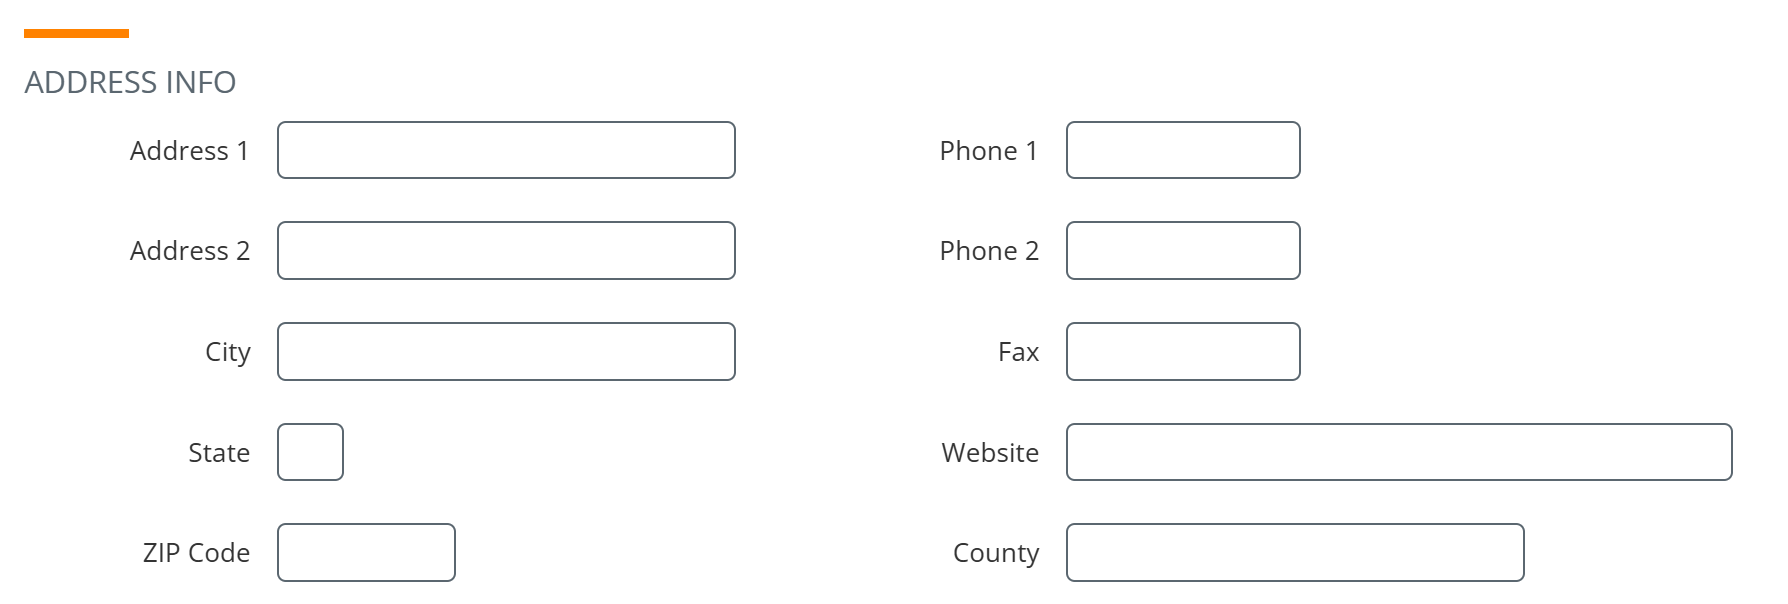
Address Info SectionNEW EDIT VIEW |
The physical address of the selected facility: Address 1, Address 2, City, State, ZIP Code, Phone 1, Phone 2.
|
|
Creating a New account All fields are empty when you first create a new account.
|
|
|
Editing an Existing account All fields in boxes can be edited as needed. |
 |
|
Viewing an existing account The address information for the selected account are displayed for your use. |
 |
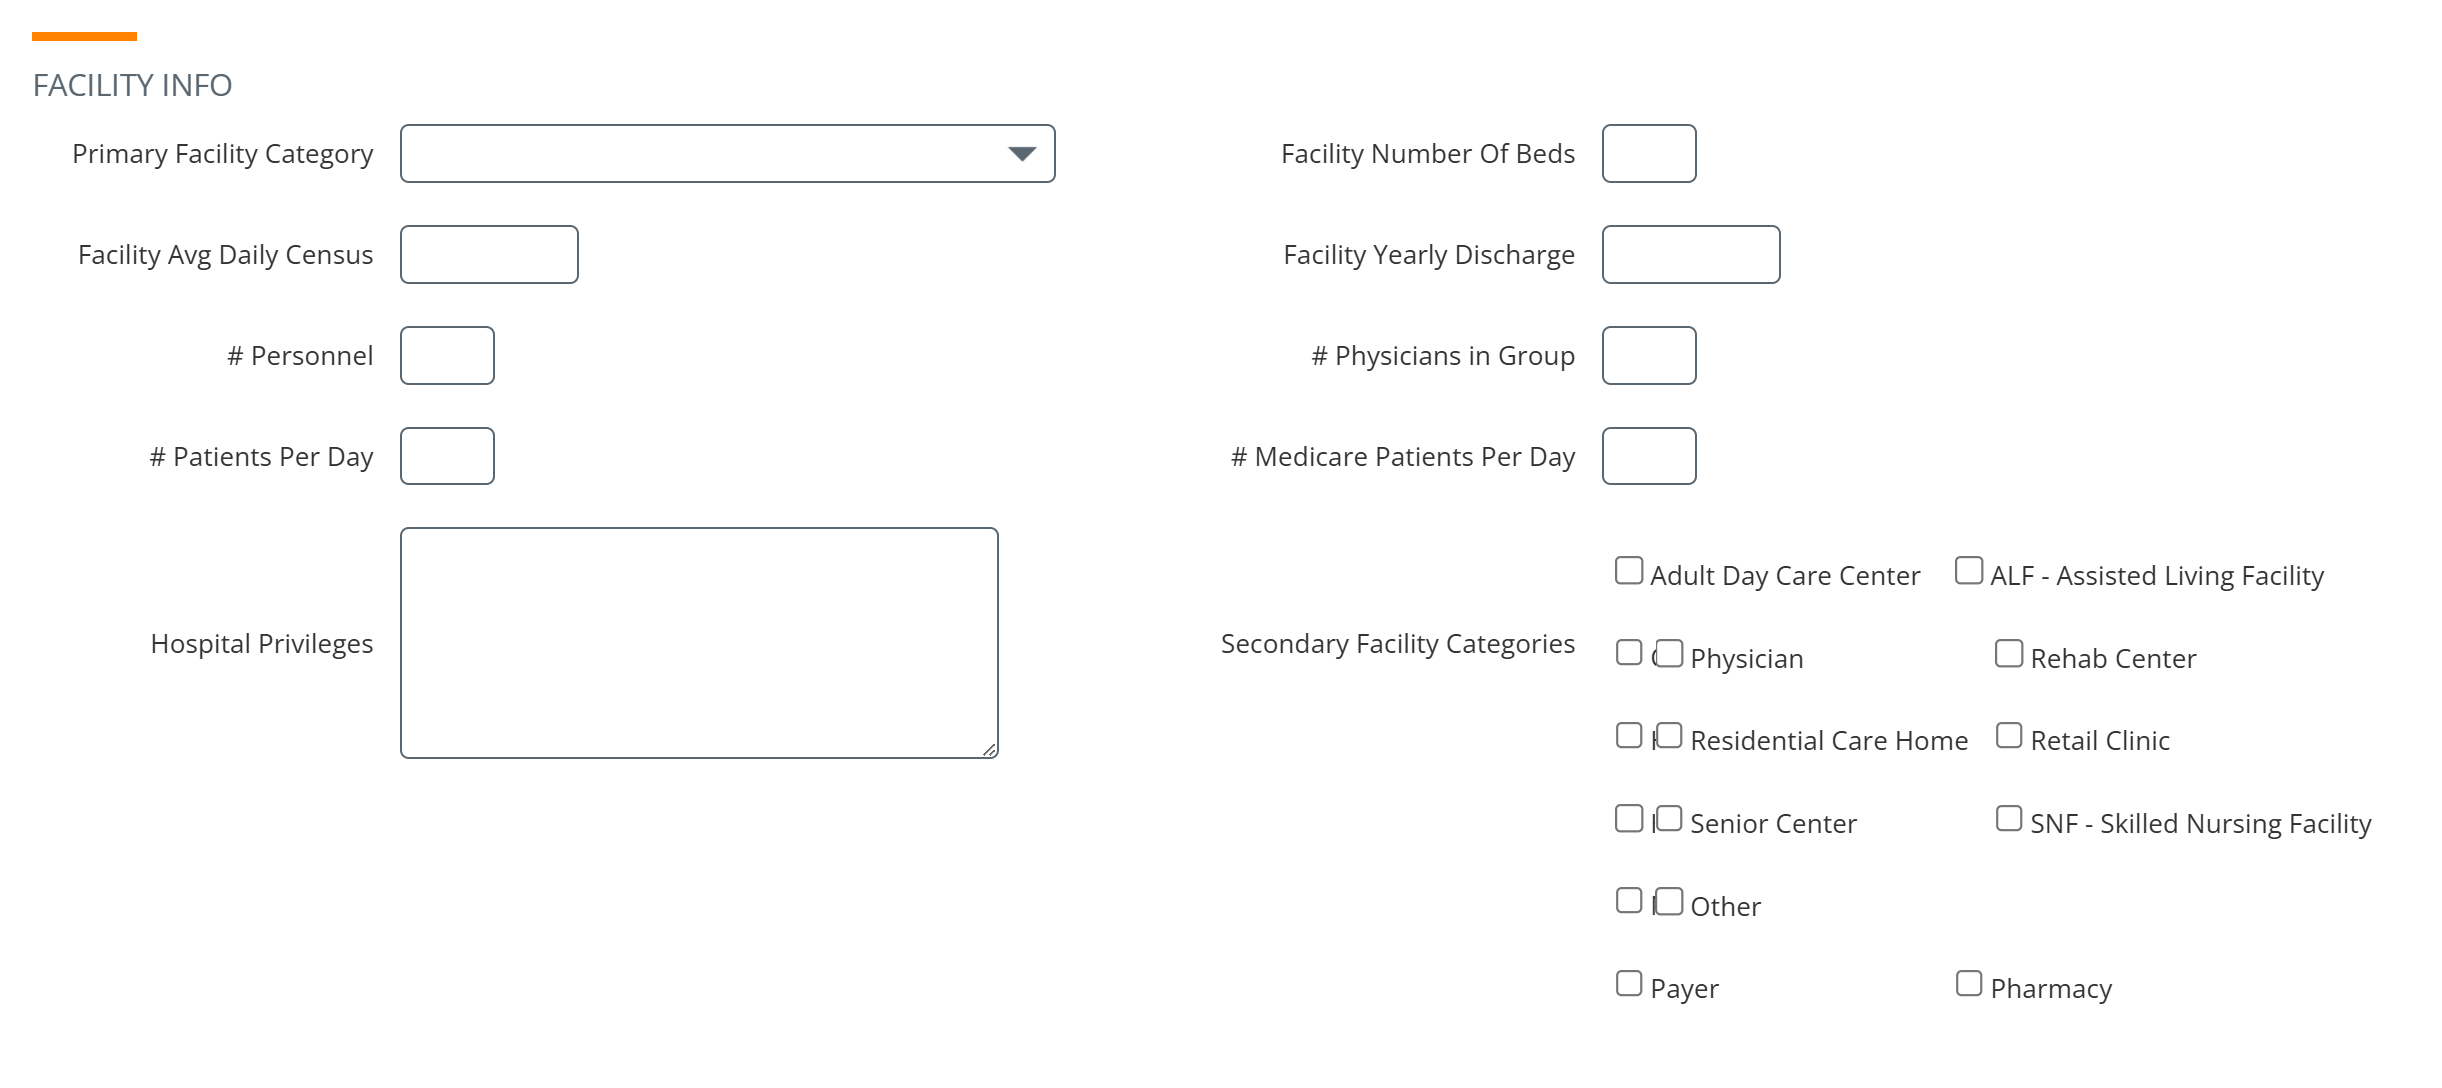
Facility Info SectionNEW EDIT VIEW |
Information specific to the facility's clinical and operational profile: Primary Facility Category, Number of Beds, Average Daily Census, Yearly Discharges, Number of Personnel, Number of Physicians in Group, Number of Patients per Day, Number of Medicare Patients per Day, Hospital Privileges, and Secondary Facility Categories. Primary Facility Category determines the operational nature of the account (Hospital, SNF, HHA, Hospice, HME, Physician Group, etc.). Secondary Facility Categories let you flag accounts that operate across multiple service lines. |
|
Creating a New account All fields are empty.
|
 |
|
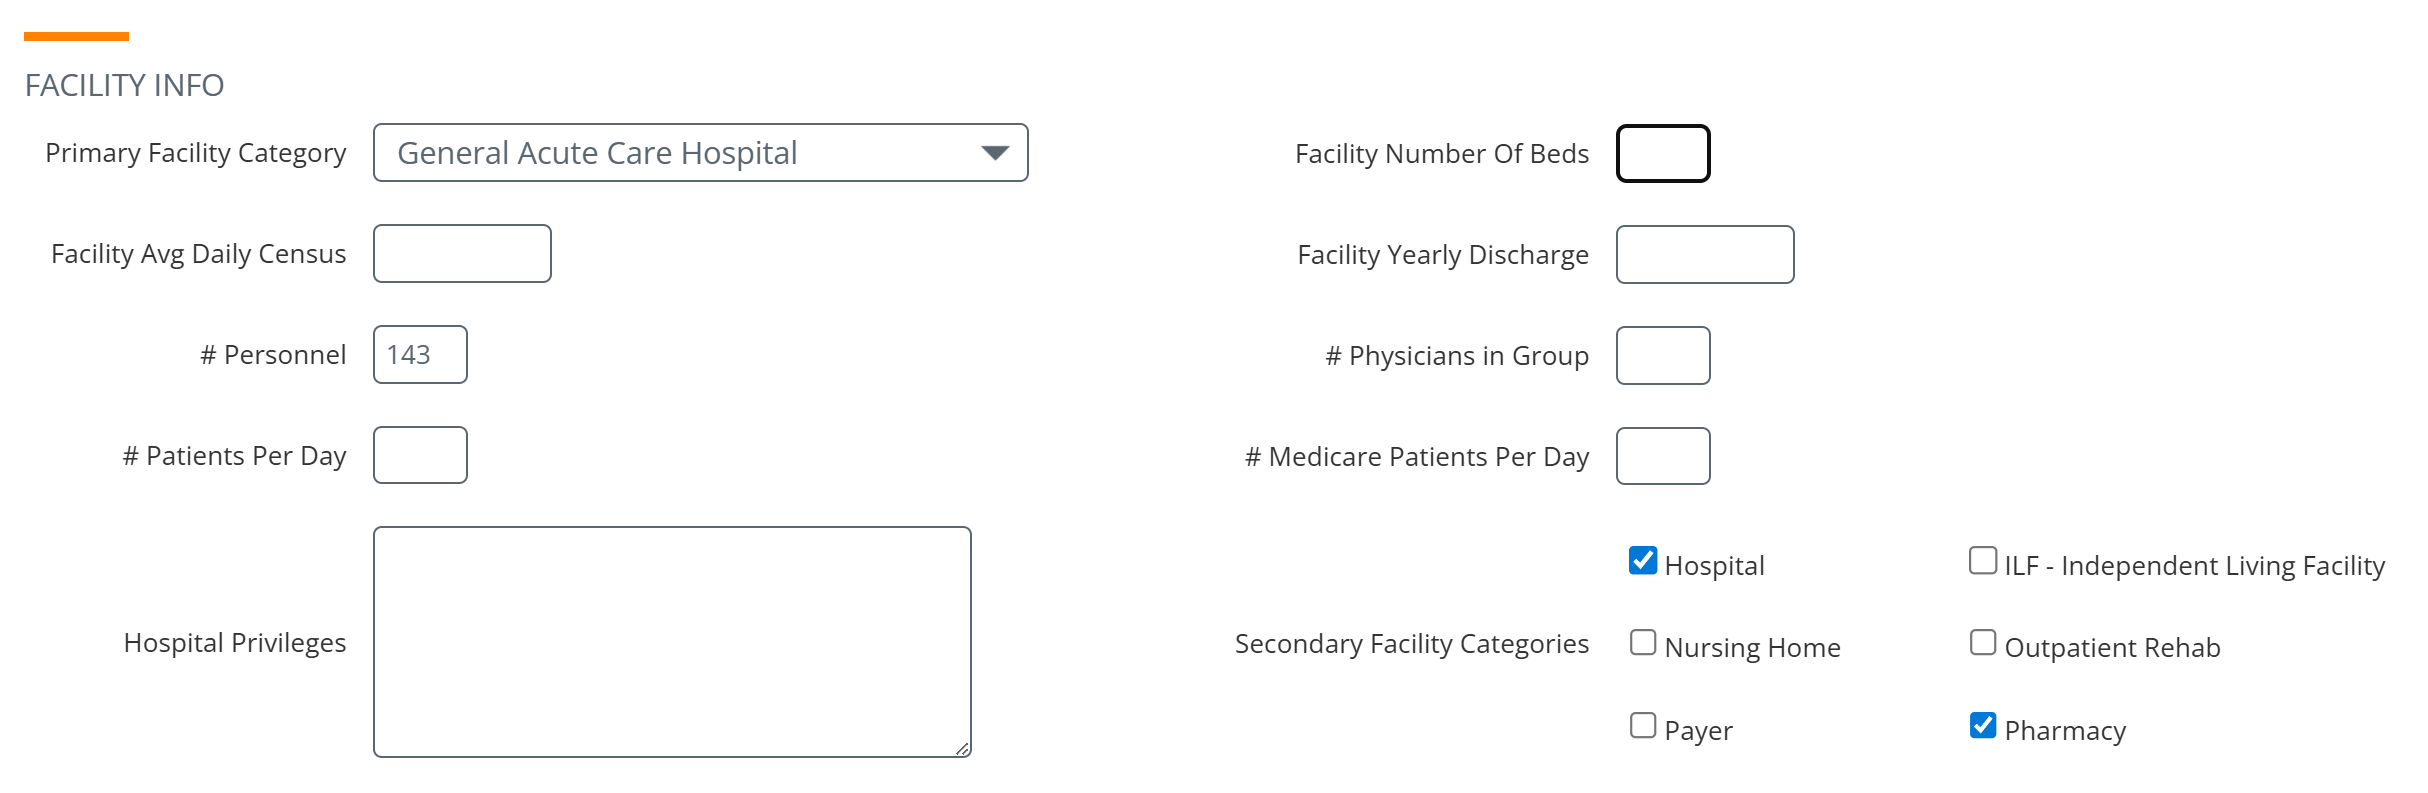
Editing an Existing account All fields can be edited as needed.
|
 |
|
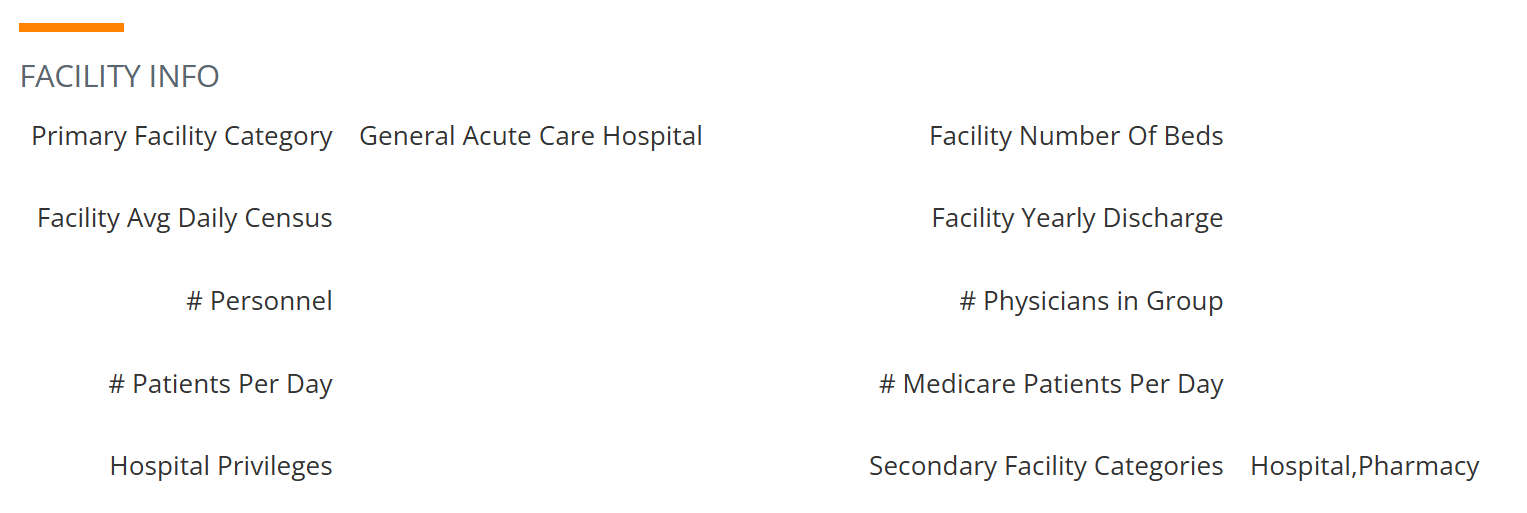
Viewing an existing account
|
 |
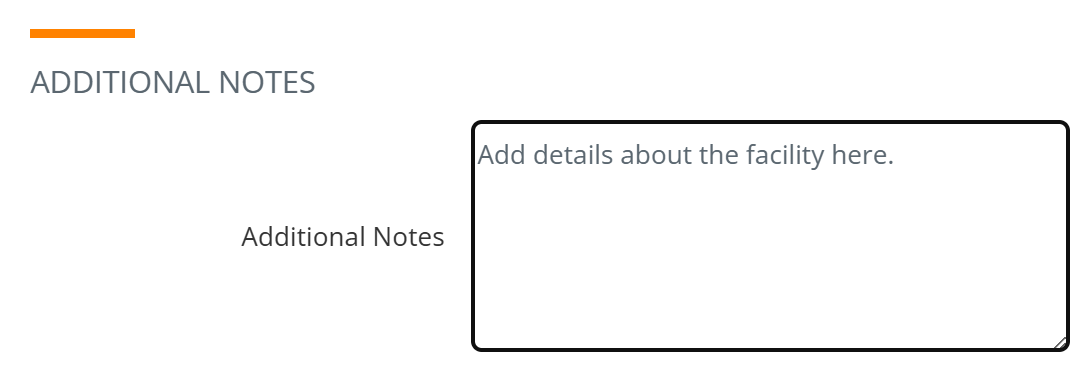
Additional Notes SectionNEW EDIT VIEW |
Two different free-text fields for any context you want to capture about the account. Notes entered here are searchable and visible to anyone who can view the account. These sections are separate, but work the same way. |
|
Creating a New account The field is empty. |
 |
|
Editing an Existing account
|
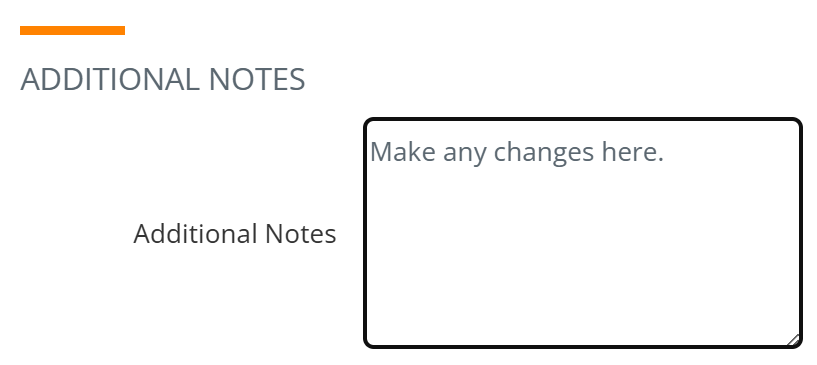 |
| Viewing an existing account |  |
|
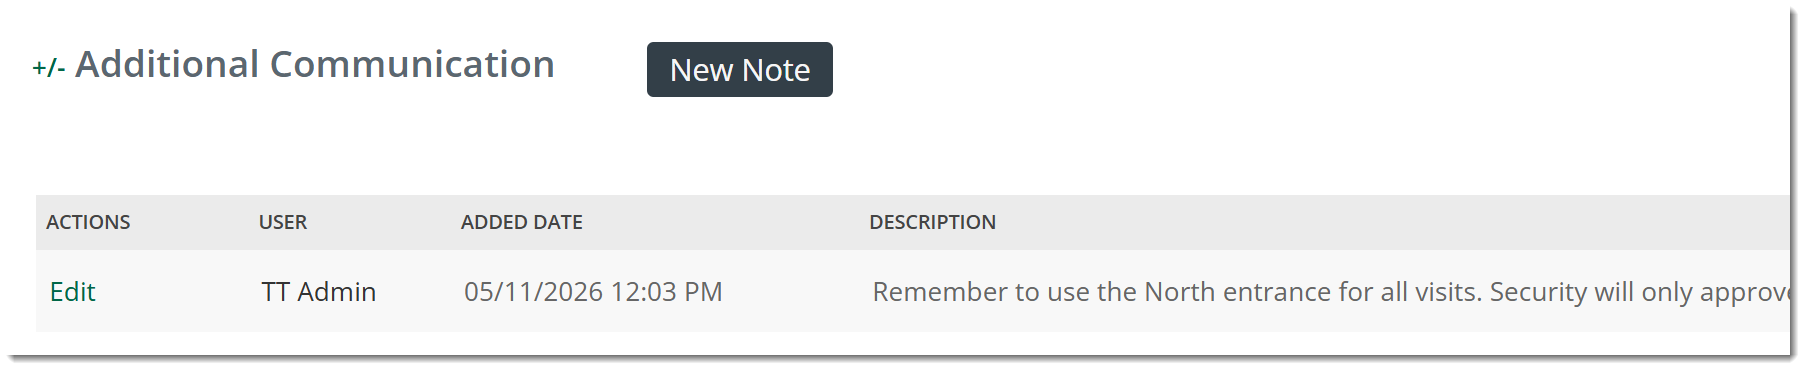
Additional Communication Section VIEW |
A free-text fields for any context you want to capture about the account. Notes entered here are searchable and visible to anyone who can view the account. |
|
Viewing an existing account Both the Additional Notes, and the Additional Communications are visible when you open the Account View page.
|
|
Contact Info SectionVIEW |
The Contacts section shows all contacts that have been associated to the selected account. |
|
Viewing an existing account The image to the right shows what appears in the Contacts section. |
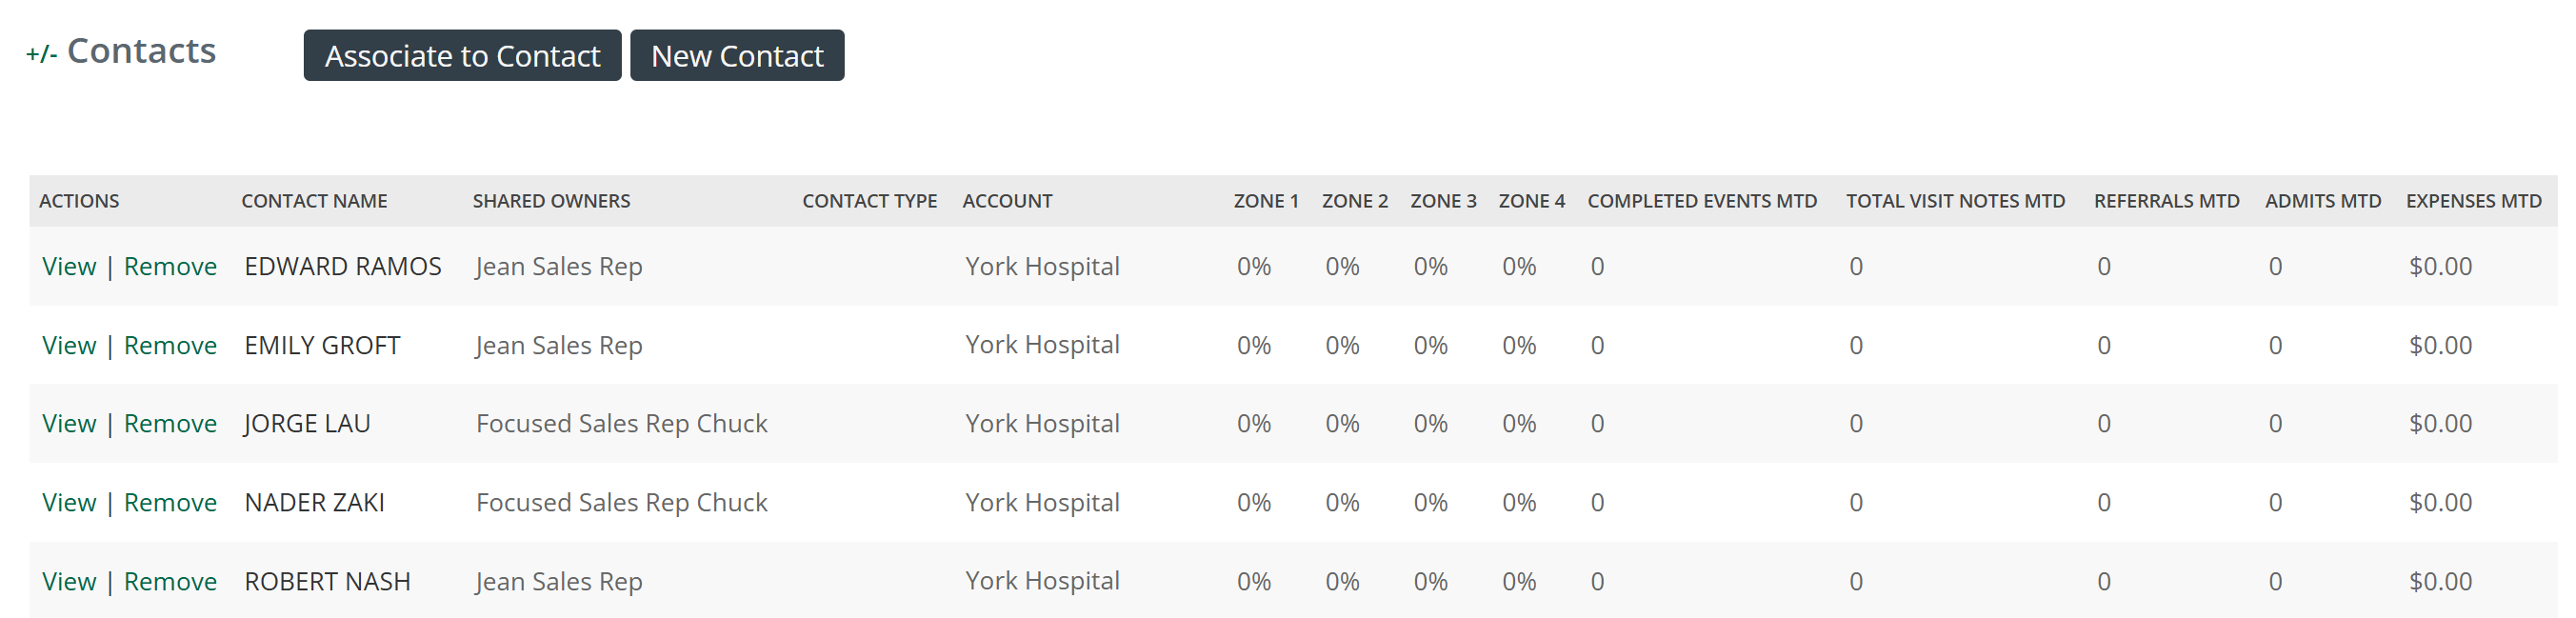 |
Details for the Contact Info section | |
|
Associate to Contact - If you know of an existing contact that is not included in the list, you can add that contact to the table in the Contacts section by clicking on the Associate to Contact button. The Find a Contact interface opens.
|
 |
|
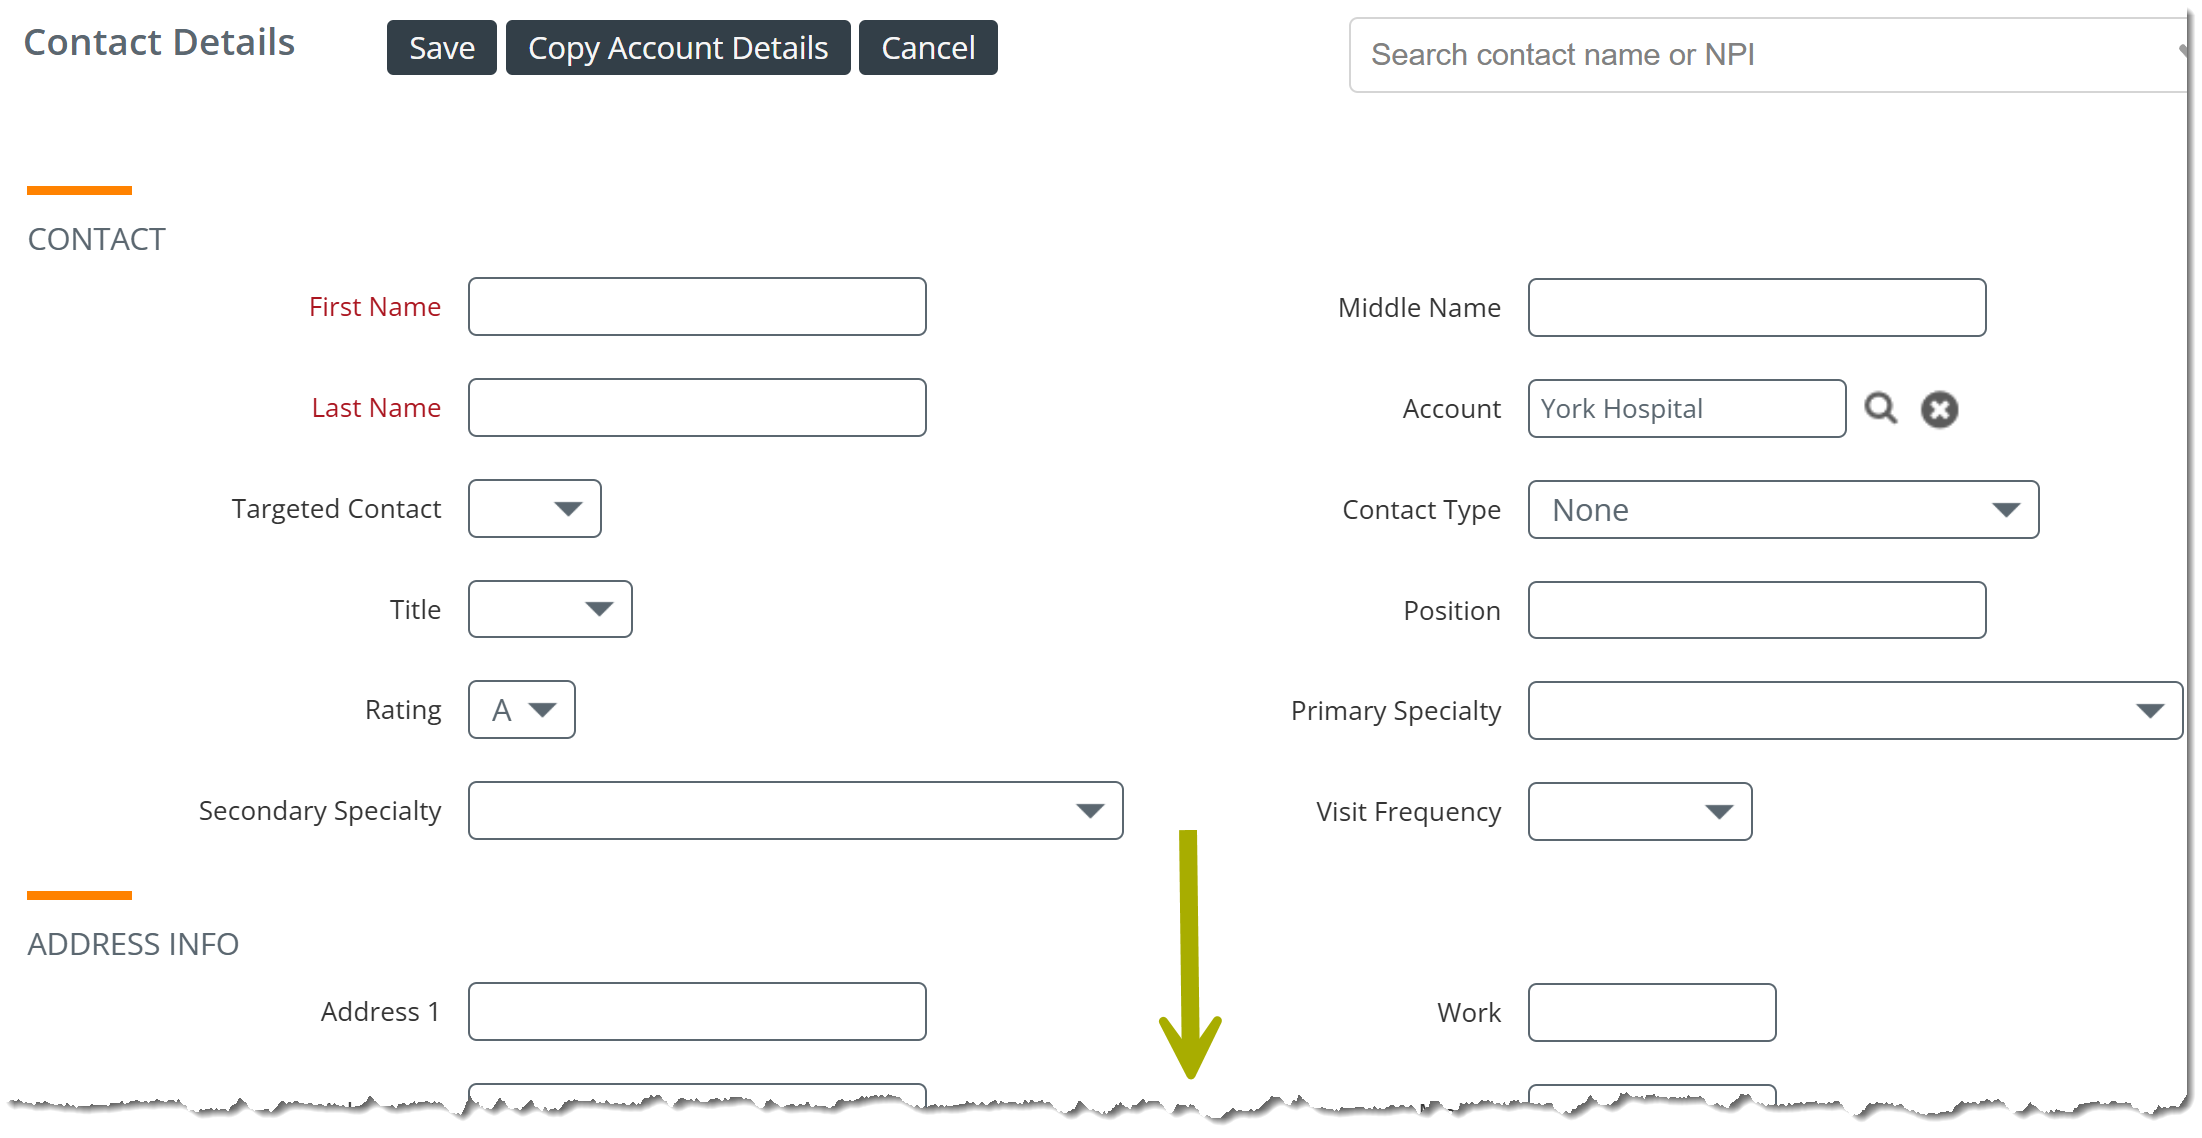
New Contact - You can easily add a new contact to the table in the Contacts section by clicking the "New Contact" button. A blank Contact Details page opens.
|
This image does not show the entire page. |
Monthly Events SectionVIEW |
The table in the Monthly Events sections shows all events that have taken place at the selected account. You can choose a specific time period for which events will be shown. |
|
Viewing an existing account The table shows Events that fall within the date range selected at the top right. |
 |
Details for the Monthly Events section | |
|
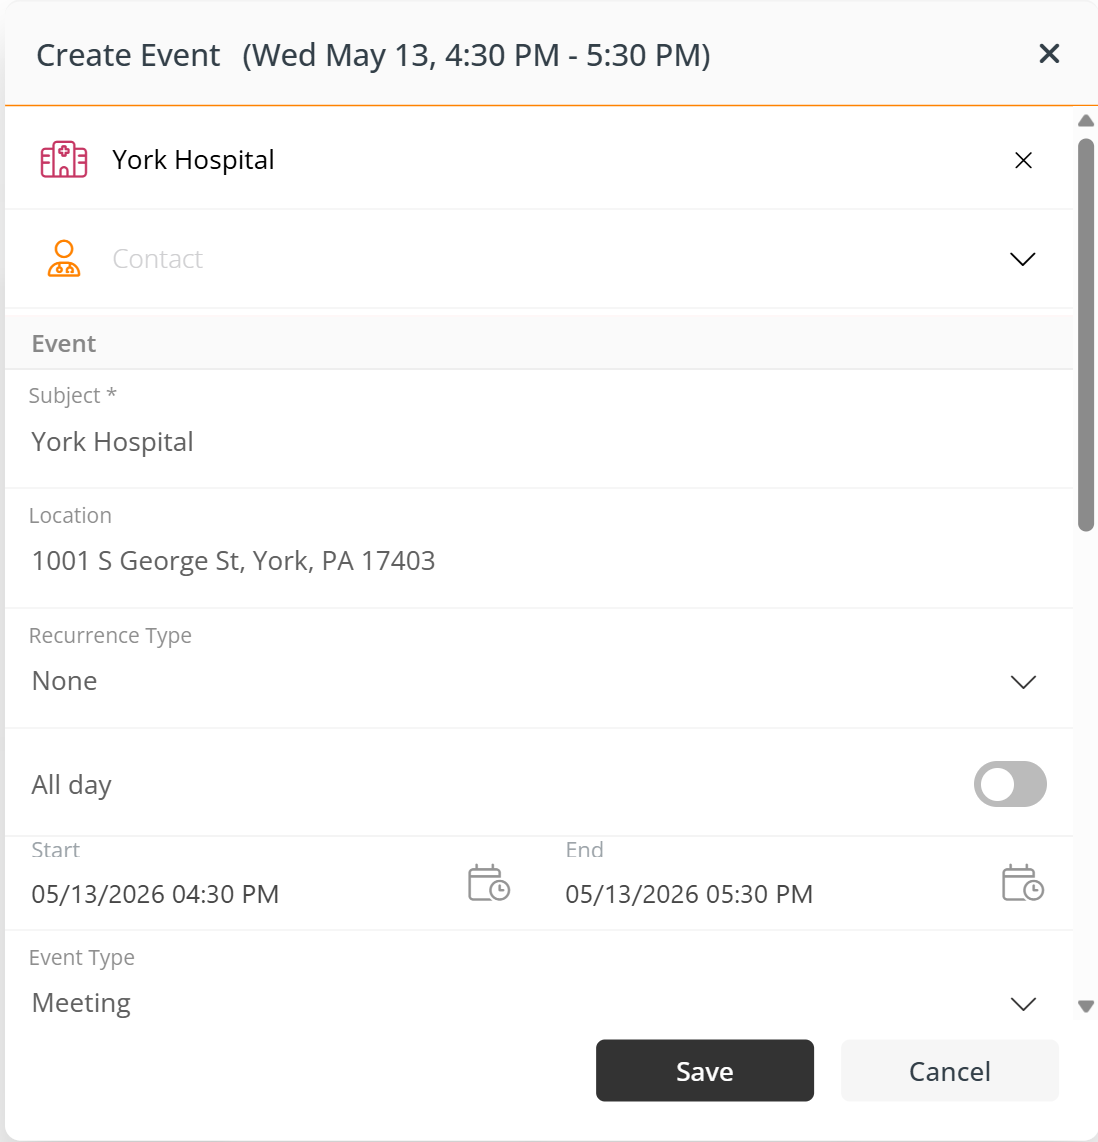
New Event - You can add a new event to the Monthly Events section by clicking the "New Event" button. The Calendar page will open with the Create Event interface open. (shown at right.)
|
 |
|
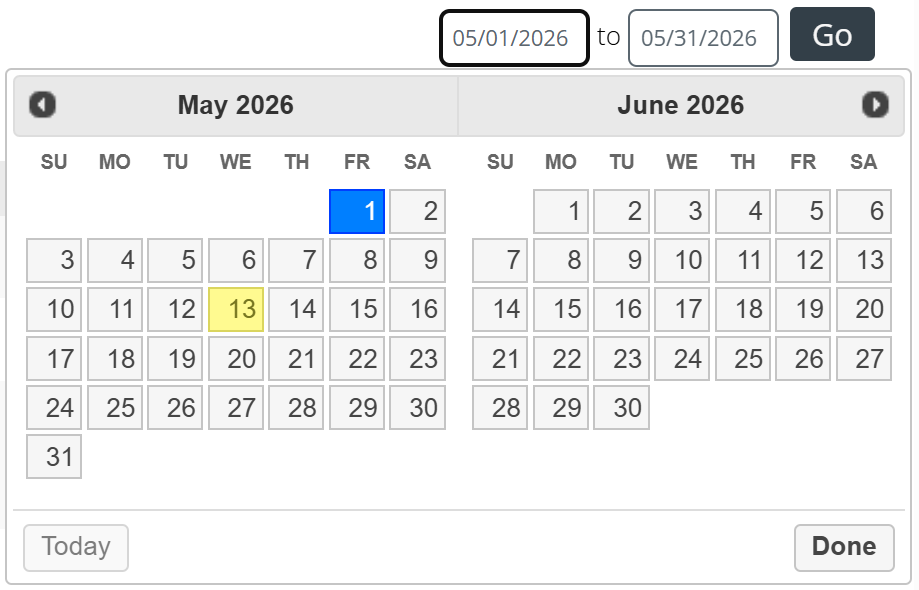
Date Range - You can change the date range for the events shown in the Monthly Events section.
The interface shown at right will open.
The table will display events that fall into your chosen date range. |
 |
Historical Call Notes SectionVIEW |
The historical notes section offers notes from previous events with any of the account's associated contacts, presented in a list with the most recent notes at the top. Historical notes from any user that services the account (or contacts) should be available to view, unless that permission has been revoked by the company's account administrator in the Role Management settings. |
|
| |
Referrals SectionVIEW |
The Referrals section allows you to see referrals for a selected period.
|
|
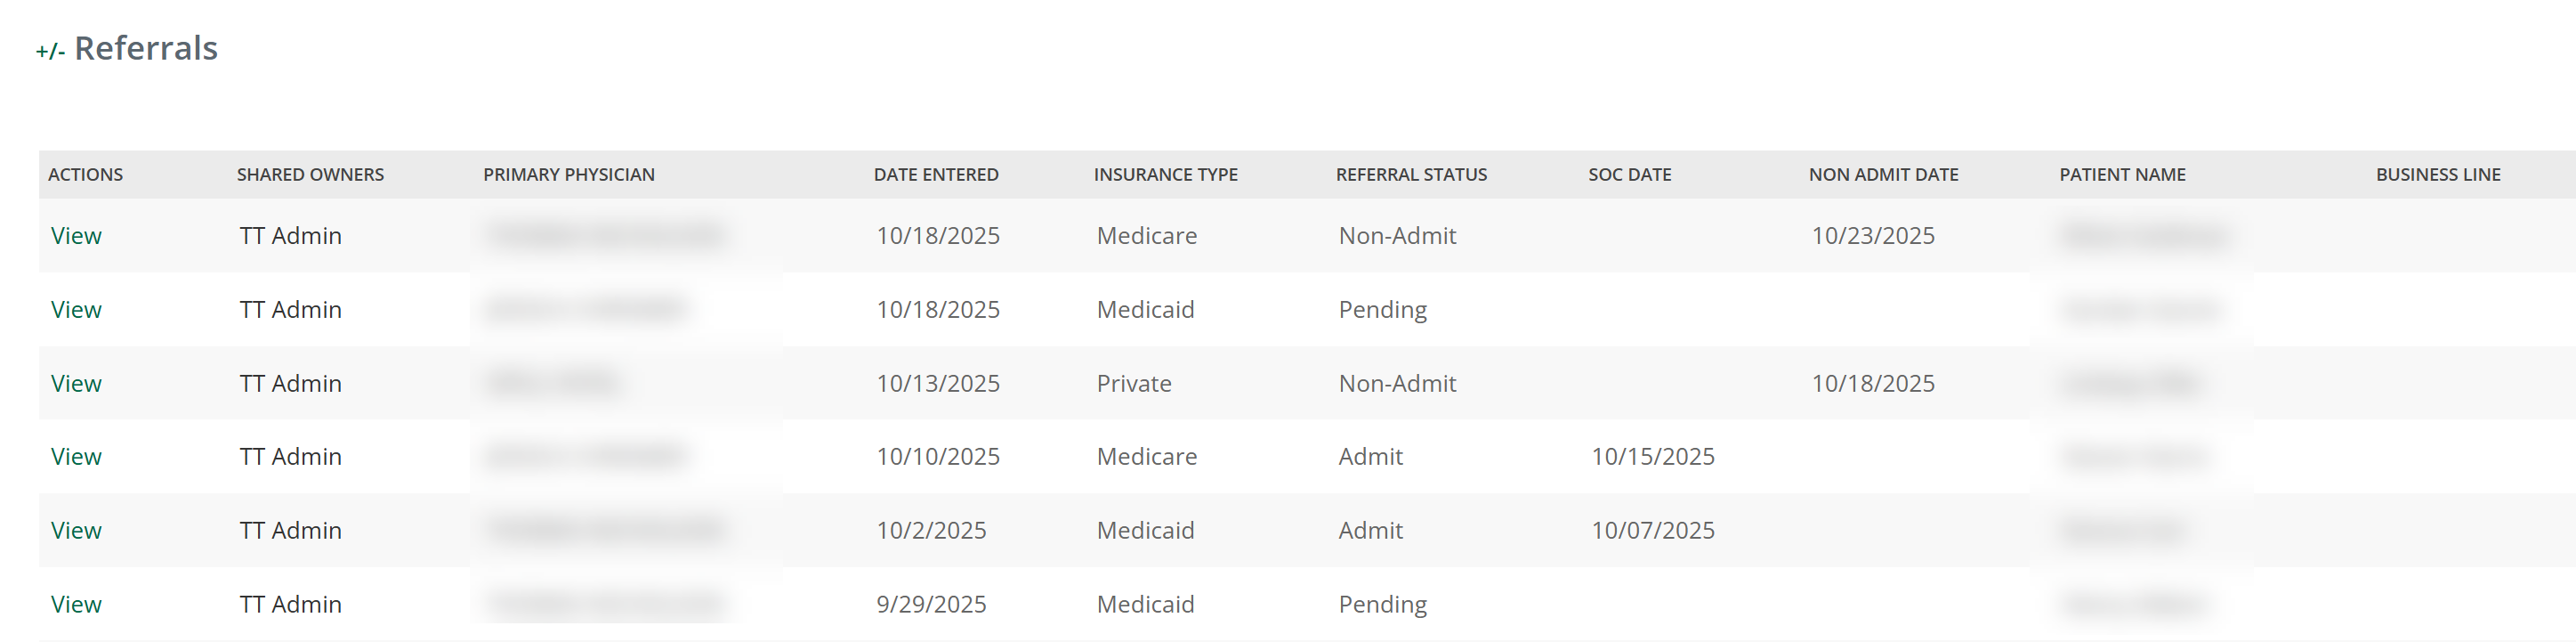
Viewing an existing account The Referrals section shows a list of all referrals for the selected account. |
 |
Details for the Referrals section | |
|
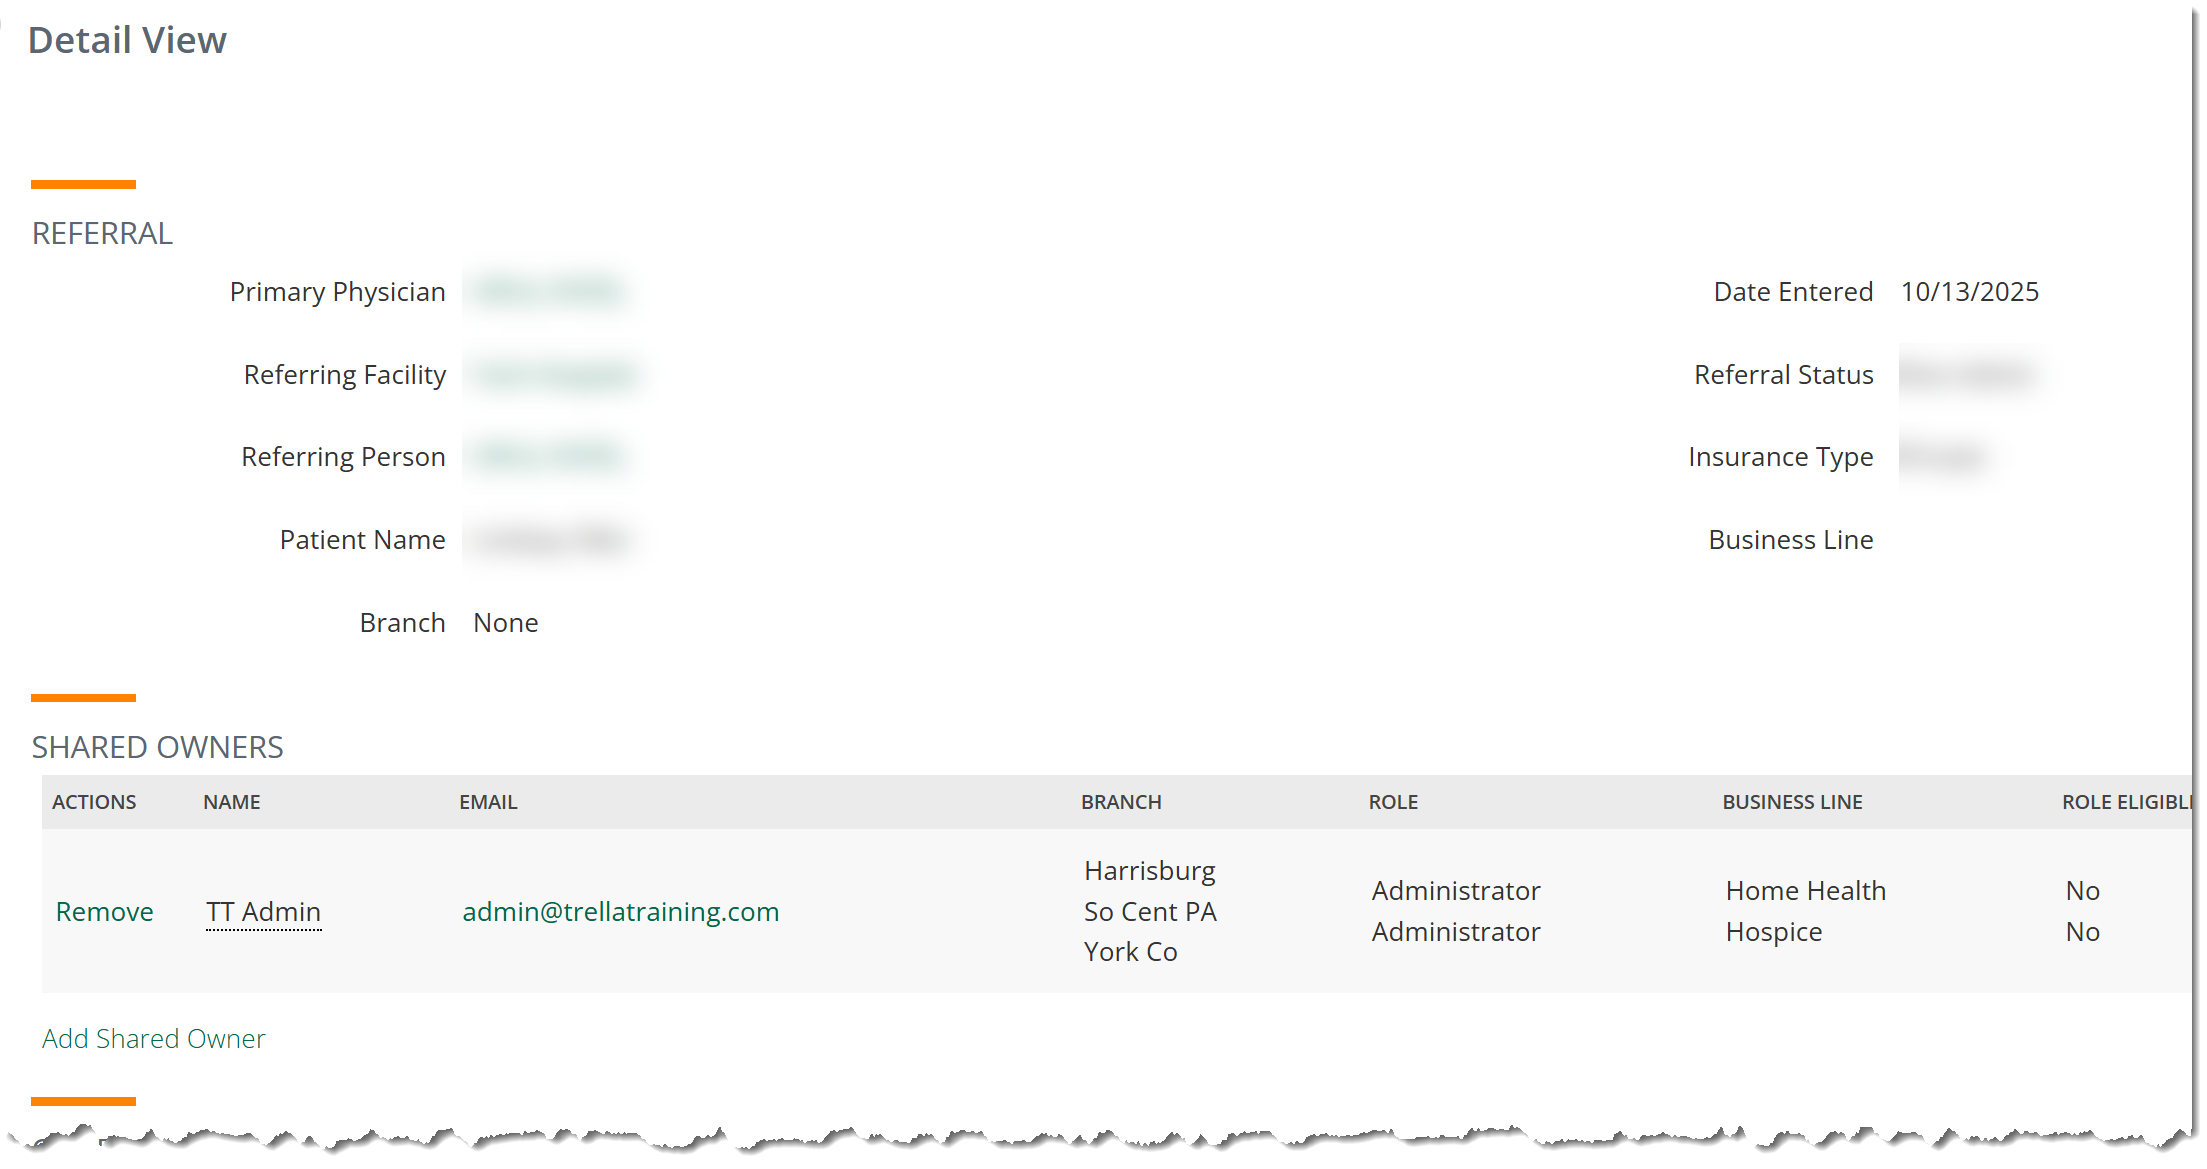
View - the "View" link allows you to see the details of a specific referrral.
The Detail View for the chosen referral will open. (image at right.) |
The image does not show the entire page. |
Leads SectionVIEW |
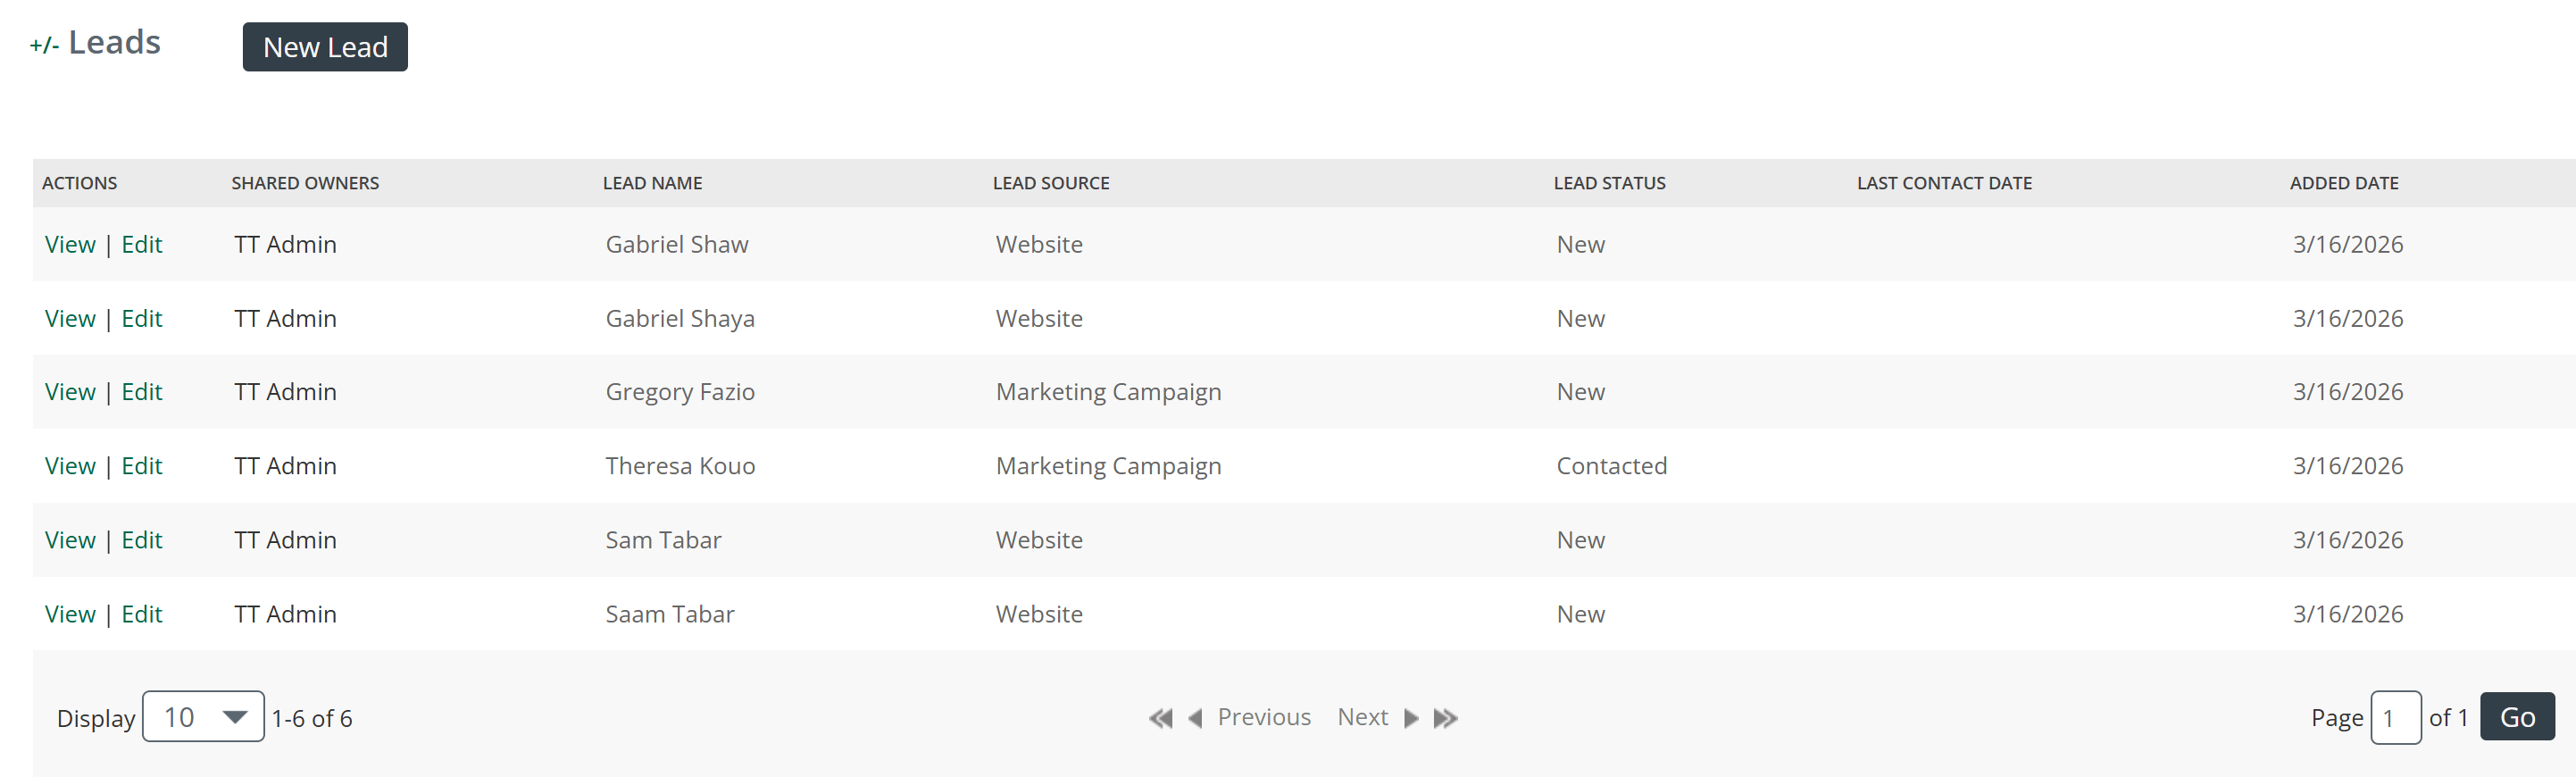
When you are viewing a selected account, the Leads section surfaces every lead tied to that account — so a sales rep can see their full pipeline activity against a target without leaving the record. The value is context at the point of action: instead of cross-referencing the Leads page separately, the rep can see open leads, lead status, and history right alongside the account's events, referrals, and call notes. It turns the account records from static profile pages into a complete relationship view. |
|
Viewing an existing account
|
|
Details for the Leads Section | |
|
New Lead - When you click on the "New Lead" button, the Leads Details page opens.
|
 |
Account Health Index SectionVIEW |
The last section of the Account Details page is the Account Health Index. This area functions as a tool to see the return on investment regarding the number of events completed with an account compared to the number of referrals generated by the account over a rolling 12 week period. In the screenshot below, the account appears to have recently been assigned, as there is little event history and no referral activity. This can be further confirmed in the three-month trend at the bottom of the section. |
|
| |
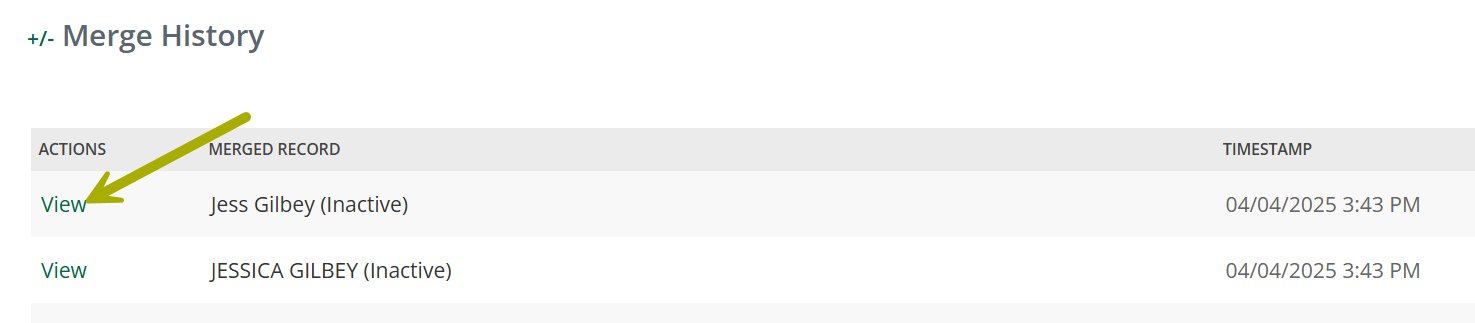
Merge History SectionVIEW |
Once you have merged records, the single, merged record will appear in the table on the page for that record type. In our example, Jessica appears in the table on the Contacts page. |
| If you click on the "View" or "Edit" links, the Details page for that record will open. If you scroll down, you will find a section called, "Merge History." | 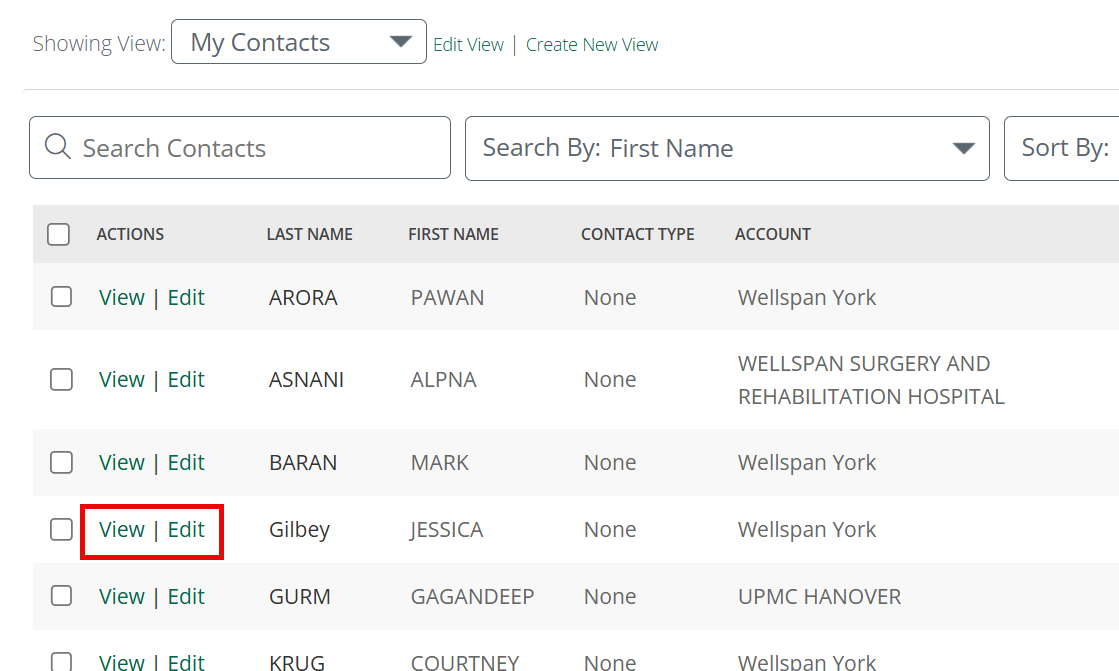 |
 | |
| |
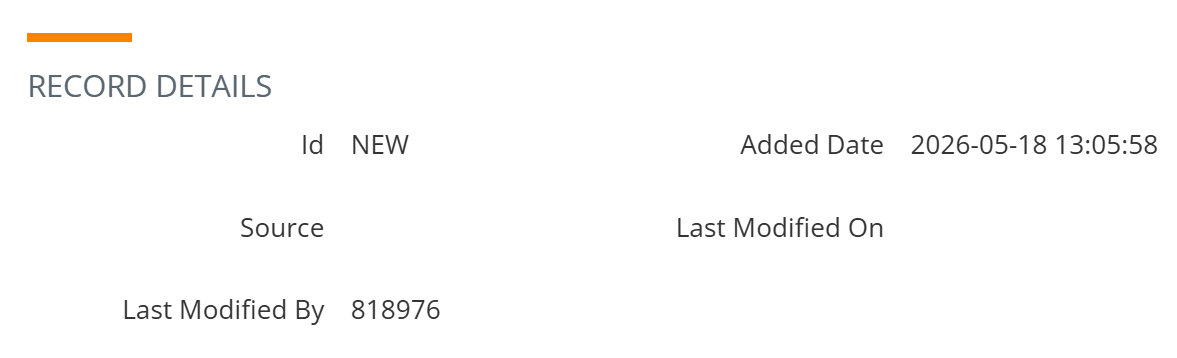
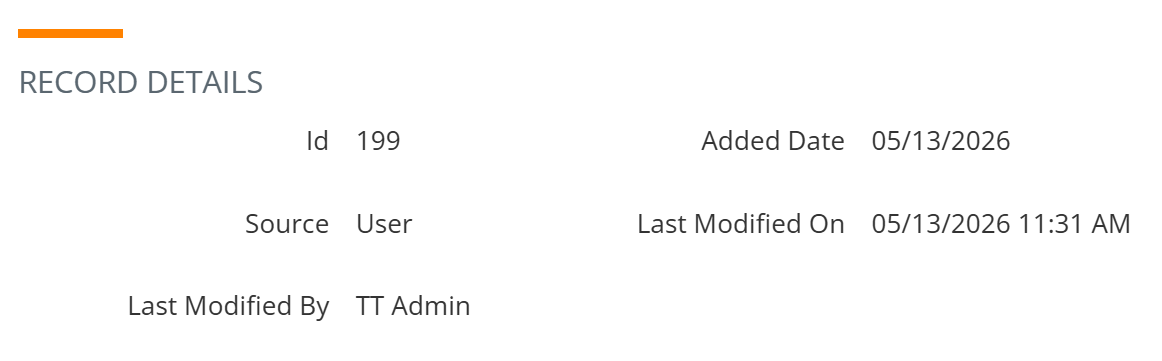
Record Details SectionNEW EDIT |
This section summarizes the basics of the account record in the database. |
|
Creating a New account All fields are empty. |
 |
|
Editing an Existing account
|
 |
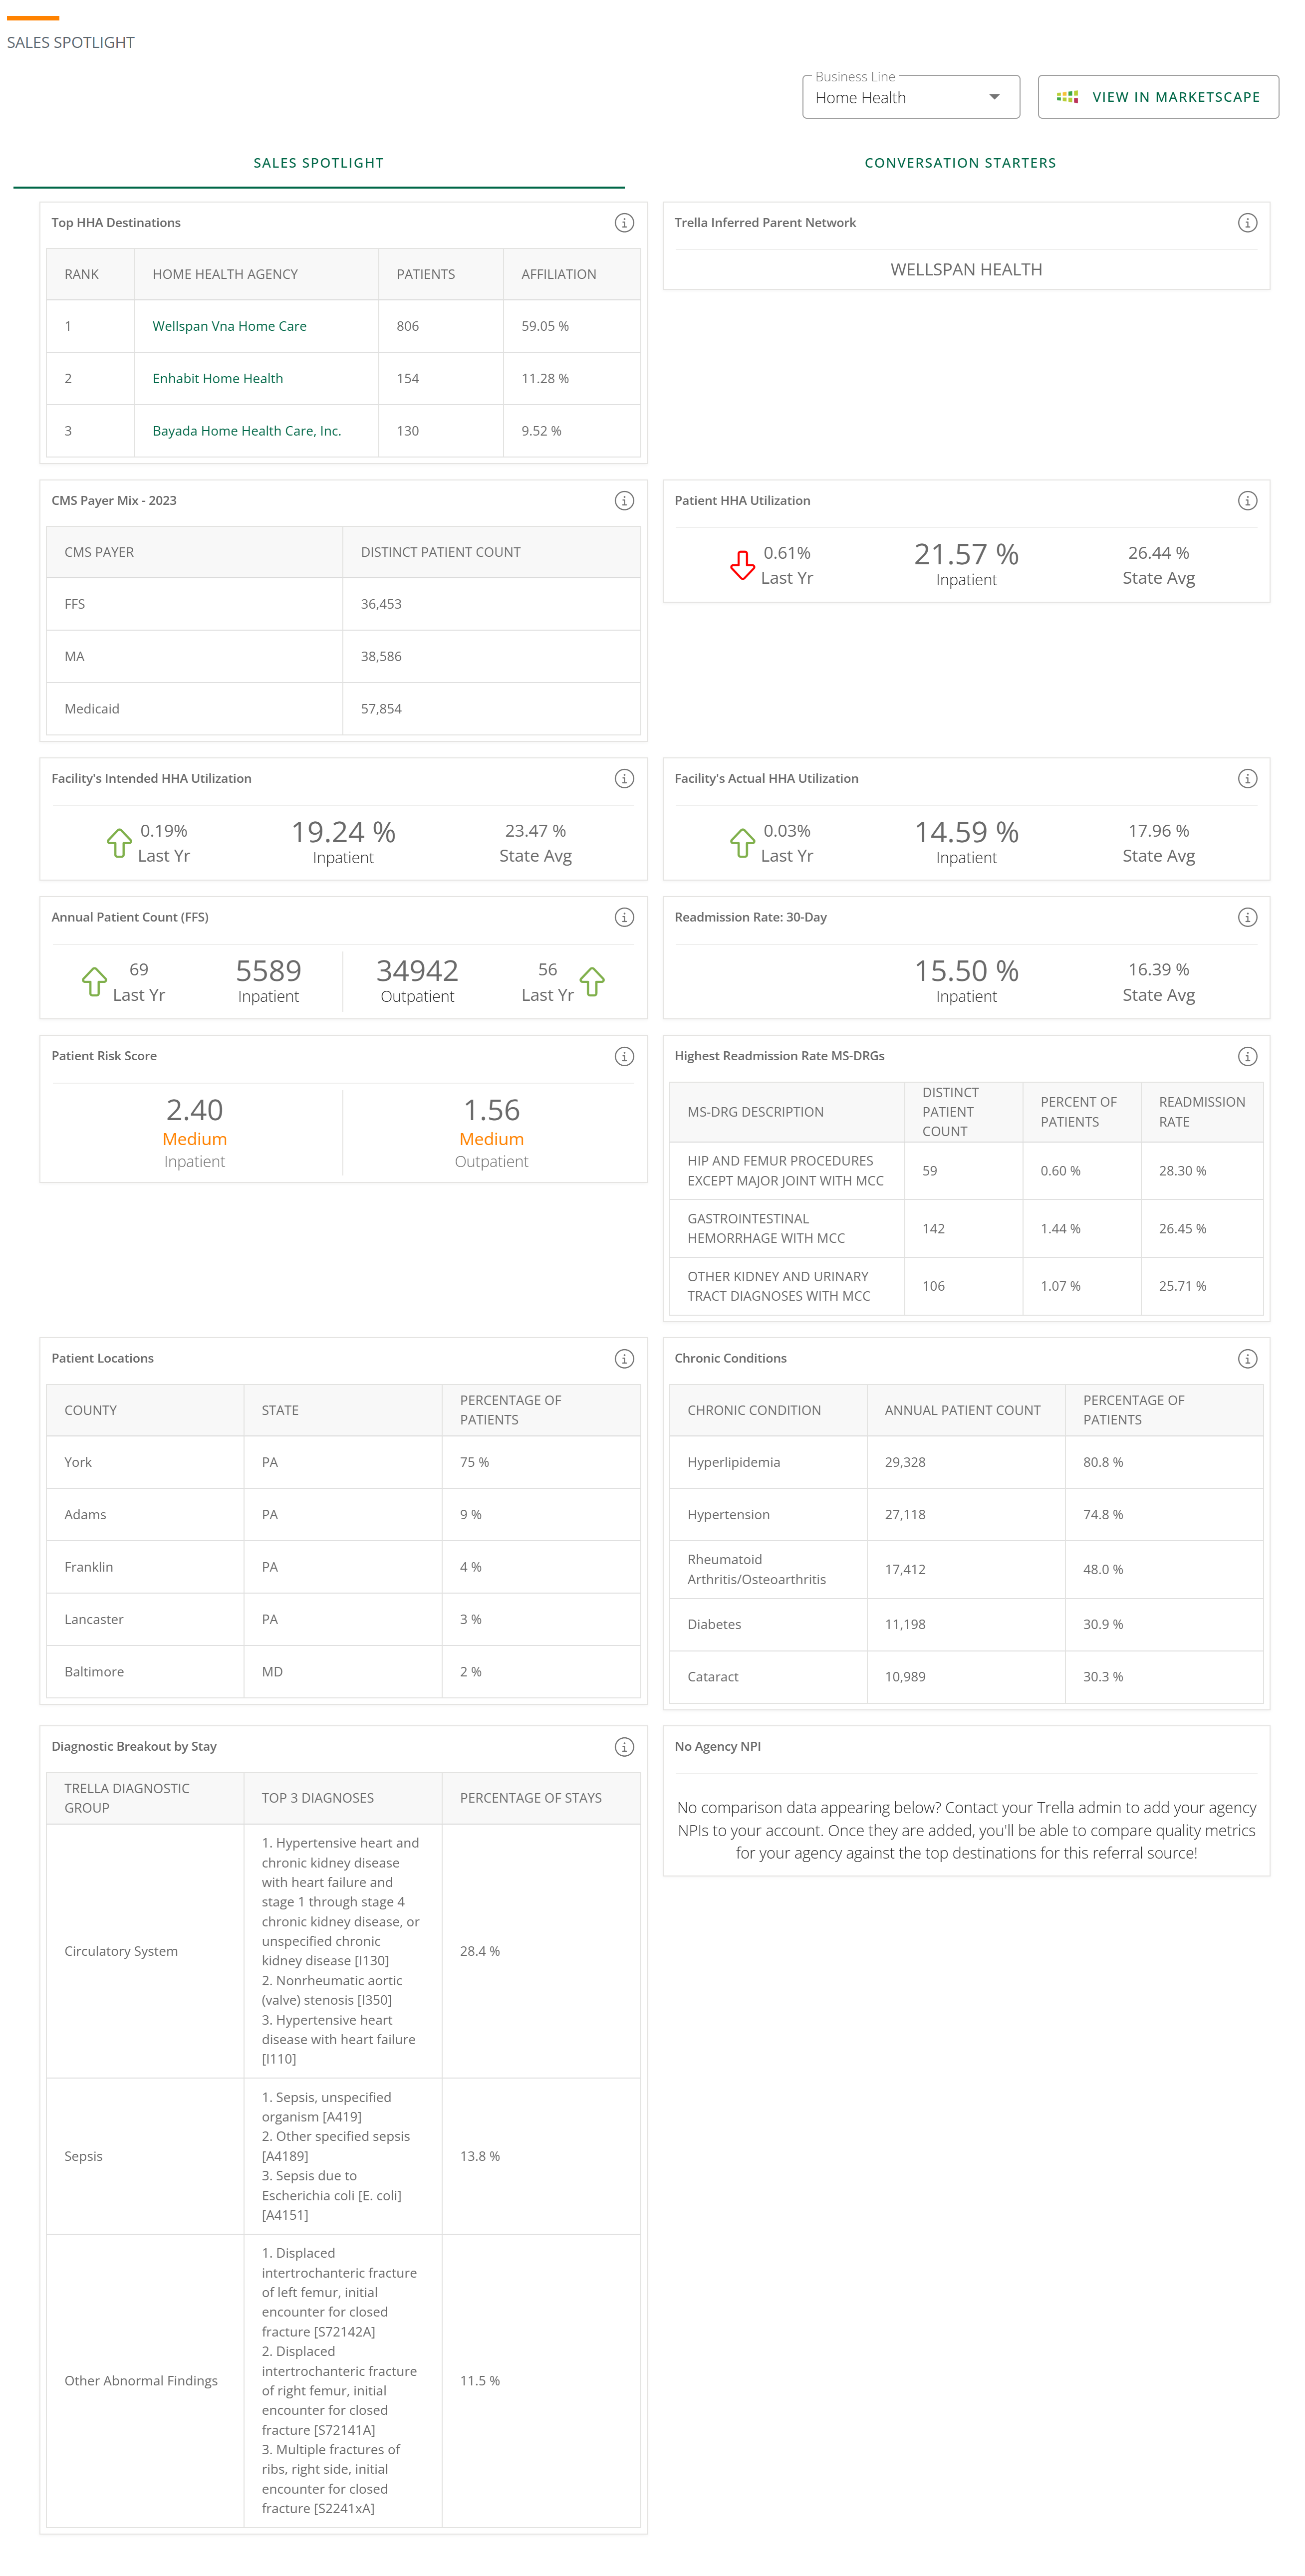
Sales Spotlight Section
VIEW
Sales Spotlight contains the most important and useful metrics related for the selected account.
![]() For an overview of Sales Spotlight, see Sales Spotlight Overview.
For an overview of Sales Spotlight, see Sales Spotlight Overview.
![]() Click on the image to enlarge it.
Click on the image to enlarge it.
Views
A View is a feature that allows you to customize what you see in the page you are viewing. Some details:
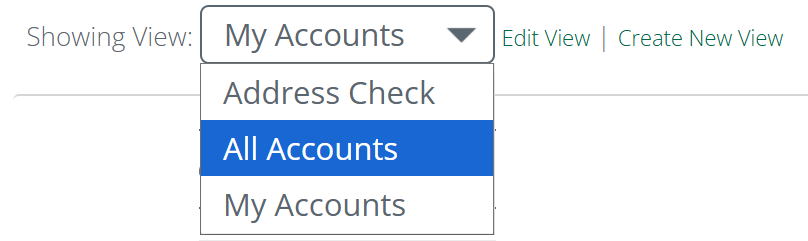
- There are two standard views for the Accounts page that can be seen by clicking the dropdown - My Accounts and All Accounts. In the sample image below, our user from the demo account has created a custom view called "Address Check."
- My Accounts - shows the company accounts that have been assigned to you
- All Accounts - shows all organizations set up as accounts in your company
![]() Whether you create a new view or edit an existing view, you will see the same page and options as shown below. We will walk through the steps of creating a new view, step-by-step. The only difference in editing a view is that the fields may already contain data. Instead of adding new data to the fields, you will make changes to existing data.
Whether you create a new view or edit an existing view, you will see the same page and options as shown below. We will walk through the steps of creating a new view, step-by-step. The only difference in editing a view is that the fields may already contain data. Instead of adding new data to the fields, you will make changes to existing data.
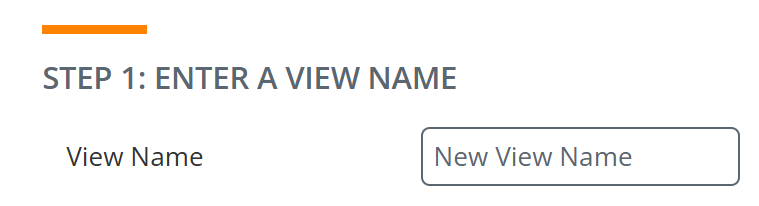
Step 1 - Name
Choose a name for your view that will help you identify the view easily in the dropdown list.
Step 2 - Fields
Choose the fields to display in your view.
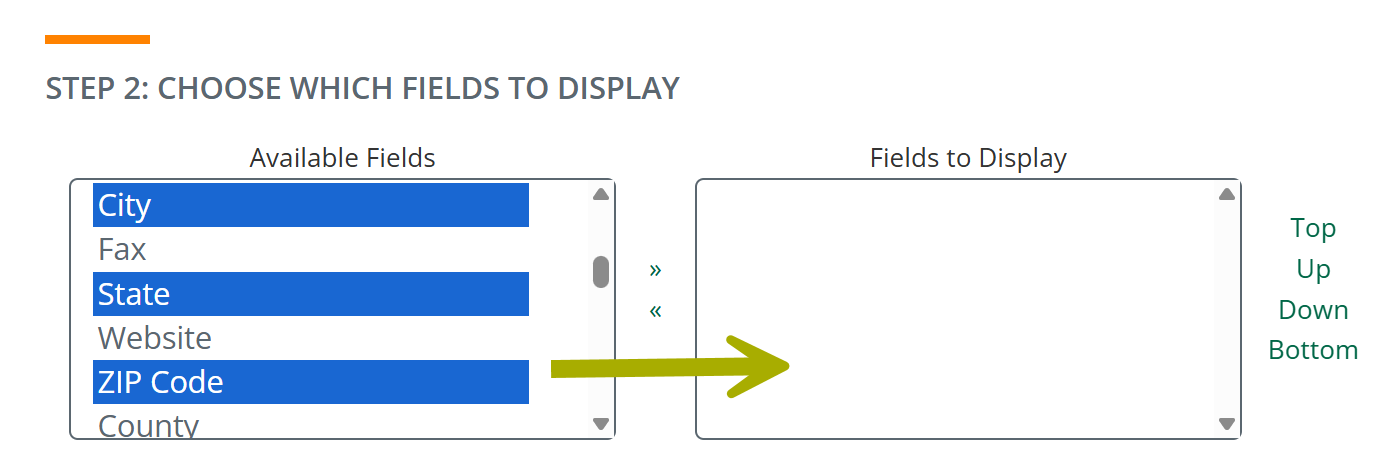
- Click on any fields in the left "Available Fields" window. You can hold ctrl and click to select multiple fields - (Command and click for Apple devices.)
- After you have selected your fields, click the >> link to migrate your selection to the "Fields to Display" window.
- To remove fields from the "Fields to Display" window, click on the fields you want to remove and click on the << link.
![]() The links to the right — Top, Up, Down, and Bottom — let you order how the columns are displayed in the table.
The links to the right — Top, Up, Down, and Bottom — let you order how the columns are displayed in the table.
Step 3 - Simple Filter Criteria
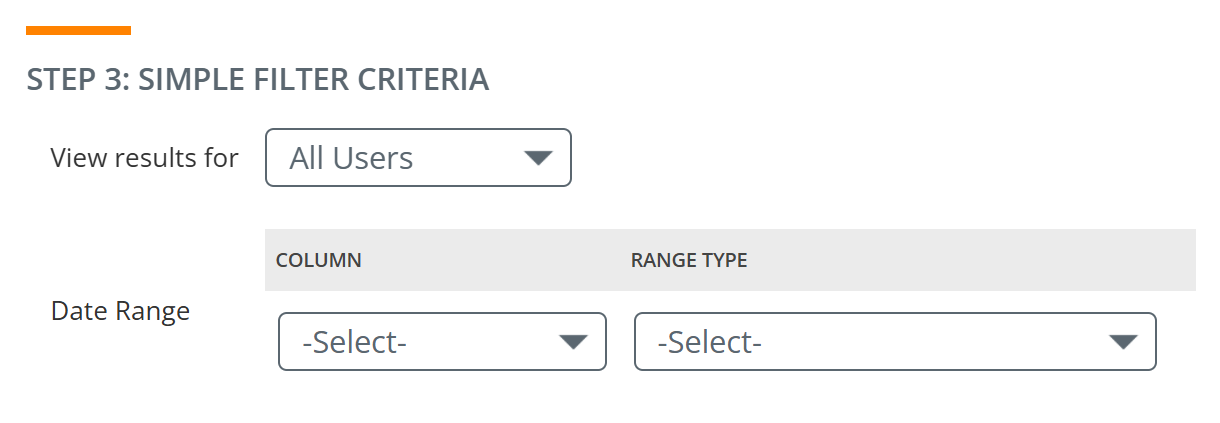
The simple filters limit the results shown in the Accounts table.
View Results for:
View Results for limits the accounts in the table to the different groups of users shown in the dropdown menu.
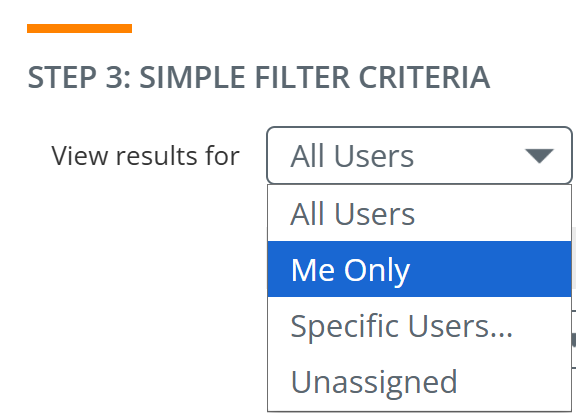
- My Team — Your account administrator sets up the members of your "team." Choosing My Team limits the table to accounts owned by your team members.
- Me Only — Limits the accounts in the table to only those owned by you.
- Specific users — Opens an interface that lets you add specific users. Click the "Add User" link to add a user. The filter limits the table to accounts owned by your selected users.
- Unassigned — Shows only accounts that do not have an owner. Unassigned is a quick way to identify accounts that need to be claimed or assigned.
Date Range and Type
The Date Range and Type dropdowns let you narrow the accounts displayed even further by date.
| Column |
There are dates tied to each account record by which you can filter the data.
The table will be filtered to accounts that align with your choice. |
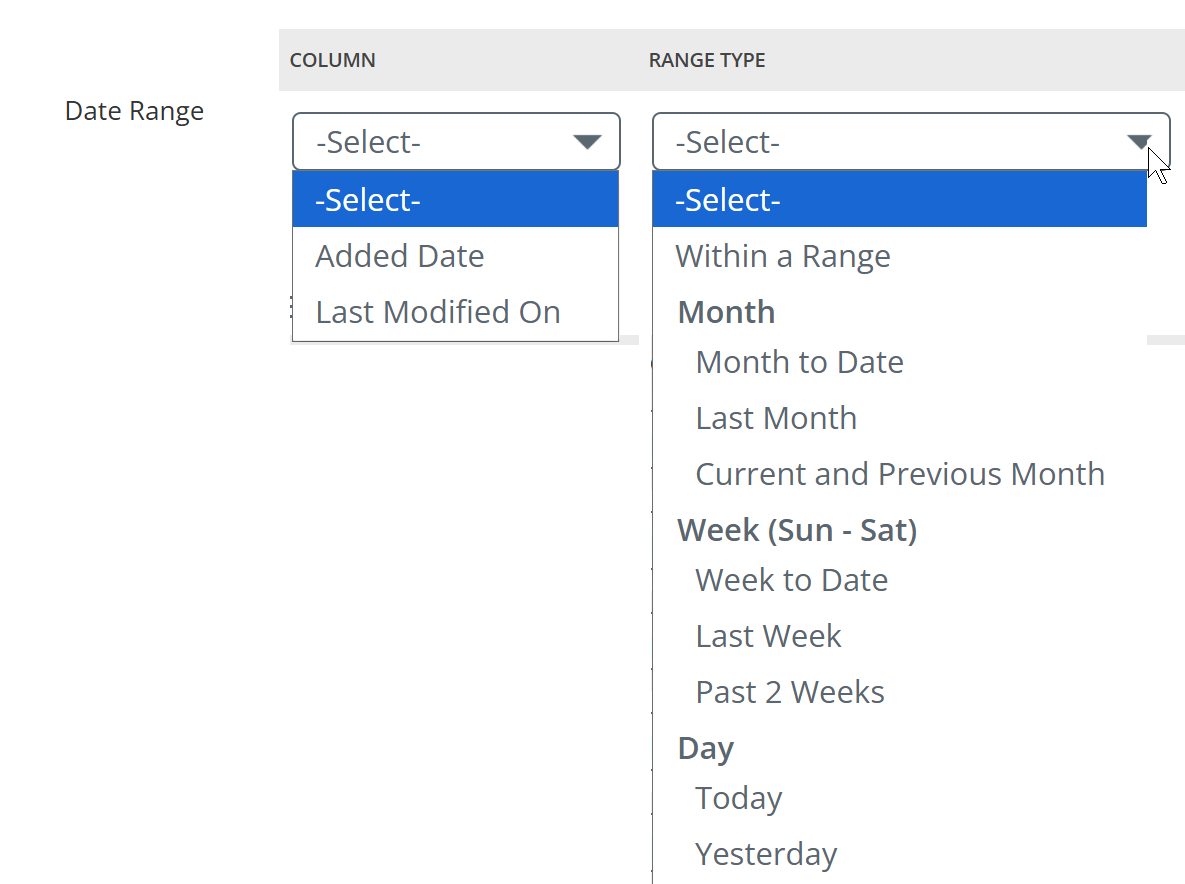 |
| Range Type |
For the date type you select, you can choose from a set of date ranges.
The table will be filtered to accounts that align with the date range you choose. |
Step 4 - Advanced Filter
To focus the results shown in the table more precisely, use the advanced filters.

For example, to show only accounts associated with a specific parent organization:
- Choose a field — these are the columns you selected to be shown in the table
- Choose an operator — options depend on the field chosen
- Specify a value — enter or select the value the field should match
![]() Advanced filters can be stacked to provide results of high specificity.
Advanced filters can be stacked to provide results of high specificity.
Step 5 - Sort Order
Choose which columns are used to sort the entries in the Accounts table.
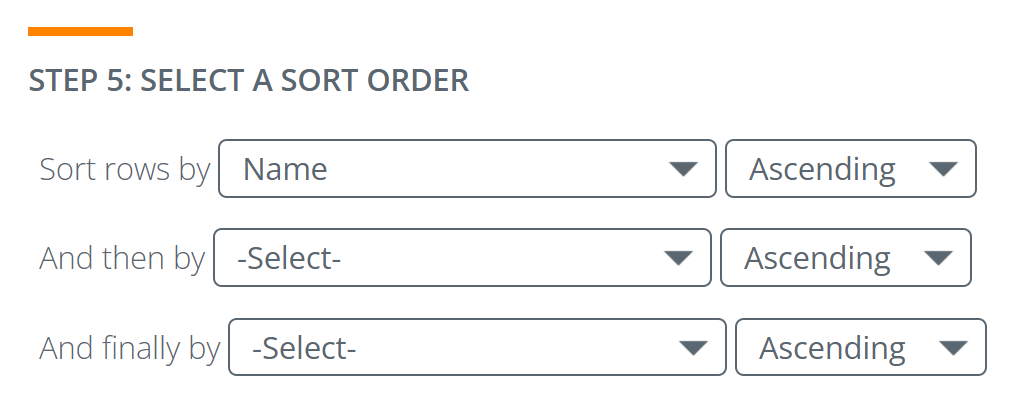
![]() You can use a simple sort of one column, or stack your sort by adding a column to the "And then by" row and the "And finally by" row.
You can use a simple sort of one column, or stack your sort by adding a column to the "And then by" row and the "And finally by" row.
Step 6 - Visibility
Use this option to make the view you create available to others, or just to yourself. You can also choose to make the view your default.

Step 7 - Send View
Use the options in this section to send a view to anyone on a selected time interval.
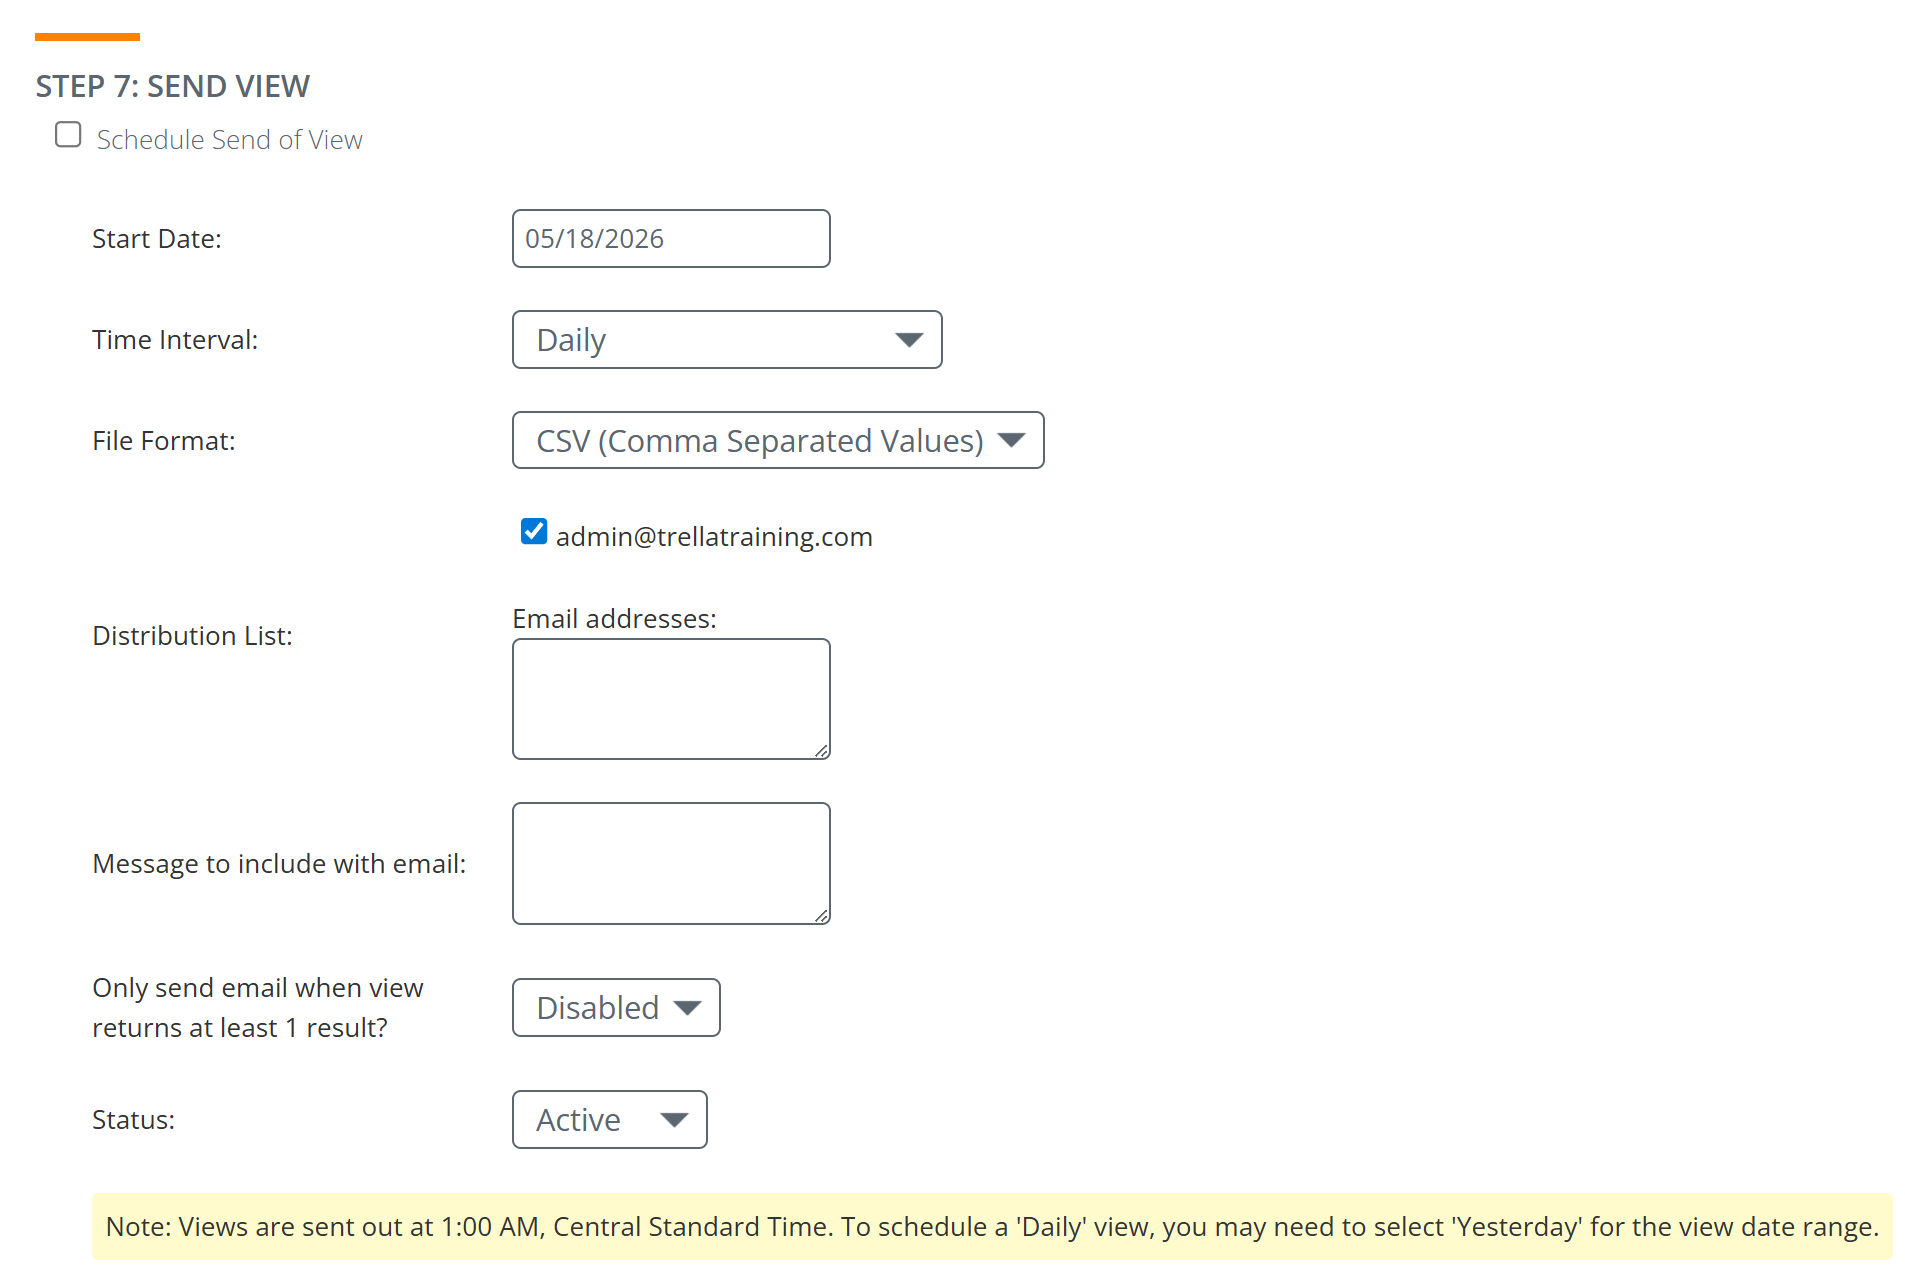
![]() If you schedule to have a view sent, the views are emailed at 1:00 AM on the selected day.
If you schedule to have a view sent, the views are emailed at 1:00 AM on the selected day.
Filters
Above the table are a row of filters that you can use to limit or organize the entries in the table quickly to fit parameters of your choice.

Filter |
What it Does |
|
Search and Search By:
|
This is a free text field where you can enter any search term to find a specific account or multiple accounts (with a shared name) in the table.
In the image below, the "Search By:" filter is set to "Name," so the correct term to enter into the "Search Accounts" field would be a name of a desired account. |
|
This dropdown lists every column in the table, as set in the table View. You can select any of the listed columns, and then, the "Search Accounts" field can be used to search that column. Click on the "Go" button when you have set the search term and the search column | |
| Sort By: and Order |
This dropdown will show every column in the current table.
|
|
If you choose to sort the table by a column you chose in the "Sort By:" dropdown, the "Order" dropdown allows you to choose whether to sort the table by that column either ascending or descending. | |
| Go |
Once you have chosen all of your filter parameters, click on the "Go" button to implement your choices. |
| Reset | Click the "Reset" link to return the filters to the default setting. |


Bulk Actions
|
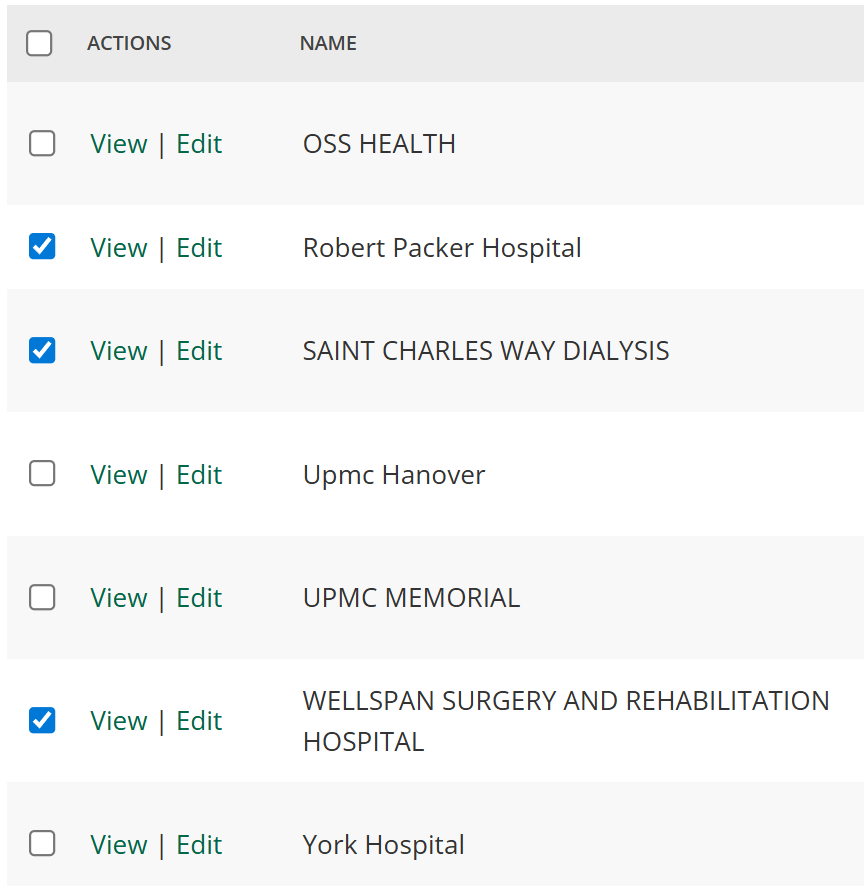
There are several actions that you can apply to multiple accounts at one time. In order to apply a bulk action you will need to select accounts for the bulk action.
|
 |
|
The Bulk Actions dropdown contains all of the bulk actions available.
|
 |
Details
The specific details for each bulk action are included below.
Merge Records
The Merge Records bulk action combines selected records into a single record.
 Details
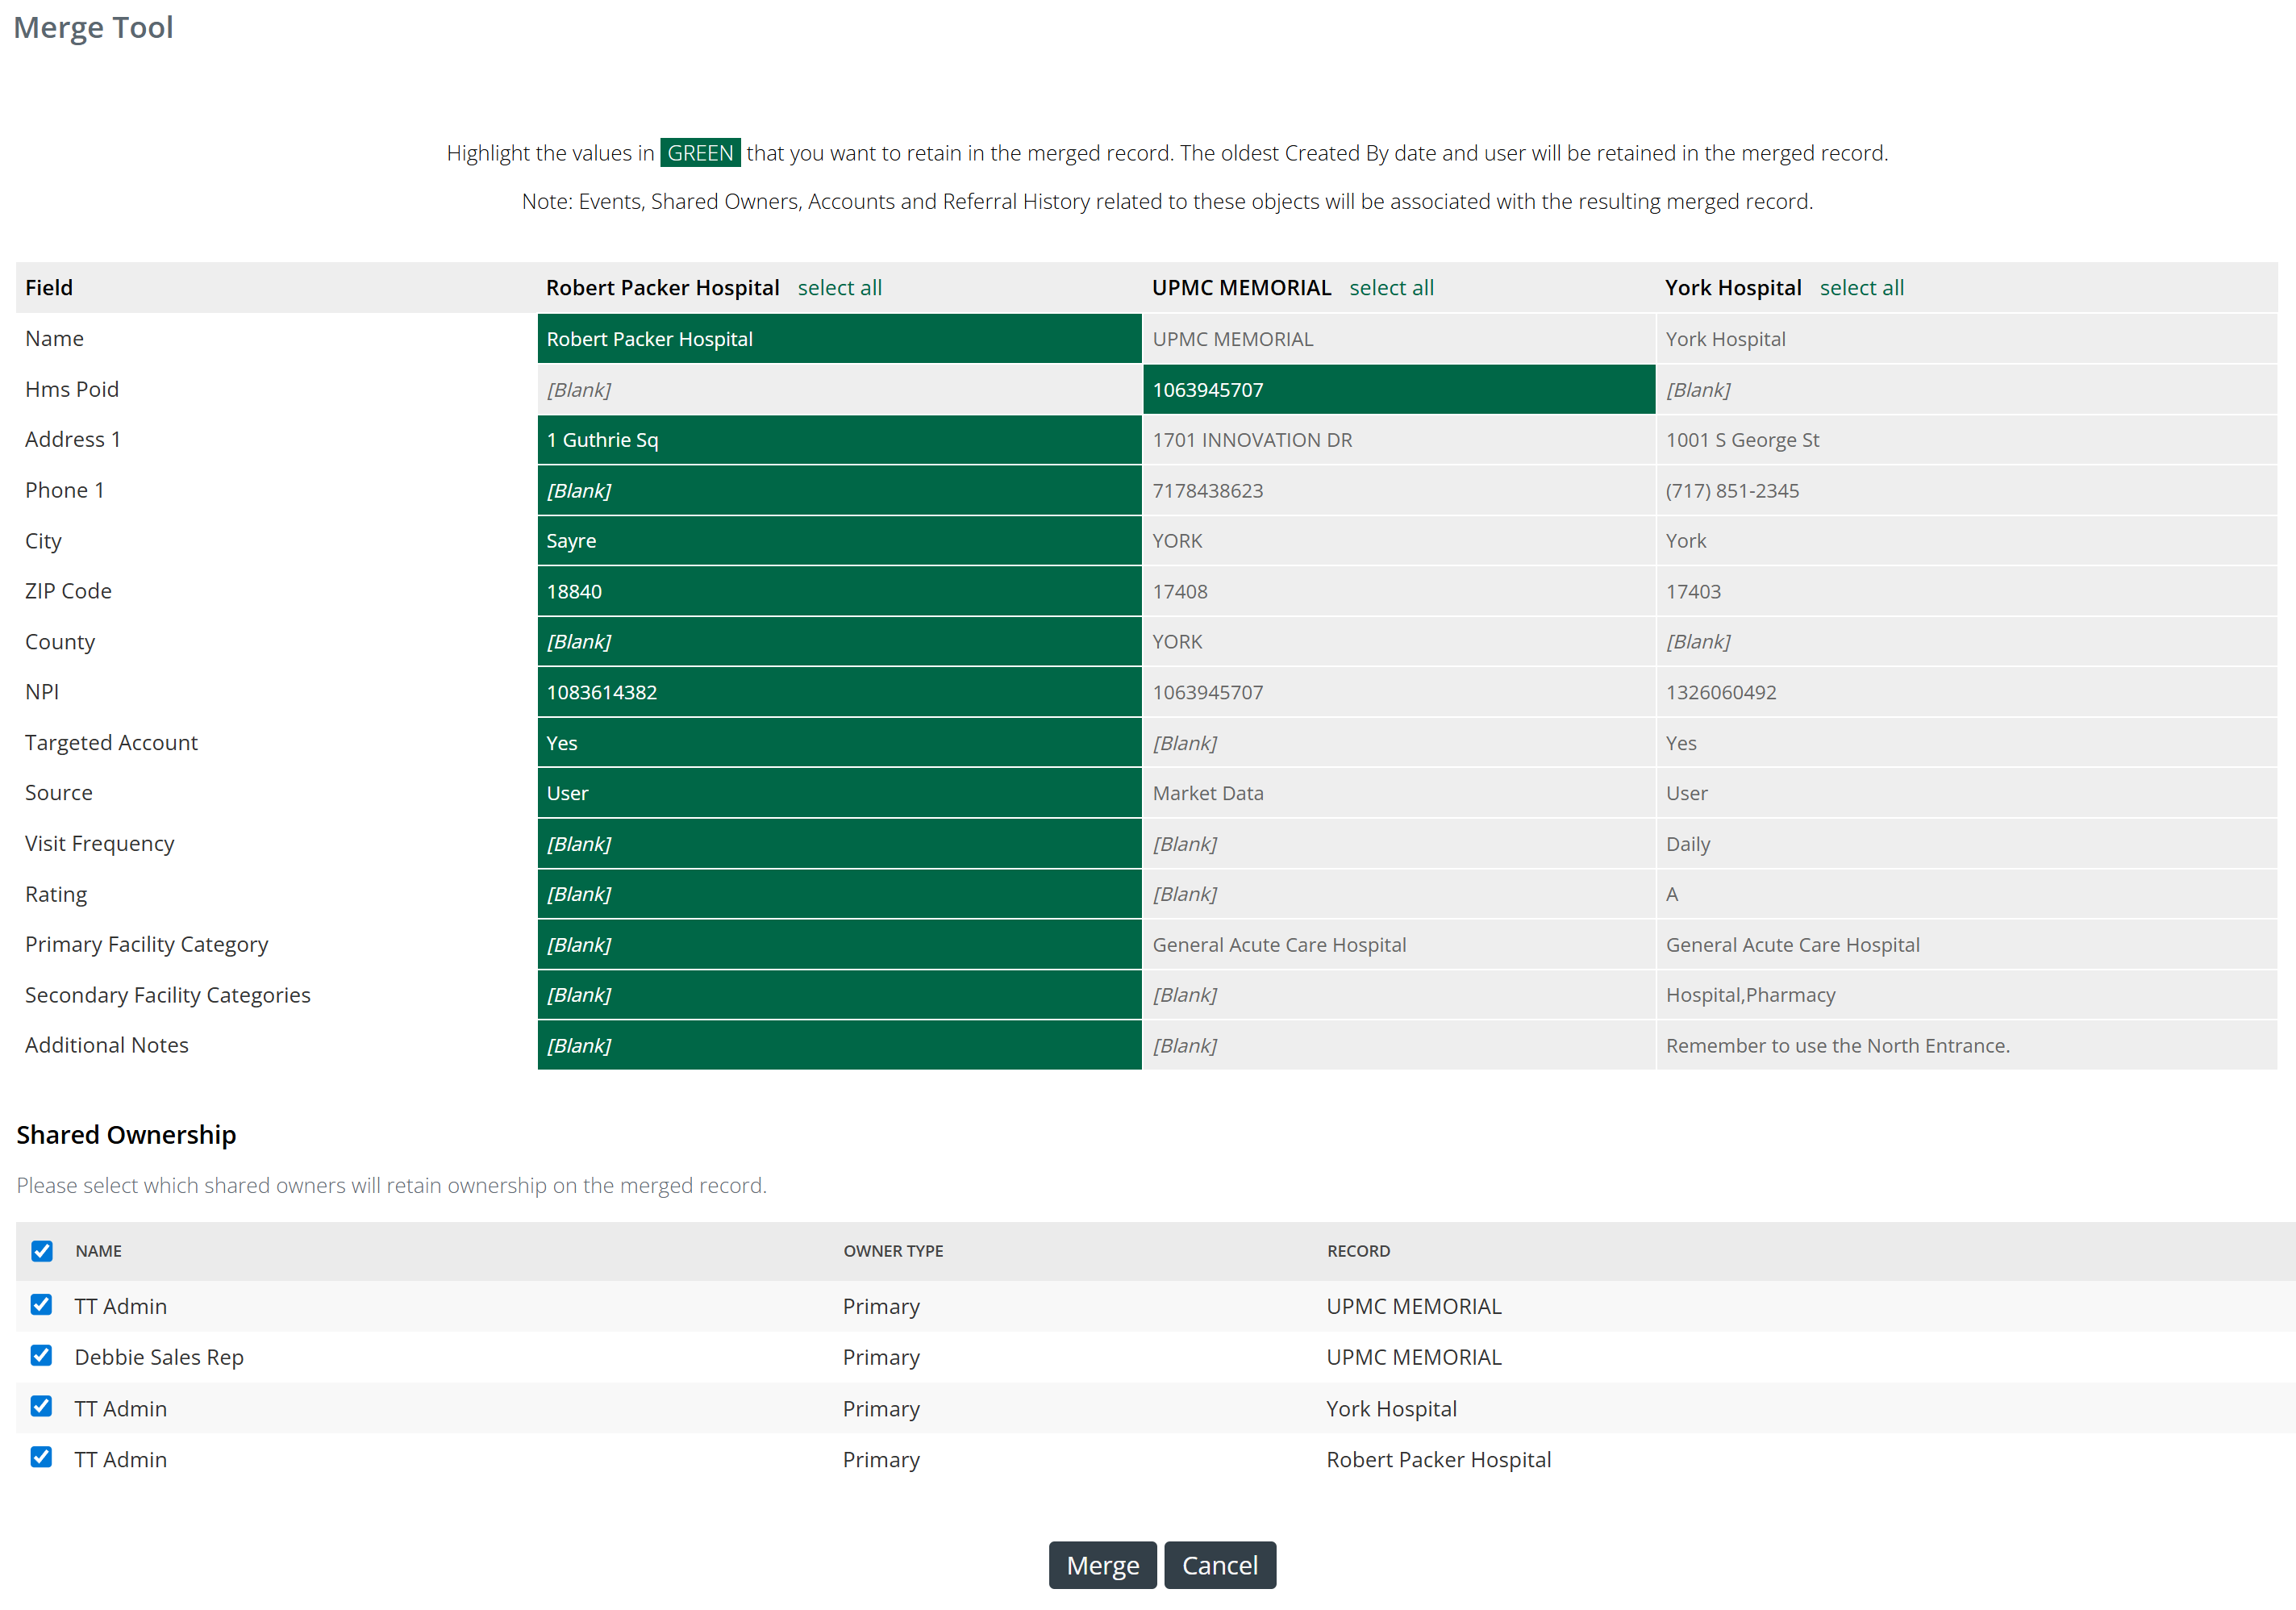
- Two or more records might have differences, so highlight the values in green that you want to retain in the merged record. The oldest Created By date and user will be retained in the merged record.
- Remove ownership to the merged record from any listed users by unchecking the checkbox to the left of their name.
- Click the "Merge" button.
Events, Shared Owners, Accounts and Referral History related to the selected accounts will be associated with the resulting merged record.
![]() For more information, see Merging Duplicate Records.
For more information, see Merging Duplicate Records.
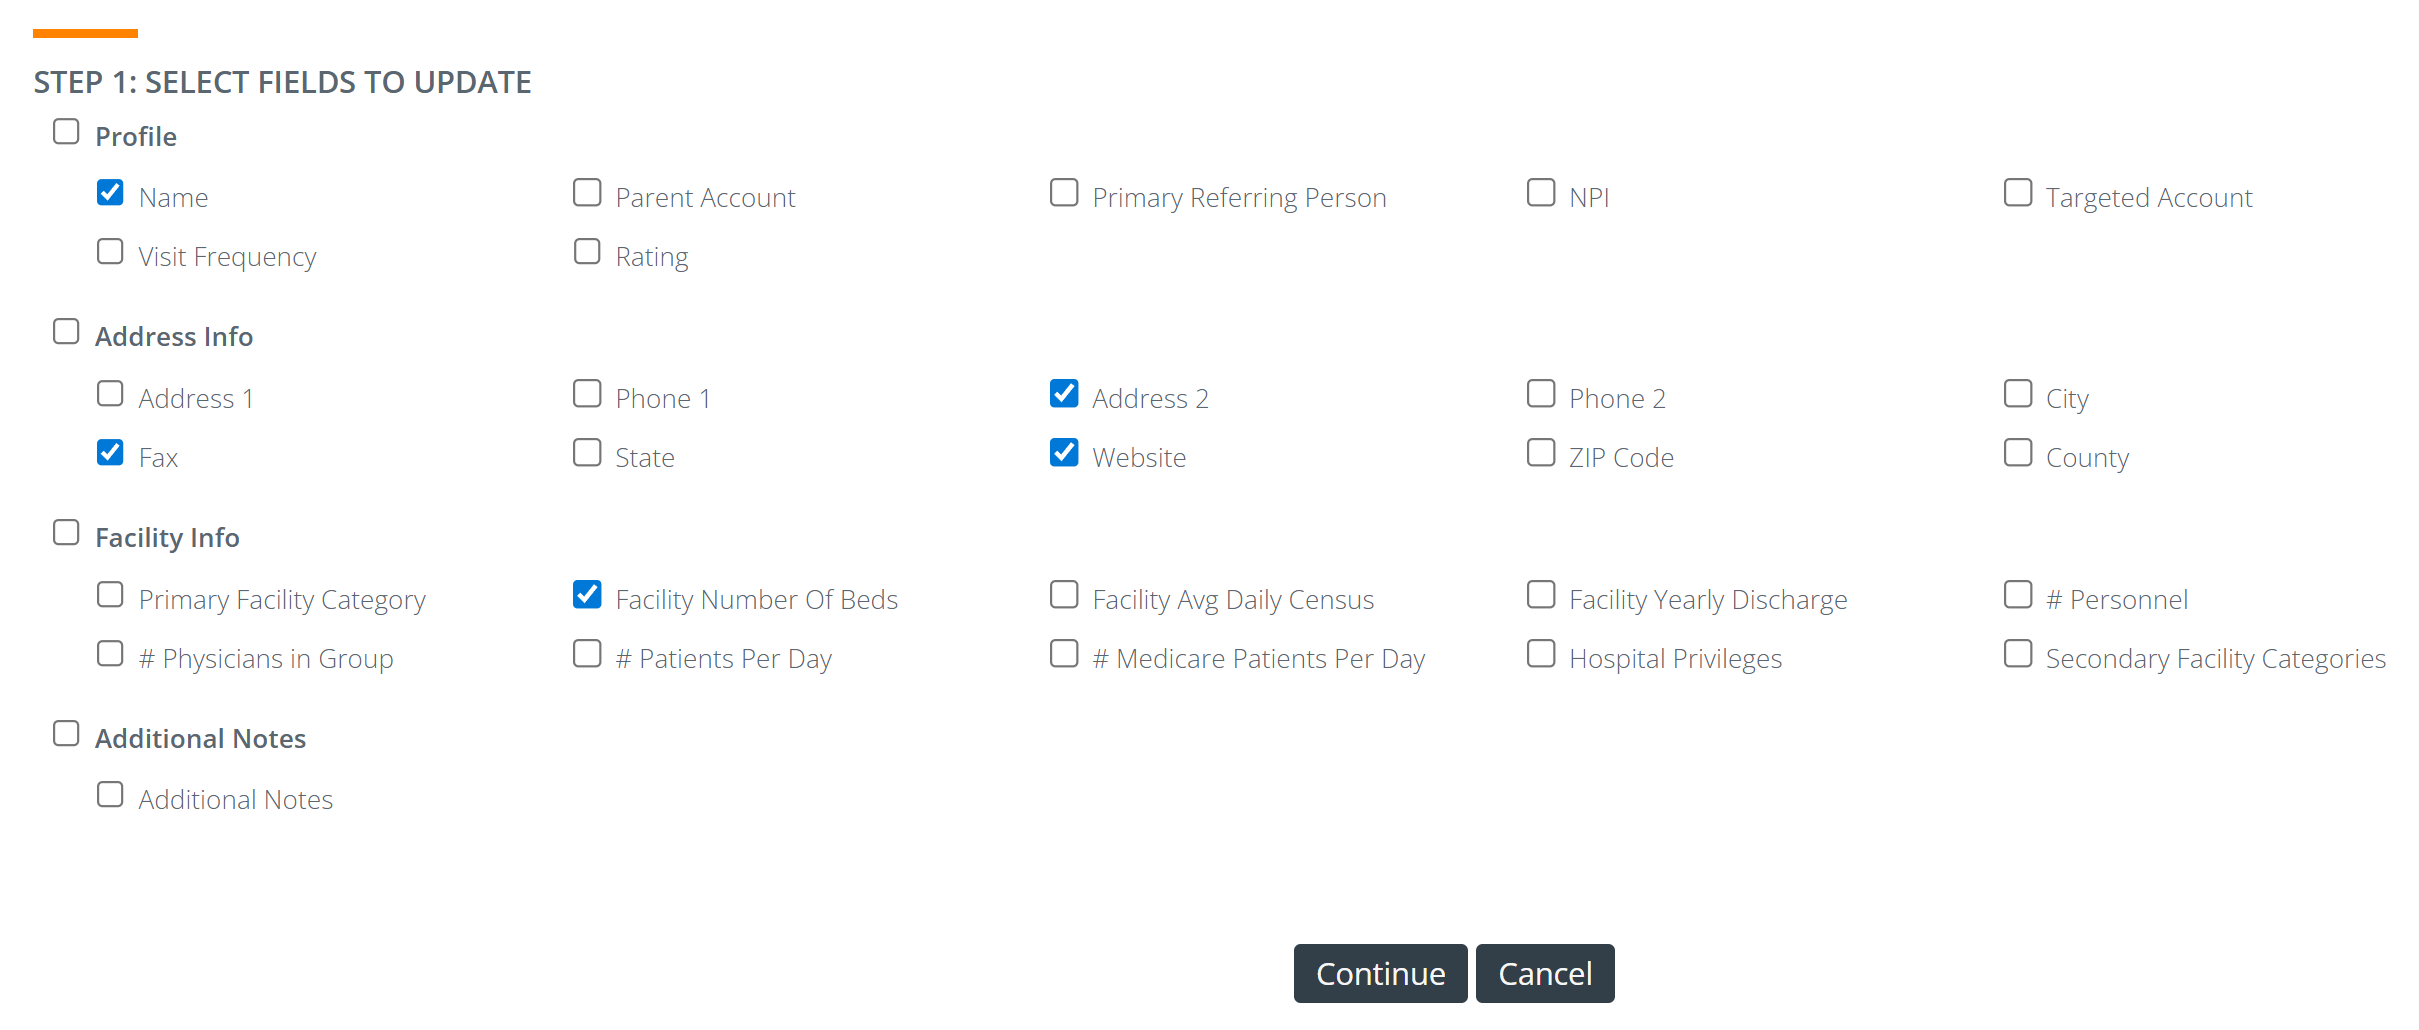
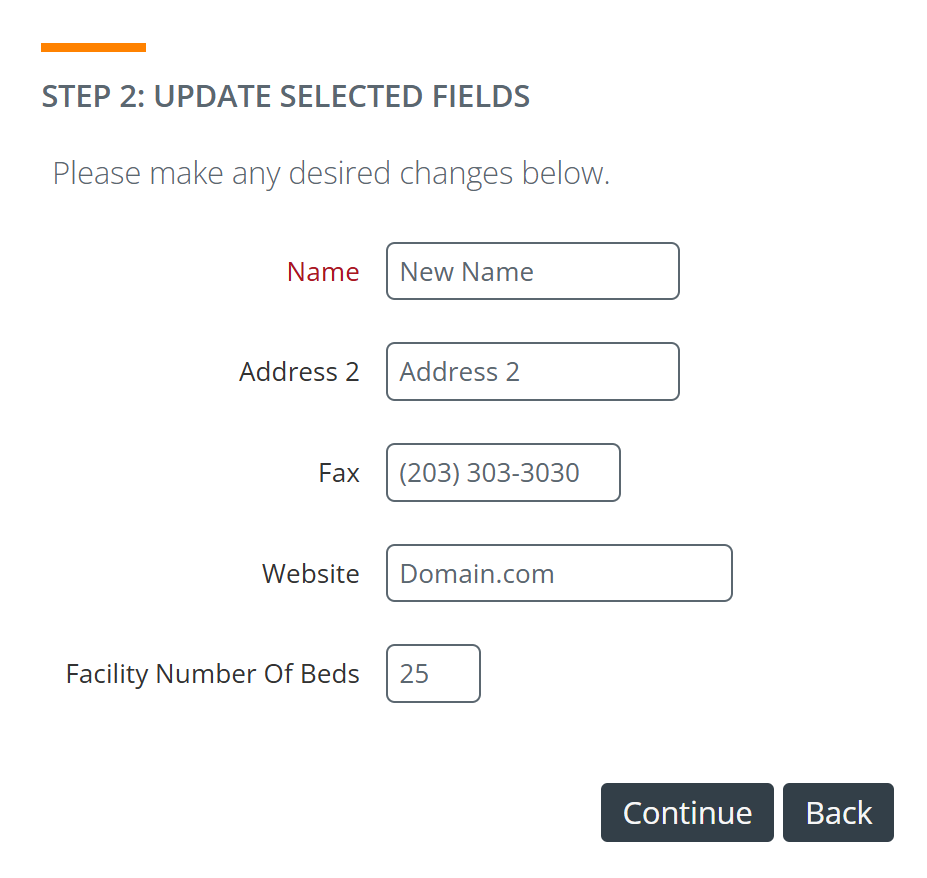
Mass Update
The Mass Update bulk actions lets you make multiple changes to a group of selected accounts at once.
- Click on Mass Update in the Bulk Actions dropdown.
There are three steps.
|
 |
|
 |
|
Step 3: Review your changes. This action has the potential of making huge changes to lots of records.
Click the "Back" button to make additional changes before you save your updates. |
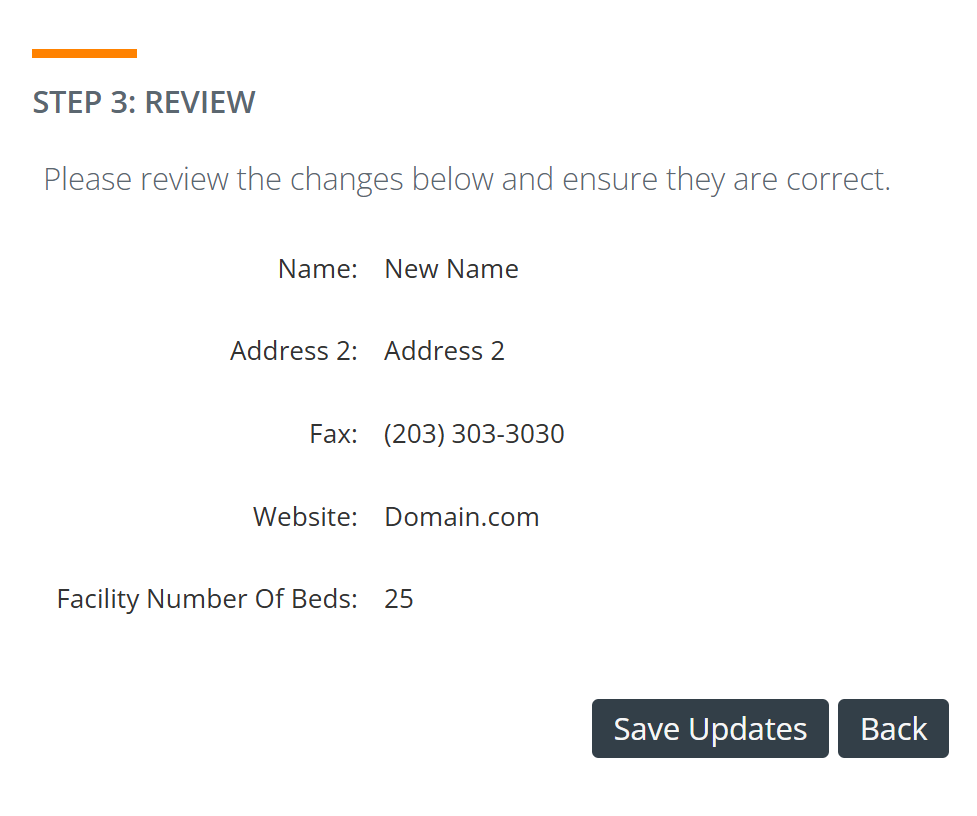 |
All changes are immediately applied to the selected accounts.
Assign Shared Owner/Remove Shared Owner/Request Ownership
There are three ownership related bulk options. Not every user can see all ownership options. Managers and administrators can assign and remove accounts. Other users can bulk request ownership.
- The Assign Shared Owner bulk action assigns an owner to multiple accounts at once. After selecting a group of accounts and choosing Assign Shared Owner, click on the empty field or the magnifying glass icon to open a list of users. Click on the "Select" link to the left of the user you want to add, then click the "Save" button.
- Remove Shared Owner removes a user from having ownership of multiple accounts. After selecting a group of accounts and choosing Remove Shared Owner, click on the empty field or the magnifying glass icon to open the user list. Click on the "Select" link to the left of the user, then click the "Save" button.
- Request Ownership lets you request ownership of multiple accounts. The request is routed to a manager or admin who can approve or deny it.
Delete Records
The Delete Records option in the bulk options allows you to delete multiple accounts at once.
Account Tools
|
At the bottom of the Accounts page there are five tools that can help you to manage accounts.
|
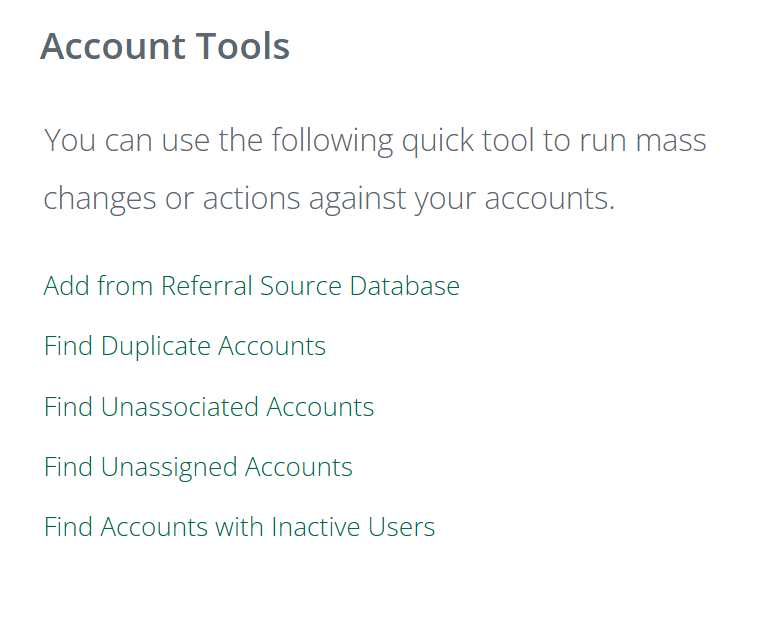 |
Add from Referral Source Database
The Referral Source Database is another way to add contacts and accounts to your book of business. The Referral Source Database is a registry of all providers in the United States who have NPI (National Provider Identifier) numbers. Information is collected from the NPI registry to provide an easy way for Trella CRM users to add providers to their books of business in the web application. The Referral Source Database is not available on the mobile application.
![]() For more information, see The Referral Source Database.
For more information, see The Referral Source Database.
Find Duplicate Accounts
Find Duplicate Accounts is a tool that allows you to quickly identify account records that represent the same actual facility but where multiple account records have been created. This can happen when someone creates a new account when one already existed, or when a created account record has a misspelling.
![]() The Find Duplicate Accounts tool is described in detail in Merging Duplicate Records.
The Find Duplicate Accounts tool is described in detail in Merging Duplicate Records.
Find Unassociated Accounts
This tool helps you to find records that are not associated to a specific account.
![]() For more information, see Maintaining Unassociated Records.
For more information, see Maintaining Unassociated Records.
Find Unassigned Accounts
Any account in your database that has no users assigned means that either the account is not being visited, or users who are visiting are not having their activity tracked in connection to the account. This tool helps you to find any accounts that have no assigned users.
![]() For more information, see Maintaining Unassigned Records.
For more information, see Maintaining Unassigned Records.
Find Accounts with Inactive Users
If a user has been terminated, their Trella CRM account should be set to inactive. Periodically, the connections between inactive users and accounts need to be purged. It is important to keep your data clean.
Account Reports
Multiple links to specific reports are included at the bottom of the Accounts page. Clicking on any of the listed reports will take you directly to the Reporting page for the selected report.
The following list shows the reports that have links on the Accounts page.
Average Daily Census Budget
Health Report Card
Inactivity Report
Conversion Ratio: by Time Period (Referrals)
AE Event Summary Report
Account Expenses
Stark II Budget
Approve Owner Change
Admits by Referral Owner by Referring Facility
Rolling Three Week Admissions by Referring Facility
Trended Admits by Referral Owner by Referring Facility
Account Engagement
Advanced AE Summary Report (Referrals)
AE Detailed Account Productivity Report (Referrals)
AE Detailed Contact Productivity Report (Referrals)
AE Productivity Summary Report (Referrals)
Detailed AE Account Activity Report (Referrals)
Detailed Sales Territory Activity Report (Referrals)
Sales Territory Summary Report (Referrals)
Accounts in Trella CRM Mobile - Coming Soon
The Trella CRM mobile app provides access to most of the same features as the web app. You can create new accounts, edit existing accounts, and review the Account Detail record from your mobile device.